There’s a specific kind of frustration that comes from knowing a tool exists, knowing it would solve your problem, and then finding out it won’t work the way you need it to. I run into this constantly when building composites that start with high-ISO RAW files. The subject is sharp, the background is a noisy mess, and the last thing I want is to flatten the entire image with a blanket denoise pass that smooths out the texture on a face or a piece of clothing I spent time lighting carefully. I want the noise reduction where I need it, and I want to leave the rest alone.
That’s exactly the scenario this Matt Kloskowski tutorial addresses. Watch the full tutorial on YouTube before or after reading this walkthrough. The short version of what Kloskowski explains: the new AI-powered Denoise feature in Lightroom Classic and Camera Raw is powerful, but it cannot be directly controlled with Lightroom’s masking tools. The noise adjustment that does appear in the masking panel is an older, weaker version of noise reduction. What you want requires a detour through Photoshop. It sounds clunky, and Kloskowski admits as much, but the result is clean, controllable, and worth the extra steps.
The workflow hinges on a simple idea: generate two versions of your image, one with aggressive noise reduction applied and one without, then blend them together in Photoshop using a layer mask. Here is how to do it, step by step.
Step 1: Open the Detail Panel and Apply AI Denoise
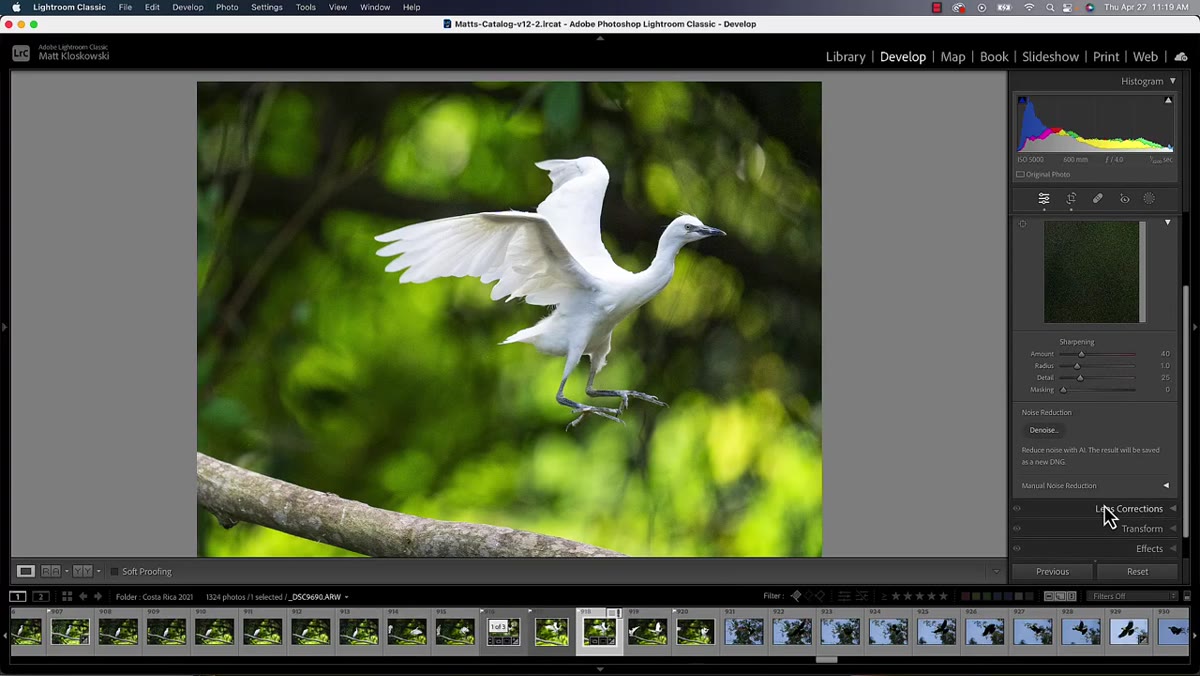 Detail panel open in Lightroom Classic with default settings
Start in Lightroom Classic with your RAW file selected. Navigate to the Detail panel in the Develop module. Leave the default sharpening settings where they are for now. Click the Denoise button to open the AI noise reduction preview dialog. Here is the key decision point: Kloskowski recommends going heavier than you normally would if you’re planning to blend this version with a masked layer later. Push the smoothing further than feels comfortable for the full image, because you are going to restore natural texture to the subject with the mask. You’re optimizing this version for the background, not the whole frame.
Detail panel open in Lightroom Classic with default settings
Start in Lightroom Classic with your RAW file selected. Navigate to the Detail panel in the Develop module. Leave the default sharpening settings where they are for now. Click the Denoise button to open the AI noise reduction preview dialog. Here is the key decision point: Kloskowski recommends going heavier than you normally would if you’re planning to blend this version with a masked layer later. Push the smoothing further than feels comfortable for the full image, because you are going to restore natural texture to the subject with the mask. You’re optimizing this version for the background, not the whole frame.
Step 2: Render the Denoised DNG
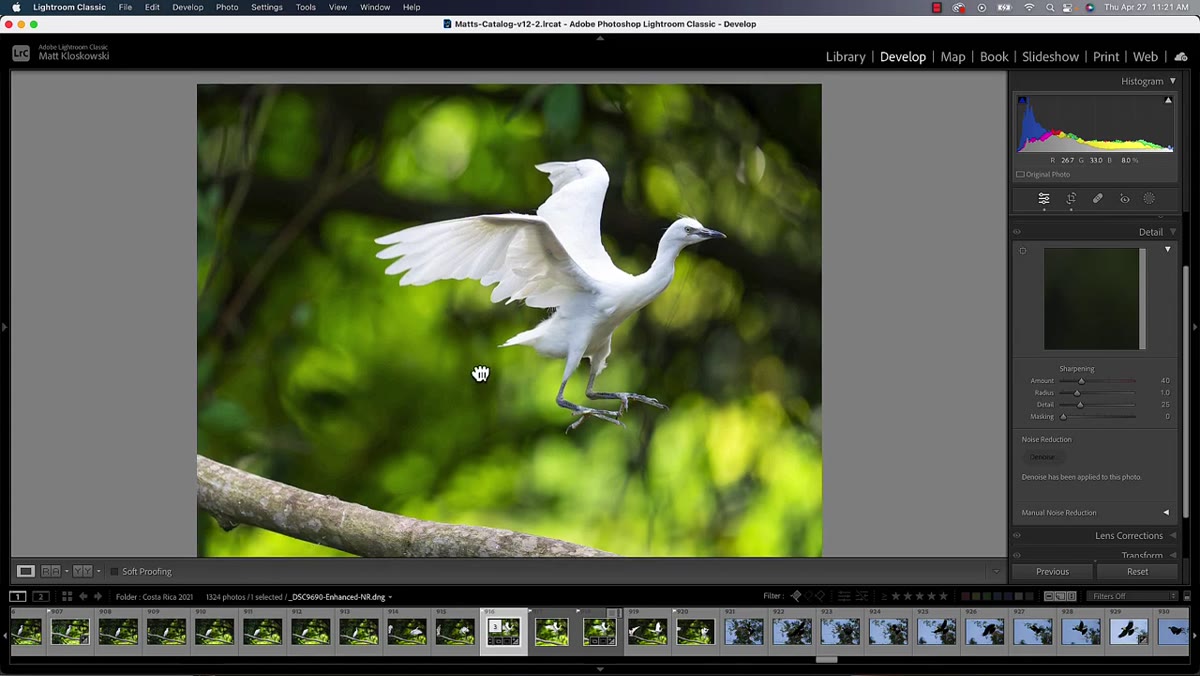 Denoised DNG file grouped with original RAW in filmstrip
Once you confirm the denoise settings, Lightroom renders the processed file as a new DNG. This takes roughly 25 to 30 seconds depending on your machine. When it finishes, Lightroom automatically groups the new DNG with your original RAW in the filmstrip, so they sit together. You now have two files: the original with its native noise intact, and the denoised version with the heavy-handed smoothing applied. Don’t touch the denoised DNG’s settings yet. Leave it as-is.
Denoised DNG file grouped with original RAW in filmstrip
Once you confirm the denoise settings, Lightroom renders the processed file as a new DNG. This takes roughly 25 to 30 seconds depending on your machine. When it finishes, Lightroom automatically groups the new DNG with your original RAW in the filmstrip, so they sit together. You now have two files: the original with its native noise intact, and the denoised version with the heavy-handed smoothing applied. Don’t touch the denoised DNG’s settings yet. Leave it as-is.
Step 3: Select Both Files and Open as Layers in Photoshop
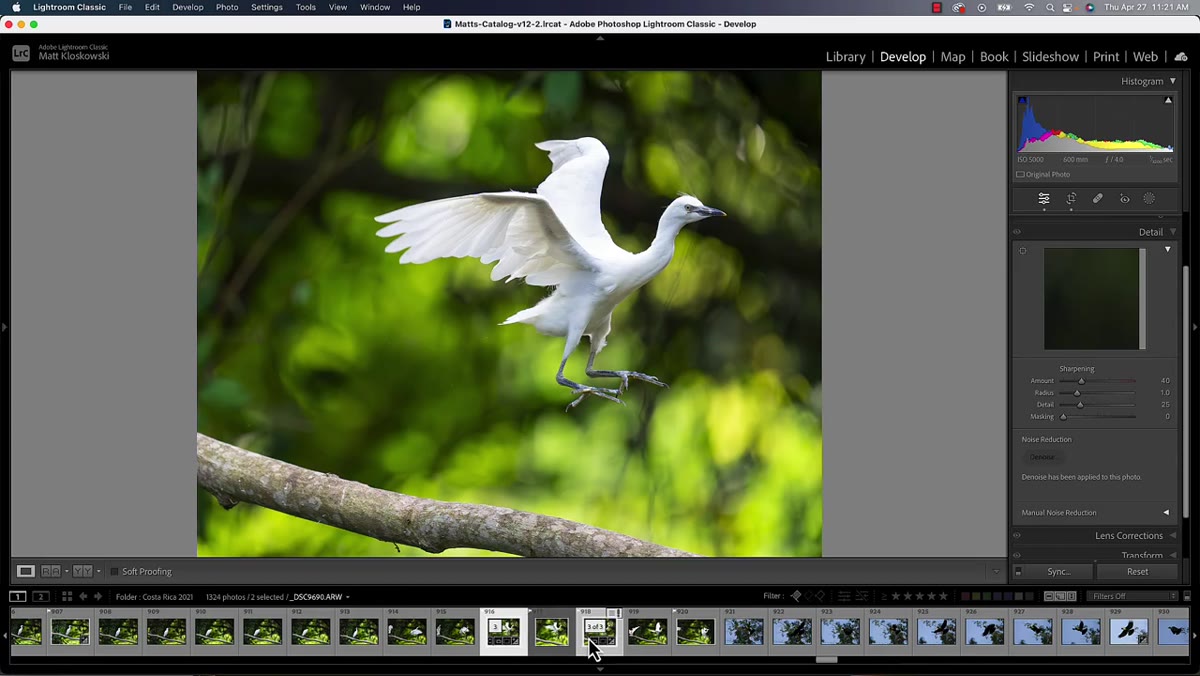 Both files selected in filmstrip, Photo menu open to Edit In
Hold Command on Mac or Control on PC and click both the original RAW and the denoised DNG in the filmstrip so both are targeted. Then go to the Photo menu at the top, select Edit In, and choose Open as Layers in Photoshop. Lightroom will export and stack both images into a single Photoshop document, one on top of the other. This is the bridge between Lightroom’s rendering power and Photoshop’s compositing tools.
Both files selected in filmstrip, Photo menu open to Edit In
Hold Command on Mac or Control on PC and click both the original RAW and the denoised DNG in the filmstrip so both are targeted. Then go to the Photo menu at the top, select Edit In, and choose Open as Layers in Photoshop. Lightroom will export and stack both images into a single Photoshop document, one on top of the other. This is the bridge between Lightroom’s rendering power and Photoshop’s compositing tools.
Step 4: Arrange the Layers Correctly
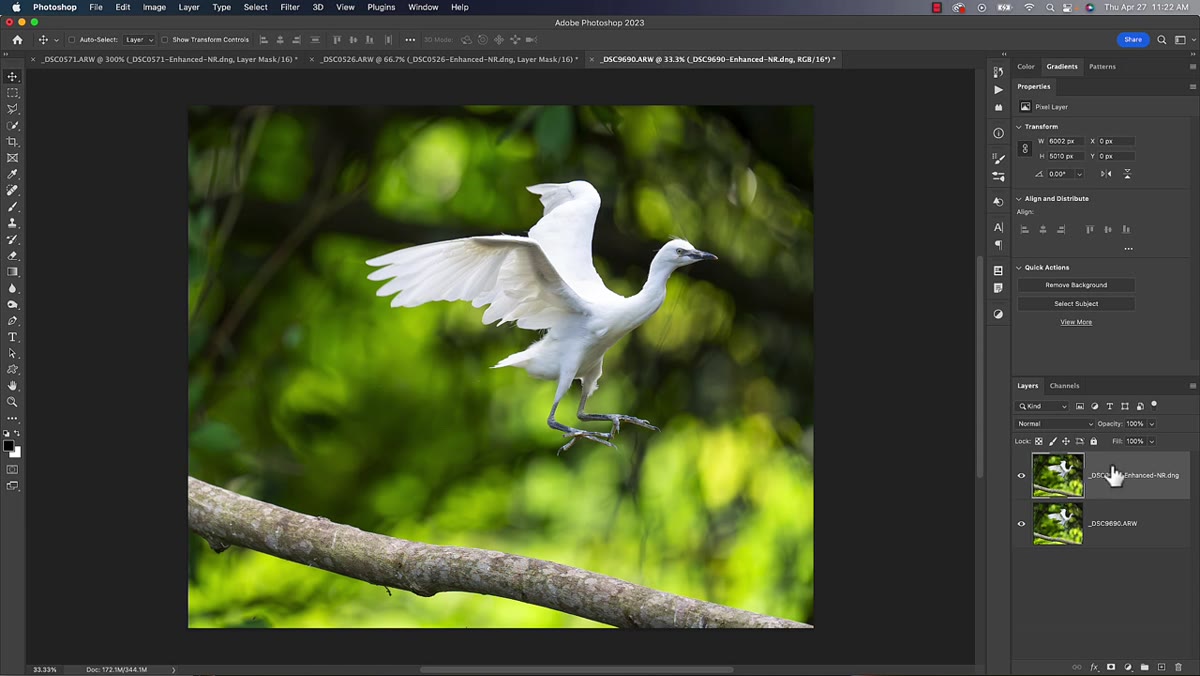 Two layers stacked in Photoshop Layers panel
When the file opens in Photoshop, check your Layers panel. The order Lightroom uses when stacking is not guaranteed, so confirm that the denoised version is sitting on top. If it is not, drag it above the original. The logic here is straightforward: the top layer is what the viewer sees by default. You will cut a hole in that top layer over the subject, letting the noisier but more textured original show through where it counts.
Two layers stacked in Photoshop Layers panel
When the file opens in Photoshop, check your Layers panel. The order Lightroom uses when stacking is not guaranteed, so confirm that the denoised version is sitting on top. If it is not, drag it above the original. The logic here is straightforward: the top layer is what the viewer sees by default. You will cut a hole in that top layer over the subject, letting the noisier but more textured original show through where it counts.
Step 5: Select the Subject Using Quick Selection or Select Subject
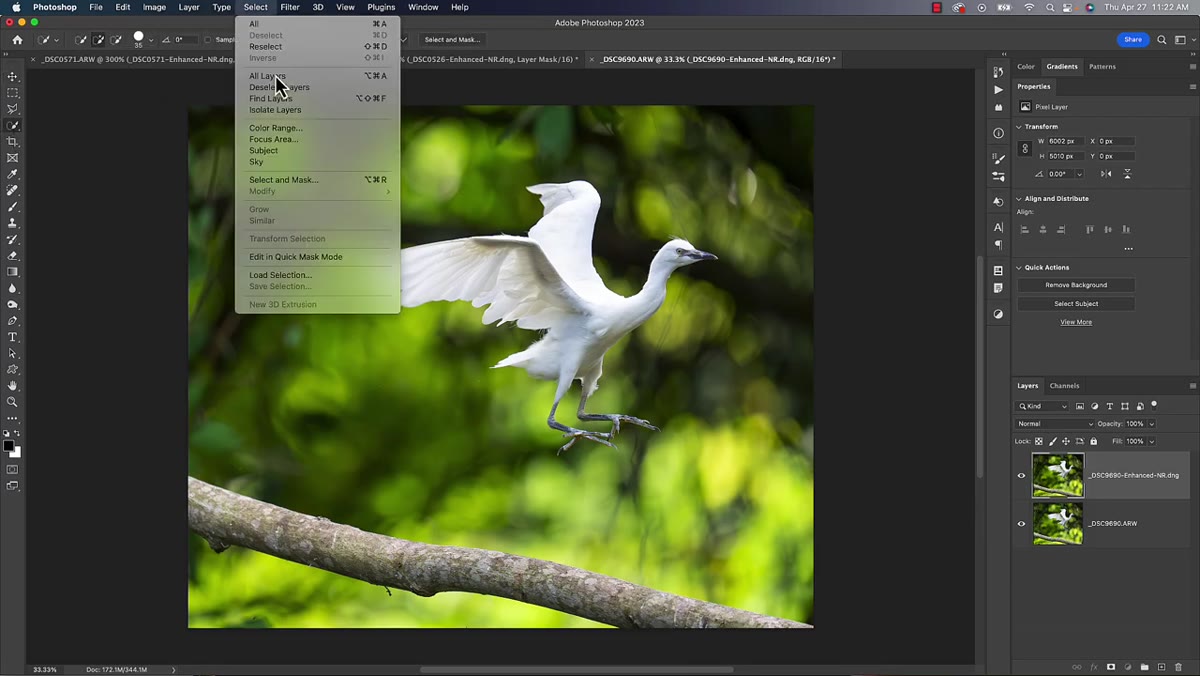 Select Subject tool active with cloud processing option chosen
With the denoised layer selected in the Layers panel, grab the Quick Selection tool from the toolbar. This activates a Select Subject button at the top of the screen. Kloskowski is clear about one setting here: choose the Cloud option before running the selection. The cloud-based processing uses Adobe’s servers for a more accurate result. Click Select Subject and let it do the work. The selection won’t be pixel-perfect out of the gate, but it should get you most of the way there and is a solid foundation to refine.
Select Subject tool active with cloud processing option chosen
With the denoised layer selected in the Layers panel, grab the Quick Selection tool from the toolbar. This activates a Select Subject button at the top of the screen. Kloskowski is clear about one setting here: choose the Cloud option before running the selection. The cloud-based processing uses Adobe’s servers for a more accurate result. Click Select Subject and let it do the work. The selection won’t be pixel-perfect out of the gate, but it should get you most of the way there and is a solid foundation to refine.
Step 6: Add a Layer Mask to the Denoised Layer
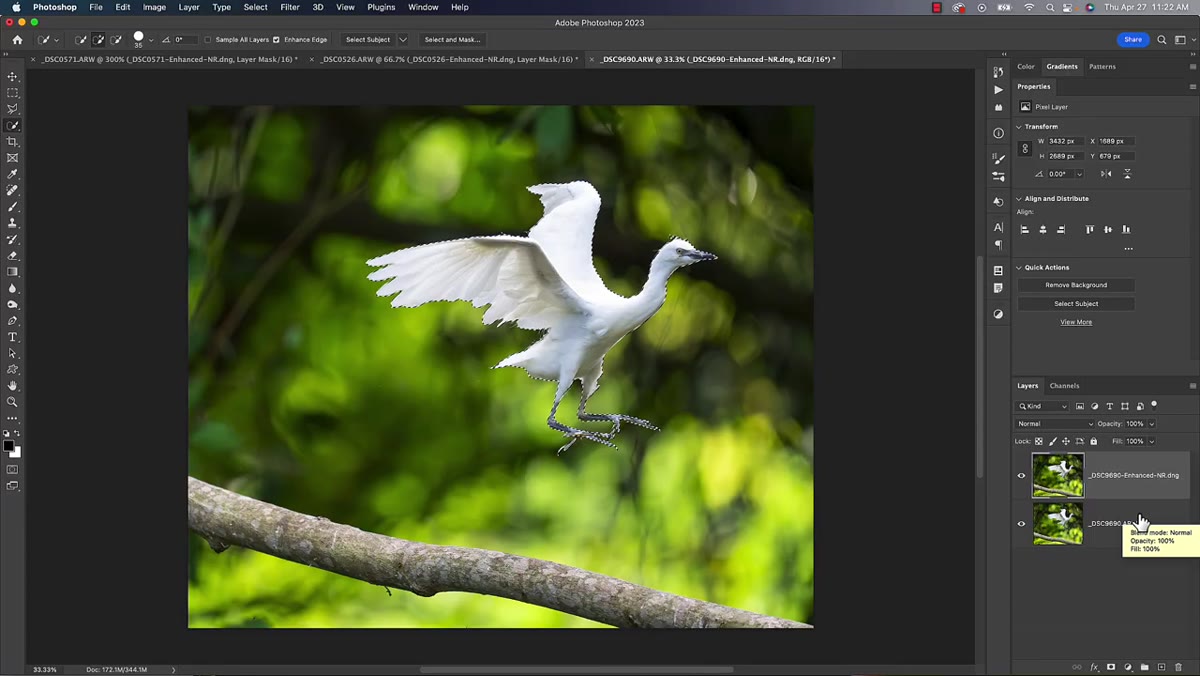 Layer mask added to denoised layer, subject masked out
With the selection still active, click the Add Layer Mask button at the bottom of the Layers panel. Because the goal is to keep the noise reduction in the background and restore the original texture on the subject, you want to mask out the subject area from the denoised layer. If the mask reveals the denoised version over the subject instead of hiding it, invert the mask by pressing Command+I (Mac) or Control+I (PC). The denoised layer should now be visible in the background, and the original, unprocessed version of the subject should show through beneath it.
Layer mask added to denoised layer, subject masked out
With the selection still active, click the Add Layer Mask button at the bottom of the Layers panel. Because the goal is to keep the noise reduction in the background and restore the original texture on the subject, you want to mask out the subject area from the denoised layer. If the mask reveals the denoised version over the subject instead of hiding it, invert the mask by pressing Command+I (Mac) or Control+I (PC). The denoised layer should now be visible in the background, and the original, unprocessed version of the subject should show through beneath it.
Step 7: Refine the Mask Edge
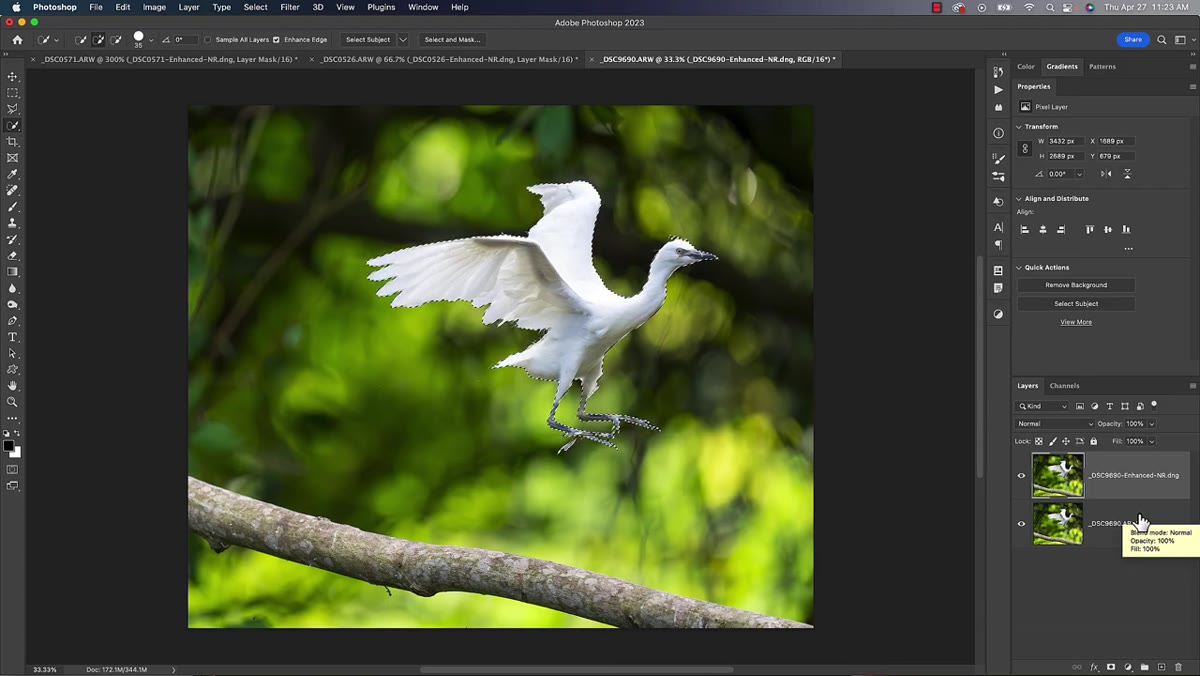 Mask edge visible around subject, layer mask selected in panel
No AI selection is clean enough to leave alone, especially around hair, fur, or any soft edge. Click on the mask thumbnail in the Layers panel to make sure you’re painting on the mask and not the image. Use a soft brush at reduced opacity to feather the transition between the two layers around the subject’s edges. Zoom in and work the boundary carefully. The goal is a seam that reads as a single coherent image, not two photos collaged together.
Mask edge visible around subject, layer mask selected in panel
No AI selection is clean enough to leave alone, especially around hair, fur, or any soft edge. Click on the mask thumbnail in the Layers panel to make sure you’re painting on the mask and not the image. Use a soft brush at reduced opacity to feather the transition between the two layers around the subject’s edges. Zoom in and work the boundary carefully. The goal is a seam that reads as a single coherent image, not two photos collaged together.
A Note from My Own Work
I do most of my compositing on commercial projects where the source images are a mix of studio photography and stock, and noise inconsistency between layers is one of the fastest ways to break the illusion of a unified scene. When one element looks crisp and clinical and another looks grainy, your eye knows something is wrong even if you can’t name it. This workflow is useful not just for the noise reduction itself, but for the broader principle it demonstrates: render your processing choices as separate files, then blend them. I use the same logic when handling HDR merges, exposure blending, and focus stacking. The Lightroom-to-Photoshop pipeline with layers is a compositing tool in its own right, not just an export path.
The single most important thing to take from this workflow is that Lightroom’s AI Denoise and Photoshop’s masking tools are not competitors. They work in sequence. You let Lightroom do the heavy computational lifting on the render side, then you bring Photoshop in to handle the spatial control that Lightroom can’t offer. Neither tool is being asked to do something it isn’t built for.
Watch the full tutorial on YouTube to see Matt Kloskowski walk through every step with a live image.
Comments (2)
This is the kind of content that keeps me coming back.
Printing this out and pinning it next to my monitor. That good.
Leave a Comment