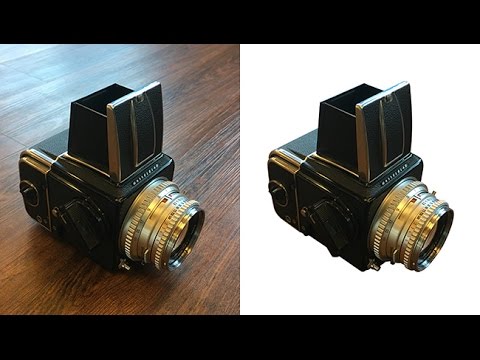
Every composite I’ve built starts with the same problem: getting a subject cleanly away from its background. After years of working on movie posters and album covers, I’ve tried every approach Photoshop offers. And still, every few months, I find myself watching a tutorial that reframes something I thought I already understood. That happened recently when I sat down with Aaron Nace’s vector mask breakdown over at PHLEARN. Watch the full tutorial on YouTube before or after reading this, depending on how you like to learn.
What stopped me in the first thirty seconds was the phrase “live preview.” I’ve used layer masks for years, painting black and white until an edge looks right, toggling visibility back and forth to check my work. It’s slow. With a vector mask built from a pen path, the cut updates in real time as you move points. For someone who sketches every composite on paper before touching Photoshop, that kind of immediate visual feedback feels closer to drawing than to software. It changes how you think about the cut.
This walkthrough follows the actual order of Aaron’s tutorial. I’ve expanded each step with the kind of detail that lets you follow along without constantly jumping to the video.
Step 1: Understand the Difference Between a Layer Mask and a Vector Mask
 Layer mask versus vector mask comparison shown side by side
Before you can use a vector mask well, you need to know what problem it’s solving compared to a regular layer mask. A layer mask is pixel-based. You paint on it with a brush, the healing brush, the clone stamp, any tool that applies pixels to a layer. Black hides, white reveals. It’s flexible and forgiving, which is why it’s the default for most masking work.
Layer mask versus vector mask comparison shown side by side
Before you can use a vector mask well, you need to know what problem it’s solving compared to a regular layer mask. A layer mask is pixel-based. You paint on it with a brush, the healing brush, the clone stamp, any tool that applies pixels to a layer. Black hides, white reveals. It’s flexible and forgiving, which is why it’s the default for most masking work.
A vector mask is different at its core. It’s defined by a path, not by brushstrokes. That means the mask edge is resolution-independent and mathematically precise, and it stays live and editable as long as you haven’t flattened it. For hard-edged objects like product shots, cameras, furniture, or anything with a clean silhouette, this precision is a genuine advantage over painting a mask by hand.
Step 2: Add a Vector Mask to Your Layer
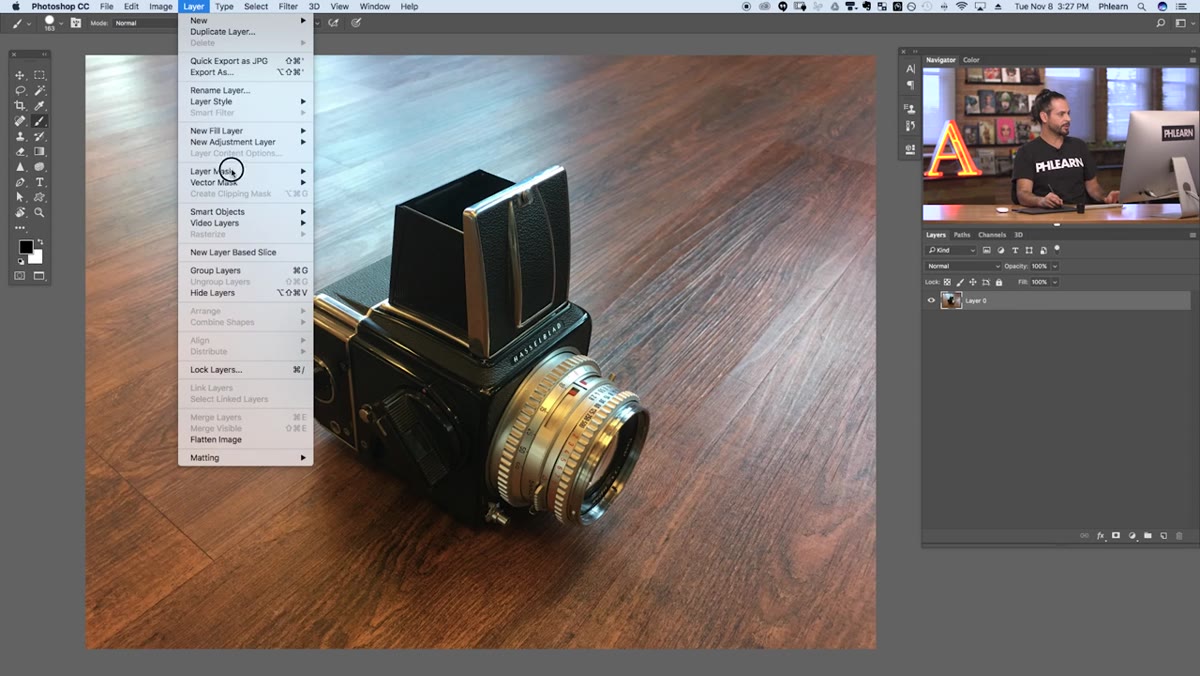 Vector mask thumbnail appearing in Layers panel after menu selection
With your layer selected in the Layers panel, go to Layer in the top menu bar, then down to Vector Mask, and choose Reveal All. This creates a vector mask thumbnail next to your layer thumbnail, and at this stage it looks almost identical to a standard white layer mask. The key difference shows up when you right-click on it: the context menu reads “Disable Vector Mask” rather than “Disable Layer Mask,” which confirms you’re working with the right type.
Vector mask thumbnail appearing in Layers panel after menu selection
With your layer selected in the Layers panel, go to Layer in the top menu bar, then down to Vector Mask, and choose Reveal All. This creates a vector mask thumbnail next to your layer thumbnail, and at this stage it looks almost identical to a standard white layer mask. The key difference shows up when you right-click on it: the context menu reads “Disable Vector Mask” rather than “Disable Layer Mask,” which confirms you’re working with the right type.
Reveal All means the entire layer is visible to start. You’ll define what gets hidden by drawing a path, not by painting over it. Think of the vector mask as a window frame you’re about to cut out of a wall. Right now the whole wall is open. Your pen path will define the shape of the window.
Step 3: Activate the Vector Mask and Select the Pen Tool
 Pen tool selected with vector mask thumbnail highlighted in Layers panel
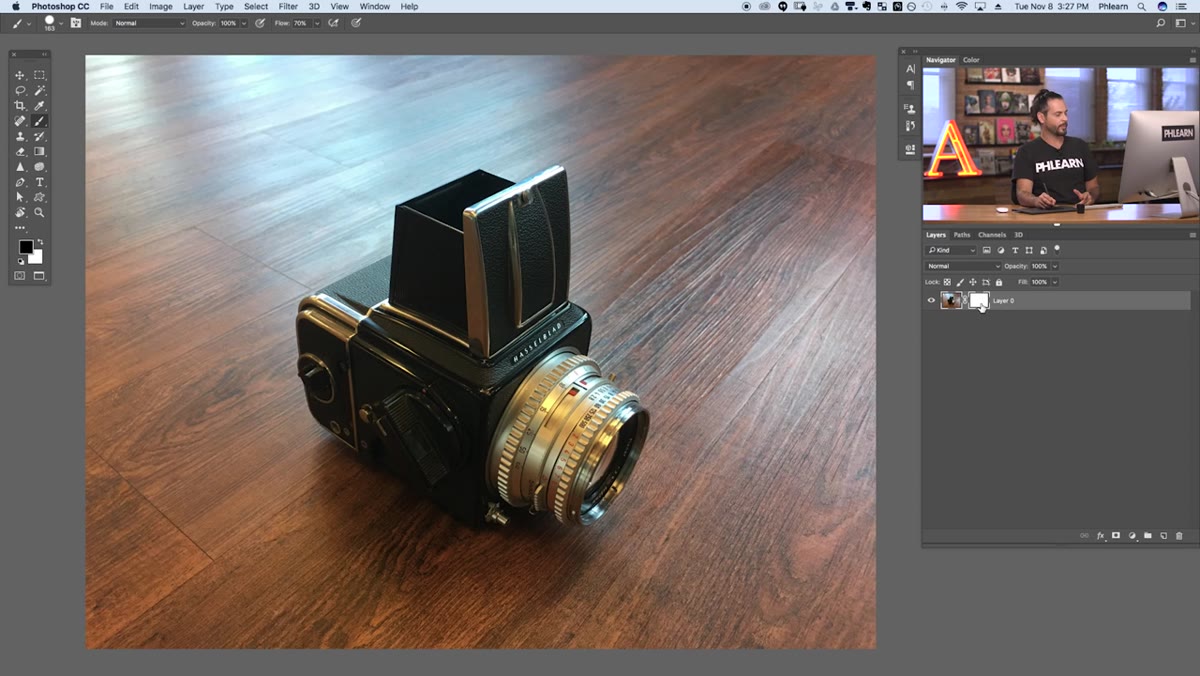
Click directly on the vector mask thumbnail in the Layers panel to make sure it’s active. This step is easy to skip and will cost you time if you do. If the layer thumbnail is selected instead of the mask thumbnail, your pen path won’t attach to the mask.
Pen tool selected with vector mask thumbnail highlighted in Layers panel
Click directly on the vector mask thumbnail in the Layers panel to make sure it’s active. This step is easy to skip and will cost you time if you do. If the layer thumbnail is selected instead of the mask thumbnail, your pen path won’t attach to the mask.
With the mask active, press P to grab the Pen tool. You want to be in standard Pen mode, not the Curvature Pen or Freeform options. Check the top toolbar to confirm the mode is set to Path, not Shape or Pixels. If it’s set to Shape, you’ll create a filled shape layer instead of a path, and the mask won’t behave the way you expect.
Step 4: Draw Your Pen Path Around the Subject
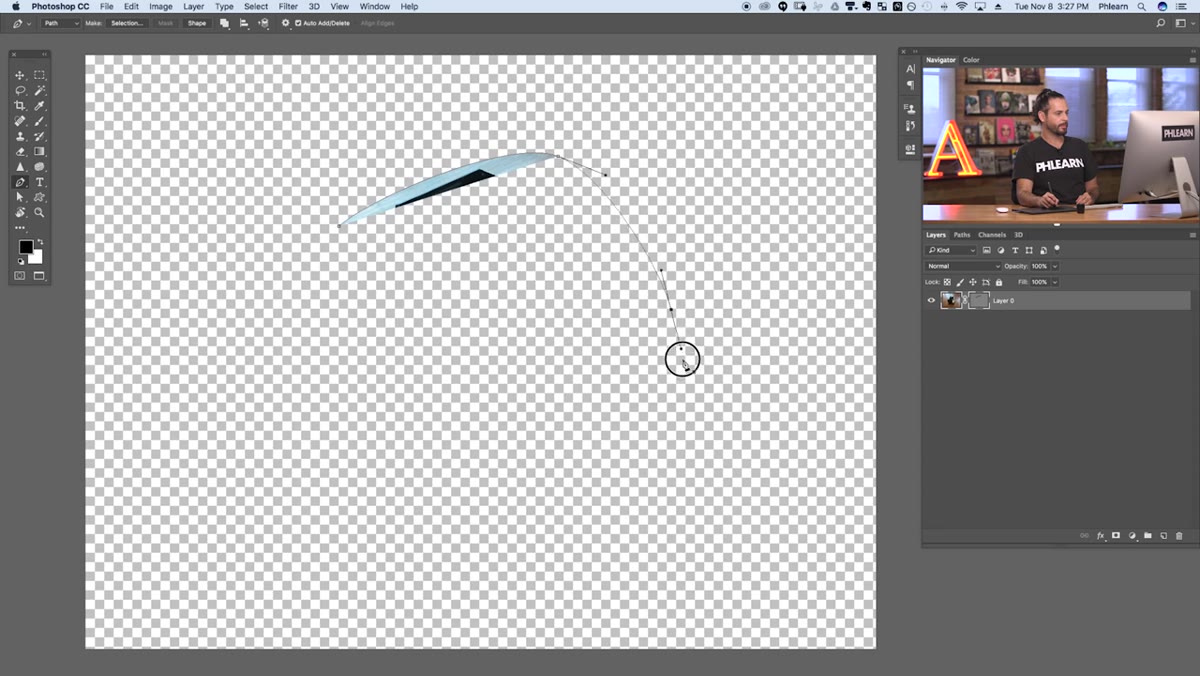 Pen path being drawn around camera with live cutout preview visible
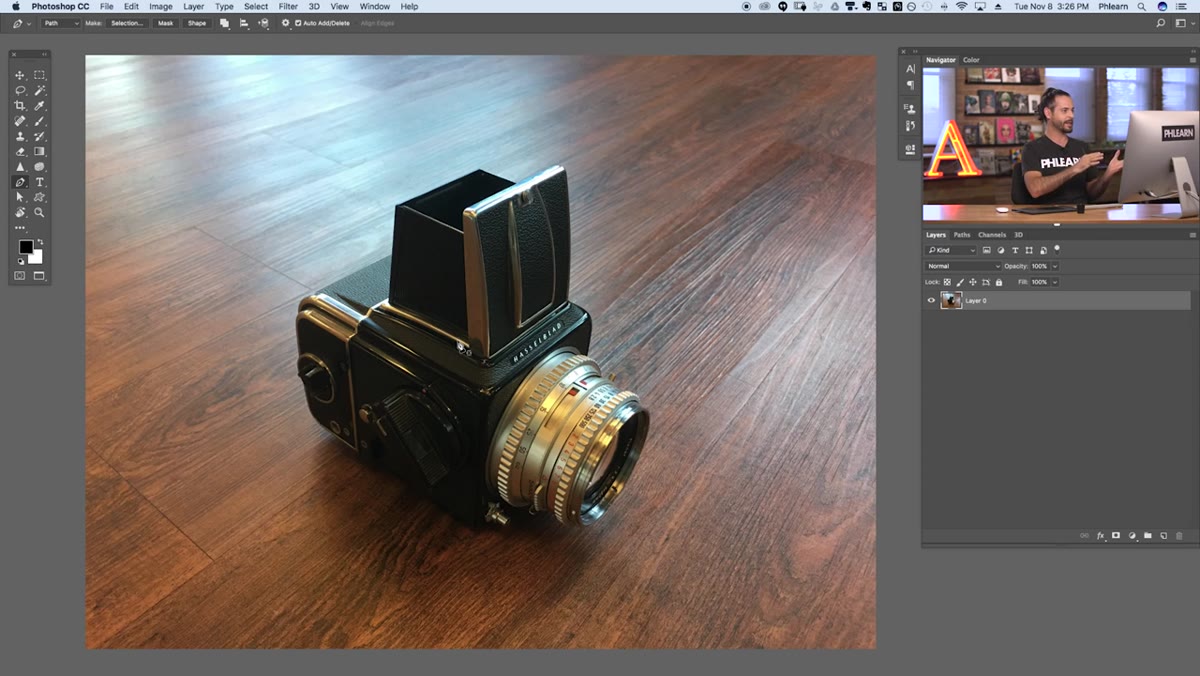
Start clicking around the edge of your subject to lay down anchor points. As you close the path or even while you’re mid-path, you’ll see the vector mask cut in real time. The area inside your path stays visible. Everything outside disappears. That live preview is the whole point of this method, and it’s genuinely useful on complex shapes where you’re trying to judge a cut while you’re making it.
Pen path being drawn around camera with live cutout preview visible
Start clicking around the edge of your subject to lay down anchor points. As you close the path or even while you’re mid-path, you’ll see the vector mask cut in real time. The area inside your path stays visible. Everything outside disappears. That live preview is the whole point of this method, and it’s genuinely useful on complex shapes where you’re trying to judge a cut while you’re making it.
For a first pass, don’t stress about precision. Aaron demonstrates this with a loose path around a Hasselblad camera, and the rough result is intentional. The goal in this step is to establish the path and see the mechanism working. Clean up comes next.
Step 5: Edit Anchor Points After the Path Is Closed
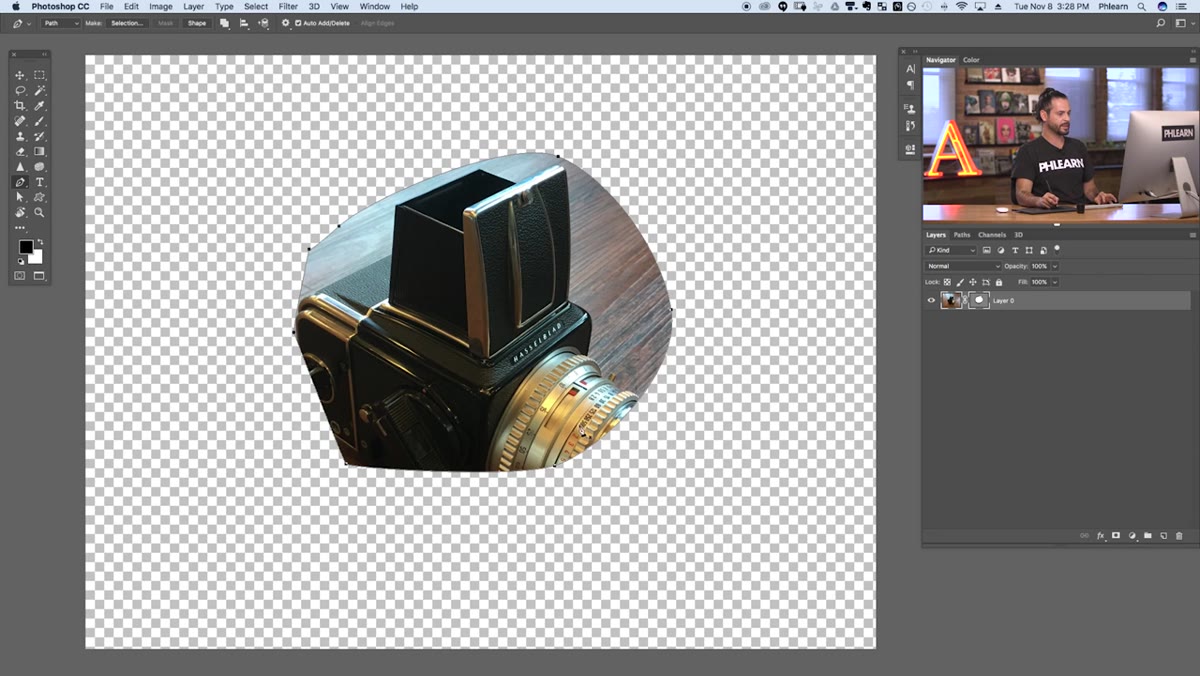 Anchor points being repositioned with Direct Selection tool to refine cutout
This is where vector masks earn their place in a professional workflow. Once you’ve closed your path, hold Command on Mac or Control on Windows while the Pen tool is active. This temporarily switches you to the Direct Selection tool, which looks like a white arrow. Click any anchor point on your path to select it, then drag it to a new position.
Anchor points being repositioned with Direct Selection tool to refine cutout
This is where vector masks earn their place in a professional workflow. Once you’ve closed your path, hold Command on Mac or Control on Windows while the Pen tool is active. This temporarily switches you to the Direct Selection tool, which looks like a white arrow. Click any anchor point on your path to select it, then drag it to a new position.
The mask updates the moment you release the point. You’re not repainting, not re-selecting. You’re nudging a mathematical point and watching the edge move with it. For fine-edged subjects, you can also click on the path segment between two points and drag to create a curve, giving you Bezier handles to shape the edge more precisely. This is where having pen tool fluency really pays off. If you need to build that skill first, Aaron’s own search bar at phlearn.com has tutorials dedicated to it.
Step 6: Disable and Re-enable the Mask to Check Your Work
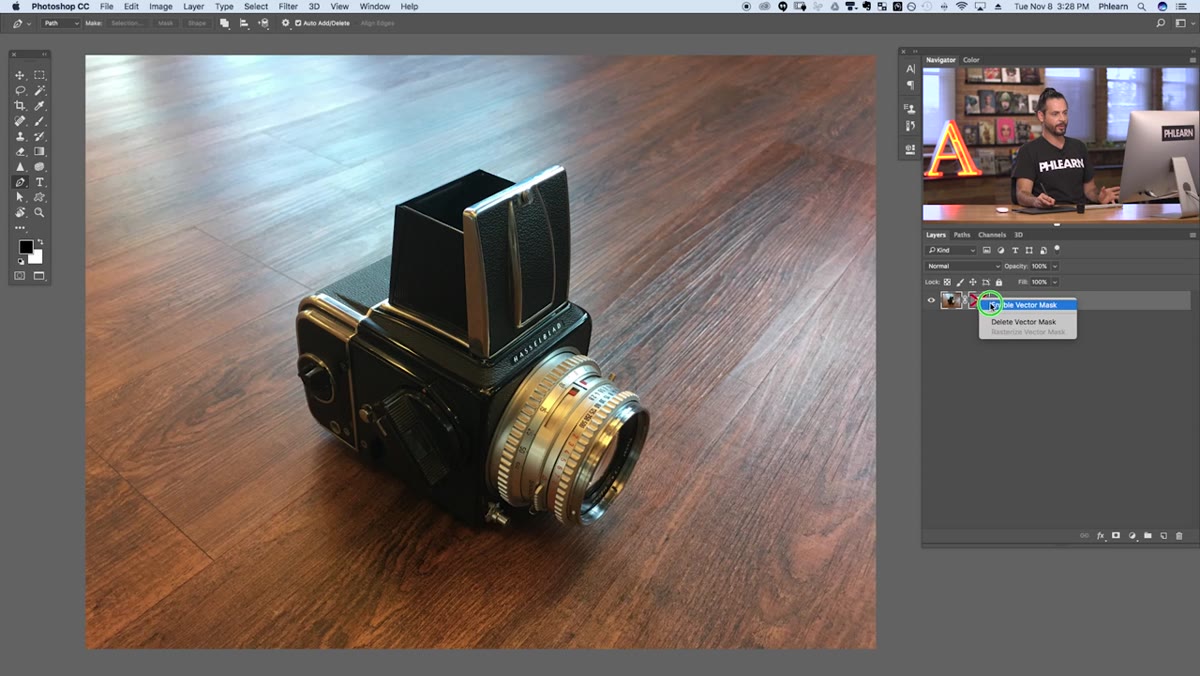 Right-click context menu showing Disable Vector Mask option on mask thumbnail
Right-click the vector mask thumbnail at any point to temporarily disable it. This shows you the original unmasked layer, which is useful for checking that your path is tracking the actual edge of the subject rather than floating somewhere nearby. Re-enable it the same way. Toggling back and forth is a fast visual check that costs you nothing.
Right-click context menu showing Disable Vector Mask option on mask thumbnail
Right-click the vector mask thumbnail at any point to temporarily disable it. This shows you the original unmasked layer, which is useful for checking that your path is tracking the actual edge of the subject rather than floating somewhere nearby. Re-enable it the same way. Toggling back and forth is a fast visual check that costs you nothing.
A Note From My Own Work With This Method
The live preview feature sounds like a small convenience until you’ve used it on a deadline. I spent years making cuts, adding layer masks, painting edges, checking the result, undoing, repainting. The feedback loop was slow. With a vector mask on a hard-edged subject, the loop collapses almost entirely. You move a point, you see the result, you move on.
That said, vector masks are not the right tool for everything. Hair, fur, translucent fabric, anything with soft or irregular edges still wants a pixel-based approach, usually a combination of Select and Mask, luminosity masking, or channel-based techniques. The vector mask shines on manufactured objects and geometric shapes where the edge is clean and the silhouette holds up at full resolution. Knowing which tool to reach for is most of the work.
The single most important thing to take away from this tutorial is the distinction that the mask stays live. You are never locked into a cut. As long as you’re working with a vector mask, every edge decision is reversible and adjustable without starting over. That changes how you approach difficult subjects, because you can commit to a rough pass first and refine from there instead of trying to get every point perfect on the first click.
Watch the full tutorial on YouTube to see Aaron demonstrate the path-loading technique at the end of the video, where a pre-built pen path is brought in to complete the camera cutout cleanly. That section alone is worth the runtime.
Comments (4)
Finally someone explains this in a way that actually makes sense.
I tried this on a client project yesterday and the results were way better than expected.
Just subscribed. If the rest of your content is this good, I'm in.
Love this. I referenced a similar technique in one of my recent posts. Always good to see other perspectives.
Leave a Comment