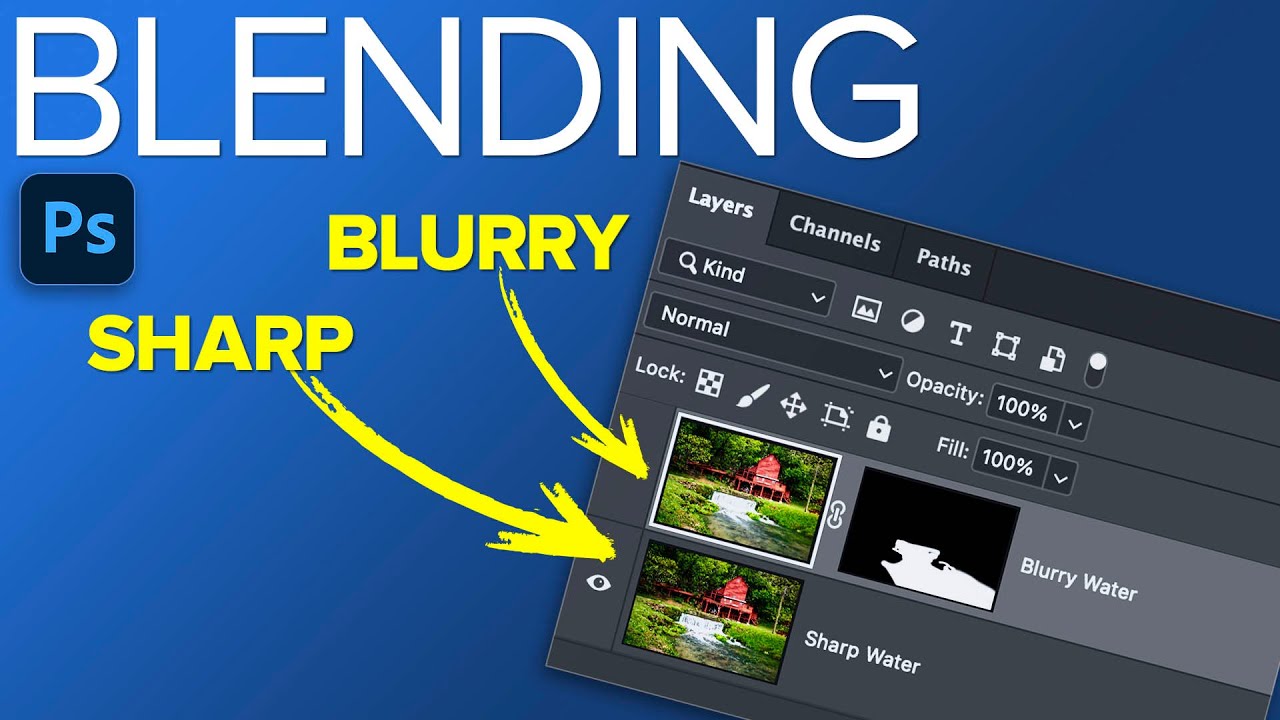
There’s a problem I run into constantly, even working in controlled studio conditions: no single frame has everything. In commercial compositing, that usually means pulling from a dozen different sources. But landscape photographers face a stripped-down version of the same headache, and it’s elegant in its simplicity. You want smooth, silky water. That takes a slow shutter. You want a sharp foreground and clean edges everywhere else. That takes a fast one. Physics won’t let you have both in the same exposure, at least not out of the camera.
I spent six months studying how light behaves on water for a single album cover project, so when I came across this technique, I felt the specific satisfaction of someone handing you a shortcut you should have built yourself years ago. In this Matt Kloskowski tutorial, Watch the full tutorial on YouTube, Matt walks through a real-world request from one of his customers, a photographer named Jim who had exactly this problem. One frame shot at 1/125th of a second: sharp everywhere, but the water looks frozen and lifeless. A second frame at half a second: the water is gorgeous, but the camera movement made the rest of the image soft. The fix is a layer mask, and it takes about five minutes once you know what you’re doing.
What I want to do here is give you a concrete, step-by-step walkthrough you can follow at your desk, with a few observations from someone who lives in Photoshop.
Step 1: Get Both Images into a Single Photoshop Document
 Two landscape photos open as separate Photoshop documents side by side
Before any masking happens, both exposures need to live in the same Photoshop document as separate layers. If you shoot tethered or work through Lightroom Classic, there’s a built-in option to open multiple images as layers directly. Bridge and Camera Raw both offer similar stacking workflows. If you’re working outside those apps, the manual method works just as well: open both files, select all and copy from the first image, switch to the second document, and paste. You’ll end up with a two-layer document where each frame is its own layer.
Two landscape photos open as separate Photoshop documents side by side
Before any masking happens, both exposures need to live in the same Photoshop document as separate layers. If you shoot tethered or work through Lightroom Classic, there’s a built-in option to open multiple images as layers directly. Bridge and Camera Raw both offer similar stacking workflows. If you’re working outside those apps, the manual method works just as well: open both files, select all and copy from the first image, switch to the second document, and paste. You’ll end up with a two-layer document where each frame is its own layer.
Name your layers immediately. Matt labels the top layer “blurry water” to keep the logic visible at a glance. The bottom layer holds the sharp version, which will serve as the base of the final image. Clear labeling matters more than it seems when you’re moving fast.
Step 2: Understand Which Layer Goes Where and Why
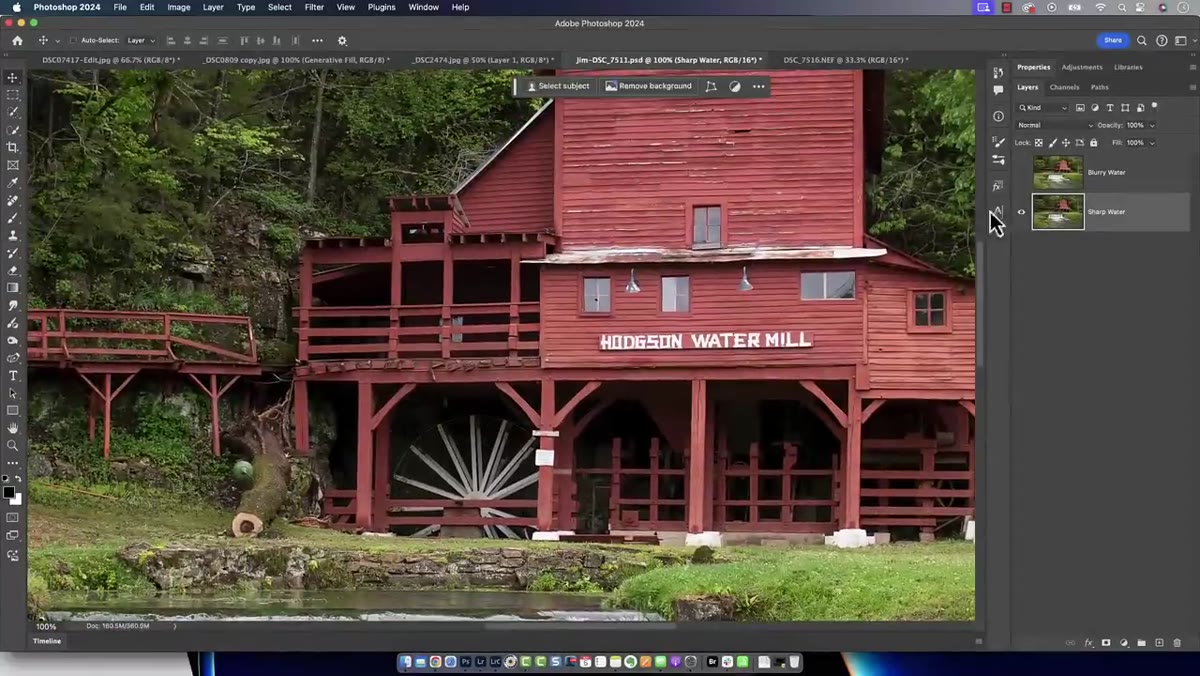 Zoomed-in comparison showing sharp vs soft water between the two layers
The sharp image sits on the bottom. The blurry water image sits on top. The goal is to reveal only the water area from the top layer while letting the sharp, well-defined landscape underneath show through everywhere else. This might feel counterintuitive at first. You’re not replacing the good parts with the blurry frame. You’re selectively showing one small, specific region of the top layer and masking everything else away.
Zoomed-in comparison showing sharp vs soft water between the two layers
The sharp image sits on the bottom. The blurry water image sits on top. The goal is to reveal only the water area from the top layer while letting the sharp, well-defined landscape underneath show through everywhere else. This might feel counterintuitive at first. You’re not replacing the good parts with the blurry frame. You’re selectively showing one small, specific region of the top layer and masking everything else away.
Take a moment to zoom into both frames and compare them critically before you start masking. At 1/125th of a second, Jim’s sharp version holds solid detail across the rocks, sky, and surrounding terrain. At half a second, that same scene softens noticeably because even a small amount of handheld movement compounds over that exposure length. Knowing exactly where the problem zones are before you touch a brush will make your masking faster and more precise.
Step 3: Add a Layer Mask to the Top Layer
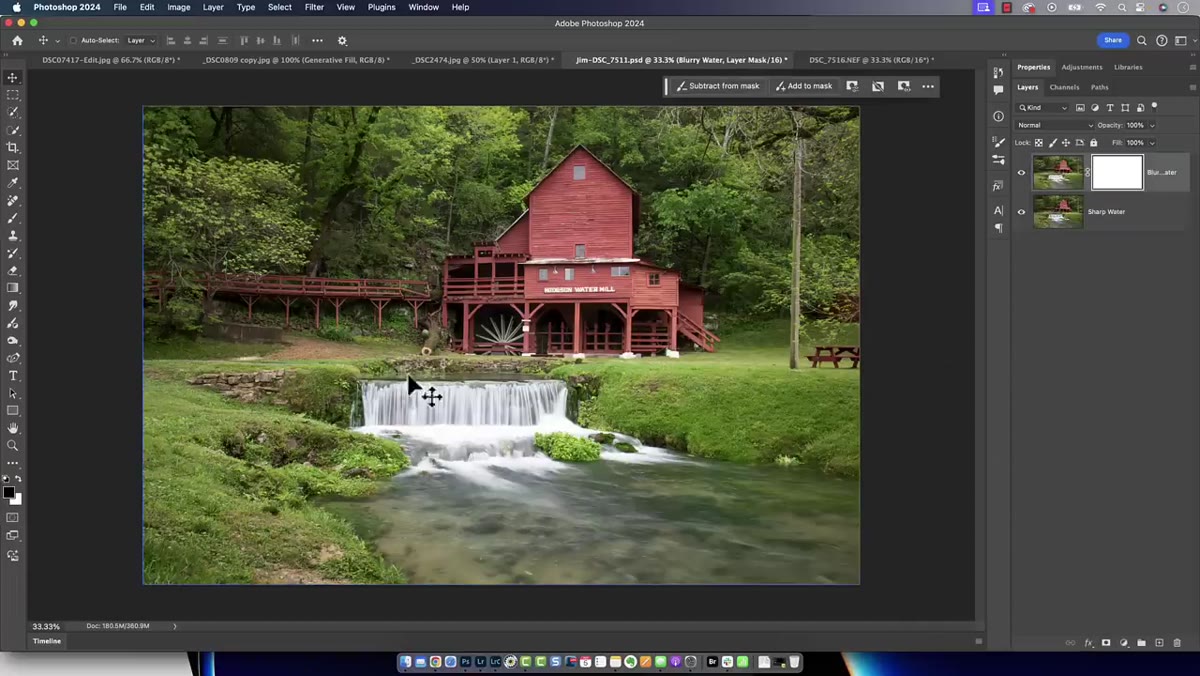 Layer mask thumbnail added to the blurry water layer in the Layers panel
Select the top layer in the Layers panel and click the Add Layer Mask button at the bottom of the panel. It looks like a rectangle with a circle cut out of it. This adds a white mask thumbnail next to your layer thumbnail. White means fully visible: the entire top layer is showing right now, which is the opposite of what you want. You need to reveal only the water.
Layer mask thumbnail added to the blurry water layer in the Layers panel
Select the top layer in the Layers panel and click the Add Layer Mask button at the bottom of the panel. It looks like a rectangle with a circle cut out of it. This adds a white mask thumbnail next to your layer thumbnail. White means fully visible: the entire top layer is showing right now, which is the opposite of what you want. You need to reveal only the water.
You have two directions you can take this. You could paint black over everything except the water, which is accurate but slow. Or, as Matt points out, you can invert your approach to work smarter. The masking strategy you choose here determines how much time you spend on cleanup, so it’s worth pausing to think about the shape of the area you’re targeting before you grab a brush.
Step 4: Invert the Mask and Paint to Reveal
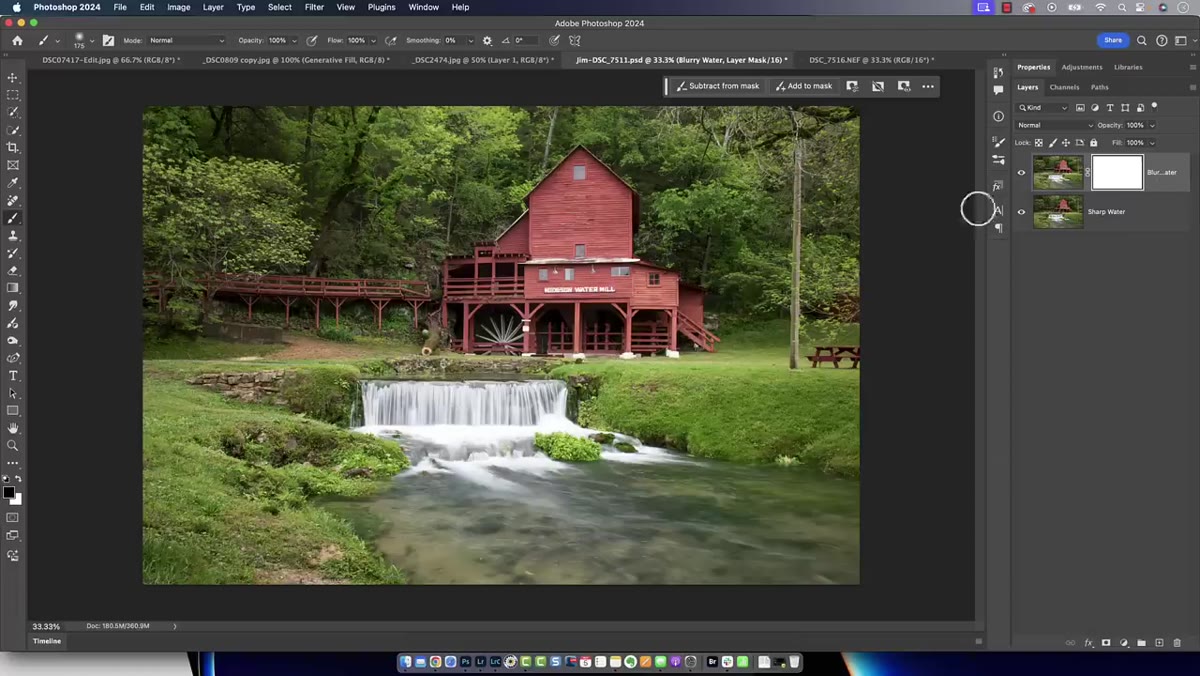 Layer mask filled with black, brush tool selected, foreground color set to white
After adding the mask, fill it entirely with black. You can do this by pressing Ctrl+I (Cmd+I on Mac) to invert the white mask to black, or by selecting the mask thumbnail, then going to Edit, Fill, and choosing Black. Now the top layer is completely hidden. The sharp base image is all you see.
Layer mask filled with black, brush tool selected, foreground color set to white
After adding the mask, fill it entirely with black. You can do this by pressing Ctrl+I (Cmd+I on Mac) to invert the white mask to black, or by selecting the mask thumbnail, then going to Edit, Fill, and choosing Black. Now the top layer is completely hidden. The sharp base image is all you see.
From here, select the Brush tool, set your foreground color to white, choose a soft round brush, and paint directly over the water area in the image. Painting white onto a black mask reveals the layer beneath the mask, which in this case means you’re bringing the silky, long-exposure water back into the composition. Work at a lower opacity (40 to 60 percent is a good starting range) if the transition between the two exposures needs to feel gradual rather than hard-edged.
Step 5: Refine the Edges and Check Alignment
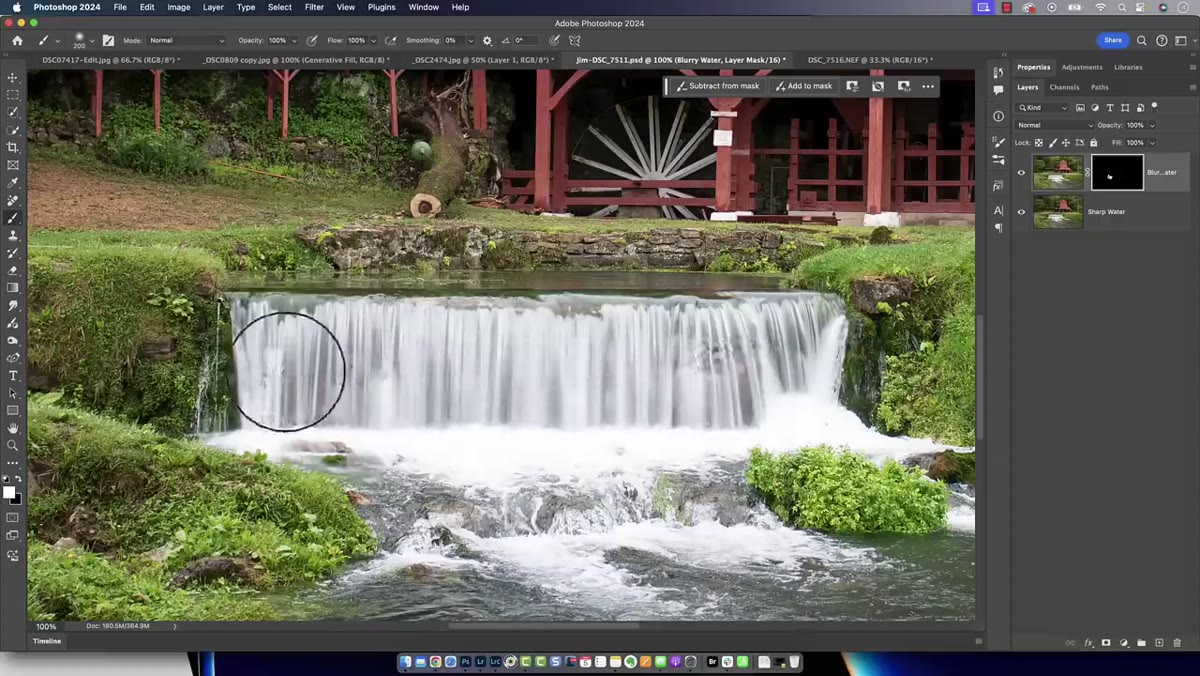 Close-up of mask edges where water meets rocks in the composition
Zoom in to where the water meets solid elements like rocks, shoreline, or the base of a waterfall. This is where the composite lives or dies. Use a smaller brush at higher precision to tighten those transitions. Toggle the layer’s visibility on and off to check whether anything looks misaligned between the two frames. If Jim shot both exposures handheld, there may be slight positional drift between the two images. If the frames don’t line up, use Edit, Auto-Align Layers before you begin masking.
Close-up of mask edges where water meets rocks in the composition
Zoom in to where the water meets solid elements like rocks, shoreline, or the base of a waterfall. This is where the composite lives or dies. Use a smaller brush at higher precision to tighten those transitions. Toggle the layer’s visibility on and off to check whether anything looks misaligned between the two frames. If Jim shot both exposures handheld, there may be slight positional drift between the two images. If the frames don’t line up, use Edit, Auto-Align Layers before you begin masking.
Misalignment is the most common reason a blend like this falls apart. I’ve had composites where everything looked clean at 50 percent zoom and fell apart the moment I checked at 100 percent. Always proof at full resolution before you call it finished.
A Note from My Own Work: The Principle Scales Up
Matt frames this as a landscape photography technique, and it is. But the underlying logic, taking the best region from multiple exposures and masking them together, is the exact same principle I use when compositing product shots, editorial images, and cover art. I’ve built hero composites from eight or nine separate captures of the same scene: one for the sky, one for the shadows, one for a reflective surface that needed a different angle of light. The mask is always the tool. The concept is always the same.
If you shoot in any situation where a single exposure can’t solve every problem in the frame, this workflow belongs in your toolkit. It doesn’t require a tripod, it doesn’t require expensive gear, and it doesn’t require advanced Photoshop knowledge. What it requires is the habit of thinking ahead: knowing before you press the shutter that you’ll be blending later, and shooting accordingly.
The single most important takeaway here is not the mask technique itself. It’s the mindset shift of treating your camera and Photoshop as one connected system rather than two separate steps. Shoot with intent, then finish the image on the computer.
Watch the full tutorial on YouTube to see Matt walk through the mask painting in real time, including how he handles the transition zones at the edges of the water.
Comments
Leave a Comment