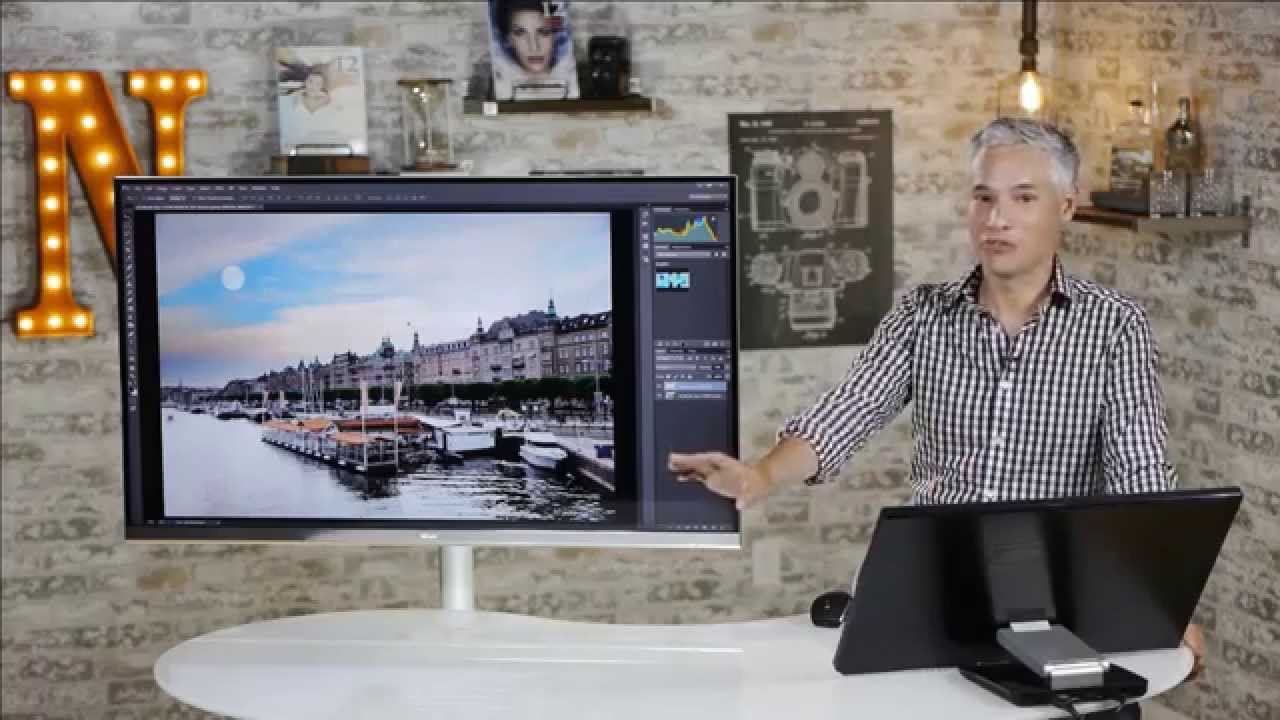
Every landscape shot I’ve ever taken has the same problem hiding inside it. The sky is perfect and the foreground is muddy, or the foreground is perfectly exposed and the sky is a blown-out white sheet. Your camera sees a single moment in time and does its best to split the difference. Your eye, on the other hand, adjusts constantly. What you remember standing in front of that scene is almost never what the raw file shows you.
This is the exact problem Tony and Chelsea Northrup dig into in their Photoshop essentials tutorial on layers and masks, using a raw shot of Stockholm where the sky has gorgeous color buried under a washed-out exposure and the foreground is too dark to read. Watch the full tutorial on YouTube before or after reading this. The technique they walk through is one I use constantly in composite work, not just for landscape photography. Any time you need to pull information from two versions of the same image, or blend two separate shots together seamlessly, this is the foundation you need to understand.
What makes this tutorial worth your time is that it doesn’t just show you how to use masks. It shows you why masks exist by first showing you the destructive alternative. That sequence changed how I taught myself to work in Photoshop years ago, and it still shapes how I explain this to other people.
Step 1: Create Two Separate Edits of the Same Raw File in Lightroom
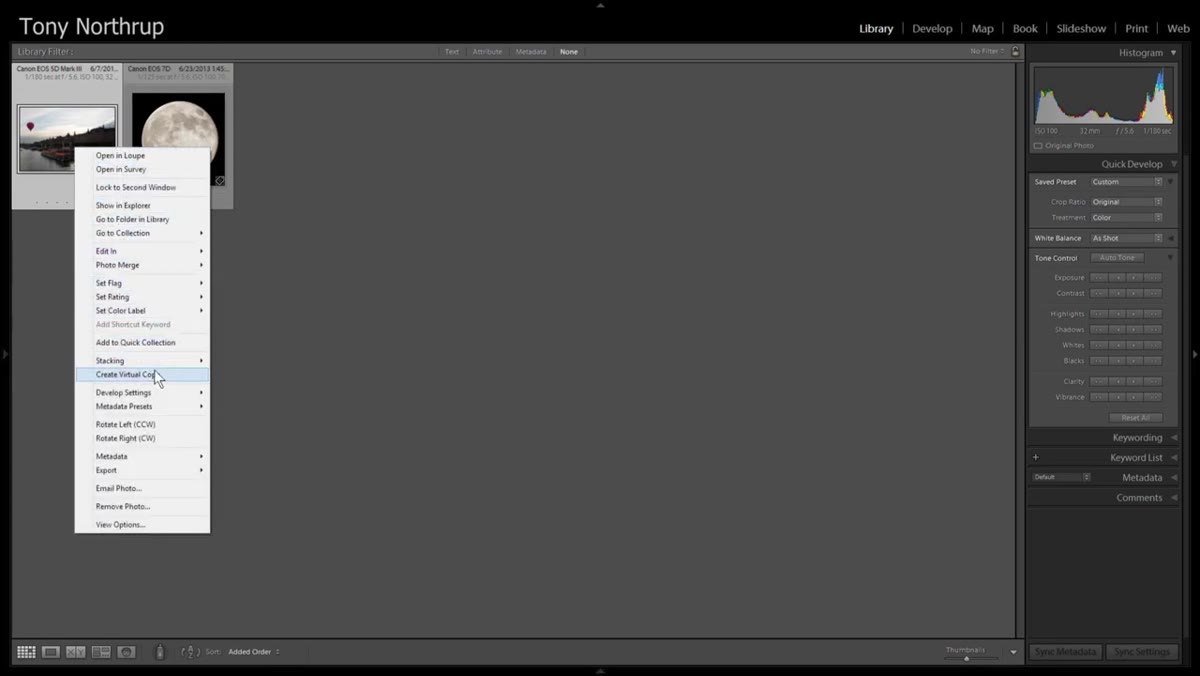 Lightroom develop module with Stockholm sky image open
Start in Lightroom with your raw file. Make a virtual copy of the image so you have two instances of the same file. On the first copy, go into the Develop module and edit exclusively for the sky. Bring the exposure down until the sky’s color and texture become visible. Bump the Vibrance slider to recover the color saturation that was compressed by the overexposure. Don’t worry about the foreground going dark here. That version of the image has one job: make the sky look the way it actually looked when you were standing there.
Lightroom develop module with Stockholm sky image open
Start in Lightroom with your raw file. Make a virtual copy of the image so you have two instances of the same file. On the first copy, go into the Develop module and edit exclusively for the sky. Bring the exposure down until the sky’s color and texture become visible. Bump the Vibrance slider to recover the color saturation that was compressed by the overexposure. Don’t worry about the foreground going dark here. That version of the image has one job: make the sky look the way it actually looked when you were standing there.
On the second copy, do the opposite. Raise the overall exposure until the foreground reads clearly. Pull the Blacks slider down slightly to keep contrast from going flat. Add a touch of Clarity if the details need definition. Again, ignore the sky entirely. It will look awful. That’s fine. You now have two images that are each right about exactly half the frame.
Step 2: Open Both Images as Layers in Photoshop
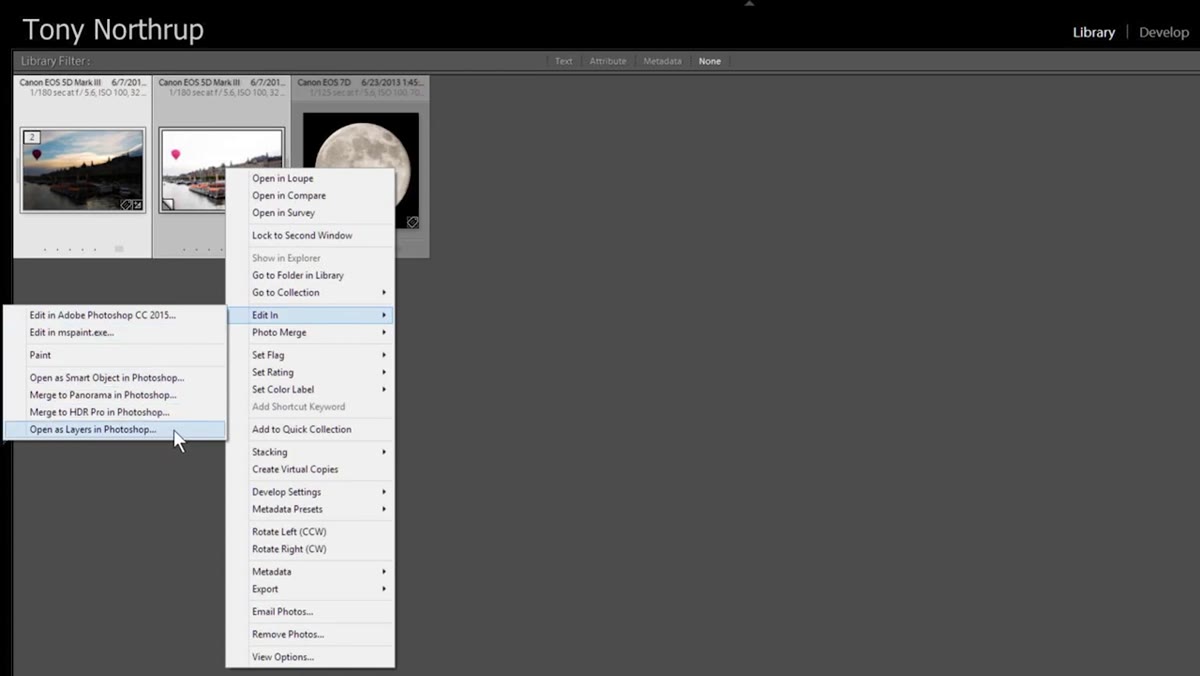 Right-click menu in Lightroom showing “Open as Layers in Photoshop”
Select both images in Lightroom by clicking one and then shift-clicking the other. Right-click, go to “Edit In,” and choose “Open as Layers in Photoshop.” Lightroom handles the stacking automatically. Photoshop will open with both exposures loaded as separate layers in the same document, perfectly aligned because they came from the same source file.
Right-click menu in Lightroom showing “Open as Layers in Photoshop”
Select both images in Lightroom by clicking one and then shift-clicking the other. Right-click, go to “Edit In,” and choose “Open as Layers in Photoshop.” Lightroom handles the stacking automatically. Photoshop will open with both exposures loaded as separate layers in the same document, perfectly aligned because they came from the same source file.
Once you’re in Photoshop, open the Layers panel if it’s not already visible. Go to Window and select Layers. You’ll see both versions stacked. The top layer is blocking the bottom layer entirely, which is exactly how layers work: each one is a complete, opaque image unless you tell it otherwise.
Step 3: Understand What You’re Looking At Before You Touch Anything
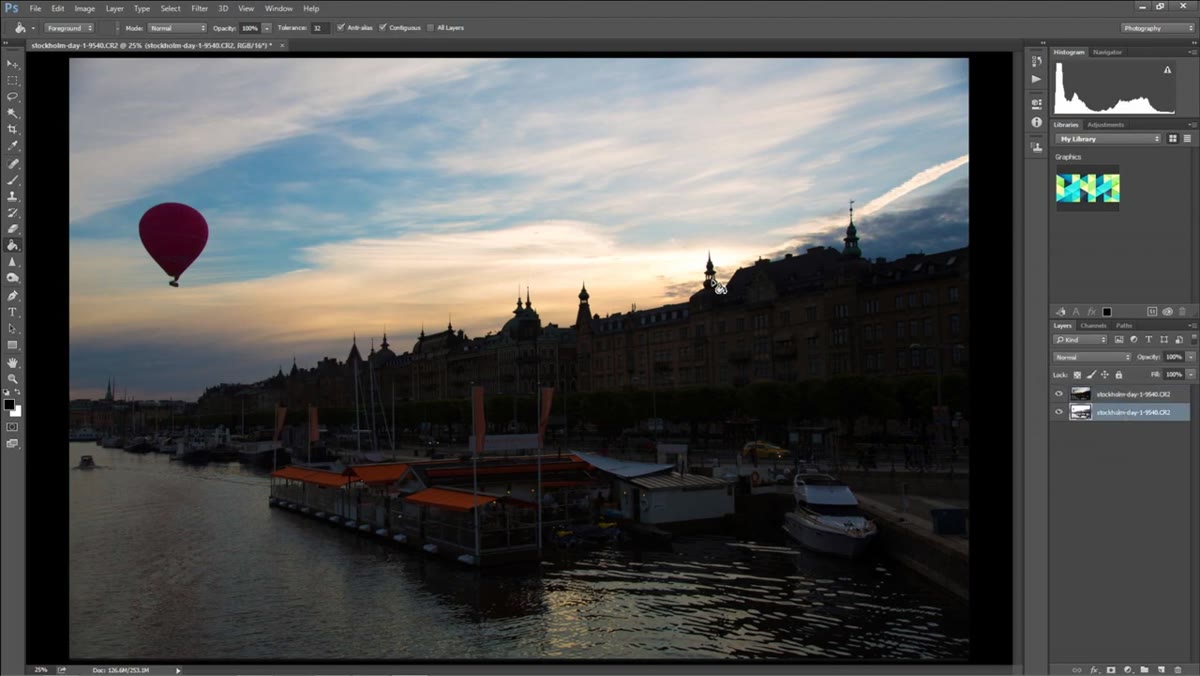 Layers panel showing two stacked image layers with visibility icons
Click the eye icon next to the top layer to toggle its visibility off and on. This is how you confirm that both images are actually there and that the alignment is correct. When the top layer is visible, you see one exposure. When it’s hidden, you see the other. Toggle back and forth a few times. This also builds your mental model of what the mask needs to accomplish: you want the sky from the top layer and the foreground from the bottom layer, blended together without a visible seam.
Layers panel showing two stacked image layers with visibility icons
Click the eye icon next to the top layer to toggle its visibility off and on. This is how you confirm that both images are actually there and that the alignment is correct. When the top layer is visible, you see one exposure. When it’s hidden, you see the other. Toggle back and forth a few times. This also builds your mental model of what the mask needs to accomplish: you want the sky from the top layer and the foreground from the bottom layer, blended together without a visible seam.
If you want to confirm the two-layer structure even more concretely, hit Ctrl+T (Cmd+T on Mac) with the top layer selected to enter Free Transform mode. You’ll see handles appear and can drag the layer slightly to reveal the one underneath. Hit Escape to cancel without applying any transformation. Never skip this orientation step. Knowing exactly what’s in each layer before you start masking saves you from chasing invisible problems later.
Step 4: See Why the Eraser Tool Is the Wrong Approach
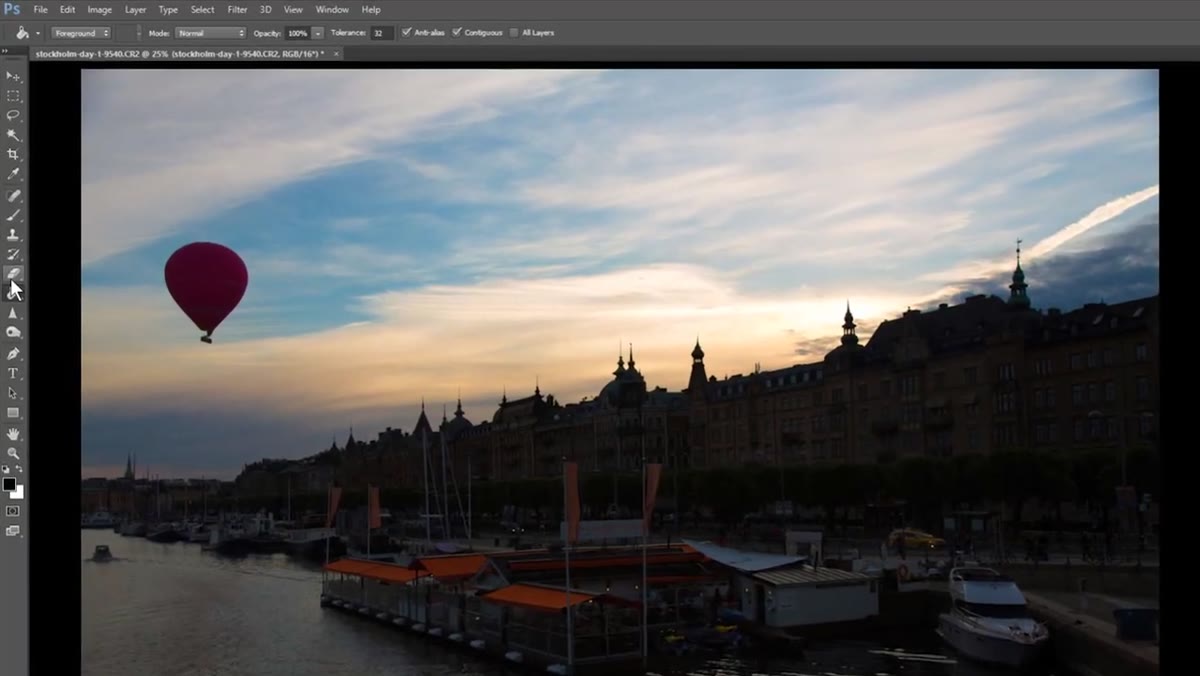 Eraser tool actively removing pixels from the top layer
Select the Eraser tool and make the brush large by pressing the right bracket key a few times. Start painting over the sky area on the top layer. You’ll see the bottom layer’s foreground version appearing where you erase. It looks like it’s working. The problem reveals itself the moment you make a mistake and go too far, or erase into an area you needed to keep.
Eraser tool actively removing pixels from the top layer
Select the Eraser tool and make the brush large by pressing the right bracket key a few times. Start painting over the sky area on the top layer. You’ll see the bottom layer’s foreground version appearing where you erase. It looks like it’s working. The problem reveals itself the moment you make a mistake and go too far, or erase into an area you needed to keep.
The Eraser destroys pixel data permanently. If you save and close the file, that information is gone. There is no coming back. For anyone doing professional work, or really any work worth keeping, this is an unacceptable workflow. Hit Ctrl+Z (Cmd+Z) to undo your erasing and step away from the Eraser tool. It has its uses, but blending exposures is not one of them.
Step 5: Add a Layer Mask and Paint the Blend
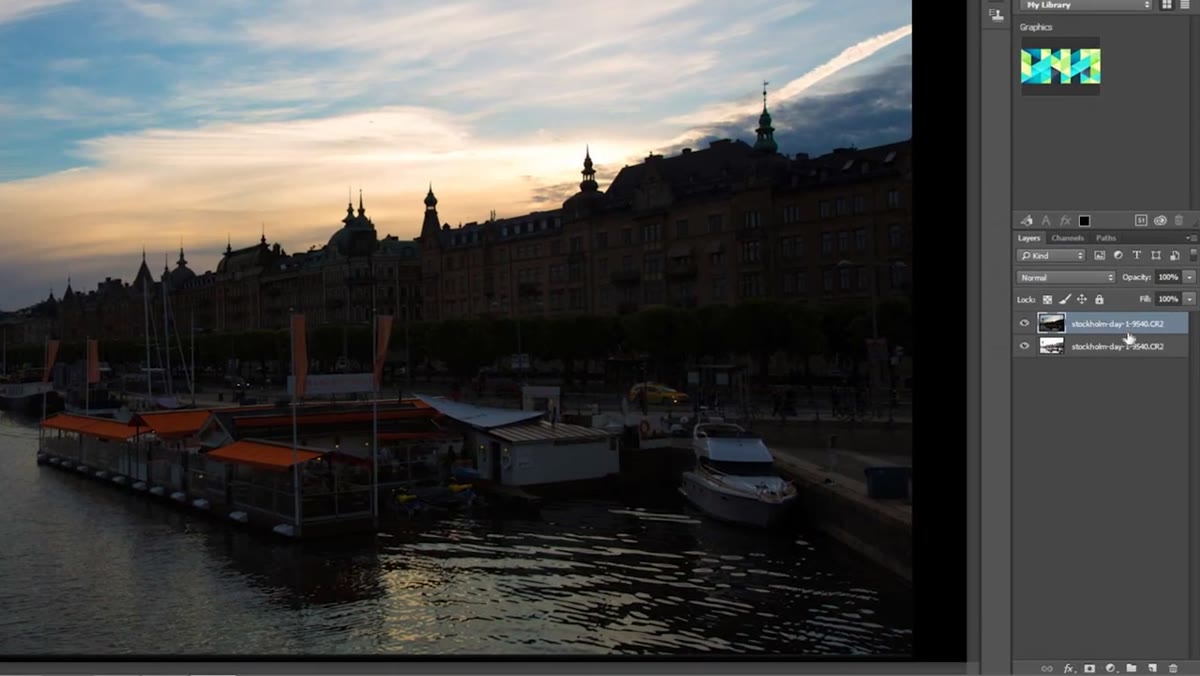 Layer mask thumbnail appearing in Layers panel after clicking mask icon
With the top layer selected, click the Layer Mask icon at the bottom of the Layers panel. It looks like a rectangle with a circle cut out of it. A white thumbnail appears next to your layer thumbnail, linked to it by a small chain icon. White on a mask means fully visible. Black means fully hidden. Painting with gray creates partial transparency.
Layer mask thumbnail appearing in Layers panel after clicking mask icon
With the top layer selected, click the Layer Mask icon at the bottom of the Layers panel. It looks like a rectangle with a circle cut out of it. A white thumbnail appears next to your layer thumbnail, linked to it by a small chain icon. White on a mask means fully visible. Black means fully hidden. Painting with gray creates partial transparency.
Click directly on the mask thumbnail to make sure it’s active, not the layer itself. Select a large, soft-edged brush and set your foreground color to black. Paint over the sky area of the top layer. As you paint, the sky from the top layer disappears and the foreground version of the bottom layer shows through in that area. If you go too far into the foreground, switch your brush color to white and paint back. Nothing has been destroyed. The pixel data in both layers is completely intact. You are only controlling visibility, and that decision is always reversible.
What I’d Add From My Own Work
The virtual-copy-in-Lightroom approach Tony demonstrates is elegant for photographers working with a single raw file, but the same mask logic applies when you’re pulling from two completely separate photographs. In composite work, I might be blending a sky shot in Iceland with a foreground shot in New Jersey. The mask workflow is identical. The extra challenge is matching the light direction, color temperature, and atmospheric haze between the two images so the seam disappears not just at the pixel level but at the physics level. That’s where spending real time on each layer’s color grading before you ever touch a mask pays off. The mask only works as well as the raw material underneath it.
I’d also suggest experimenting with a gradient on the mask instead of a painted edge for landscape horizon blends. A black-to-white linear gradient dragged across the mask creates a smooth transition that can look more natural than a hand-painted edge, especially on shots with a relatively clean horizon line.
The single most important idea in this entire tutorial is that masks are non-destructive. Every time you reach for the Eraser on a layer, stop and ask whether a mask would do the same job without the risk. Almost always, it will, and you’ll thank yourself the next time a client asks for a revision. Watch the full tutorial on YouTube to see Tony walk through the complete process with his Stockholm image.
Comments
Leave a Comment