Every composite I build starts the same way: a sketch on paper, a folder of reference images, and an honest assessment of which tool is actually right for the job. For years, my answer to “how do I isolate just the sky?” or “how do I adjust only the shadows without touching the midtones?” was automatic: open Photoshop, select by color range, build a mask, round-trip back to Lightroom. It worked. It also added twenty minutes to every edit that should have been simple.
That habit started to crack when I watched this Tony & Chelsea Northrup tutorial on Lightroom Classic’s newer luminance and color range masking tools. Watch the full tutorial on YouTube. Tony works through two real photographs, both shot at night in Puerto Rico, to show how these features solve the exact problems that used to send photographers scrambling toward Photoshop. What struck me wasn’t the novelty. It was how precisely these tools map to the selection logic I already use in compositing work.
If you’ve been treating Lightroom as a place where you adjust sliders and Photoshop as the place where you do “real” selection work, this tutorial will reset that assumption.
Step 1: Set Up Your Adjustment Brush and Paint Loosely
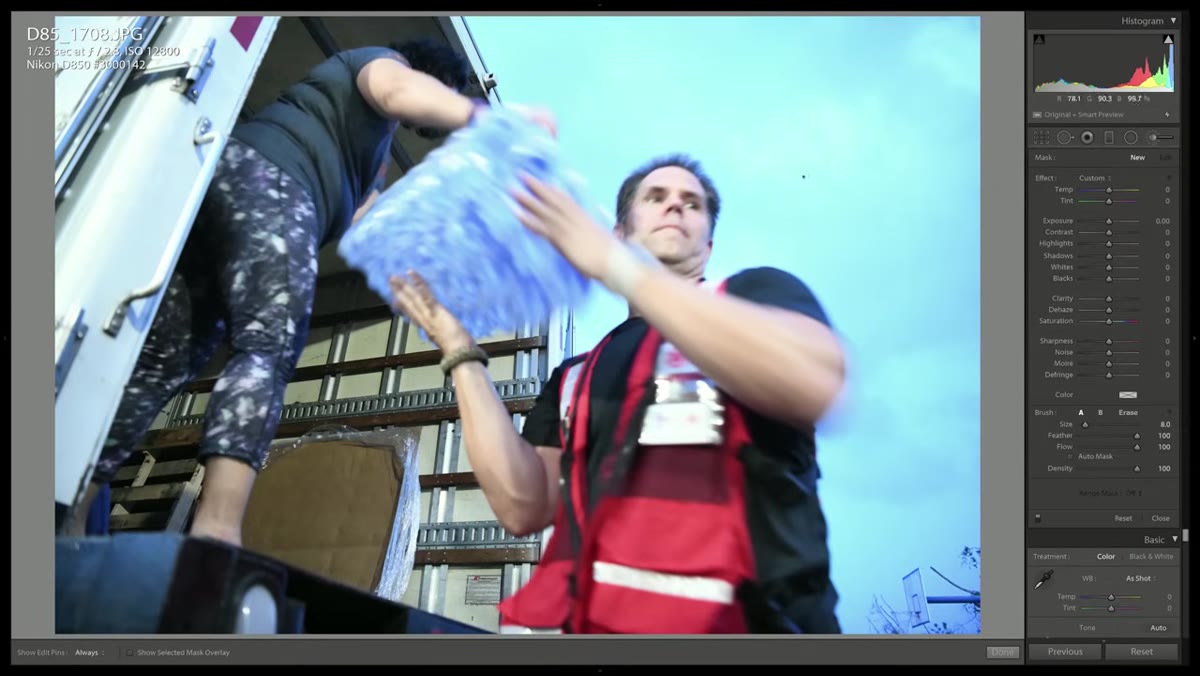 Adjustment brush selected in the Develop module
Open your image in Lightroom’s Develop module and grab the Adjustment Brush. Before you do anything else, make sure Auto Mask is turned off. This is counterintuitive if you’ve relied on Auto Mask before, but the point here is to paint fast and wide. You’re not trying to be precise. Cover the area you want to affect, including the edges and then some, the way you’d block in a rough shape before refining it.
Adjustment brush selected in the Develop module
Open your image in Lightroom’s Develop module and grab the Adjustment Brush. Before you do anything else, make sure Auto Mask is turned off. This is counterintuitive if you’ve relied on Auto Mask before, but the point here is to paint fast and wide. You’re not trying to be precise. Cover the area you want to affect, including the edges and then some, the way you’d block in a rough shape before refining it.
In the tutorial example, the goal is to correct a color cast in the sky caused by the camera locking white balance to an artificial light source. Tony paints over the entire sky region, deliberately crossing over the subject’s hair and silhouette. The mess doesn’t matter because the next step is where the actual selection logic happens.
Step 2: Enable the Range Mask and Switch to Color Mode
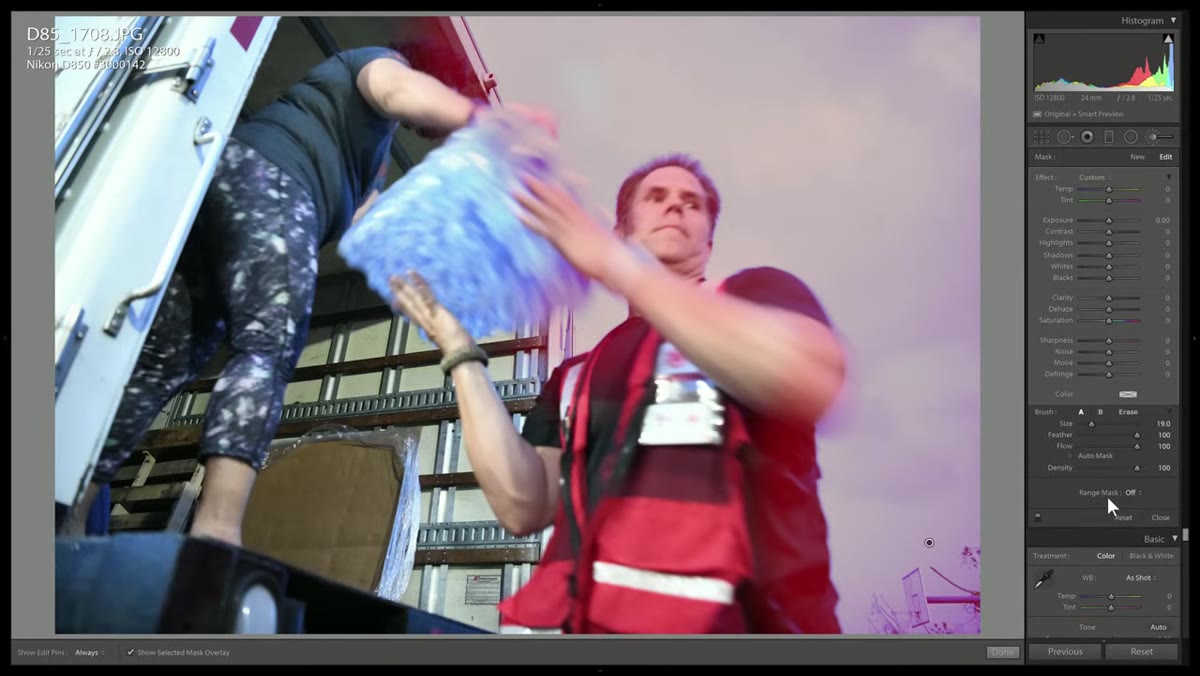 Range Mask dropdown changed from Off to Color
At the bottom of the Adjustment Brush panel, you’ll find the Range Mask dropdown. It defaults to Off, and because it sits at the very bottom of a long panel, it’s easy to scroll past. Change it from Off to Color. This tells Lightroom to apply your brush adjustment only within a specific color range you’re about to define, and to ignore everything outside it.
Range Mask dropdown changed from Off to Color
At the bottom of the Adjustment Brush panel, you’ll find the Range Mask dropdown. It defaults to Off, and because it sits at the very bottom of a long panel, it’s easy to scroll past. Change it from Off to Color. This tells Lightroom to apply your brush adjustment only within a specific color range you’re about to define, and to ignore everything outside it.
This is the moment the tool earns its place. Instead of your rough brushwork affecting every pixel you painted over, Lightroom will now use color information to decide what actually gets adjusted. The painted area becomes a search zone, not a final mask.
Step 3: Sample the Color Range with the Eyedropper
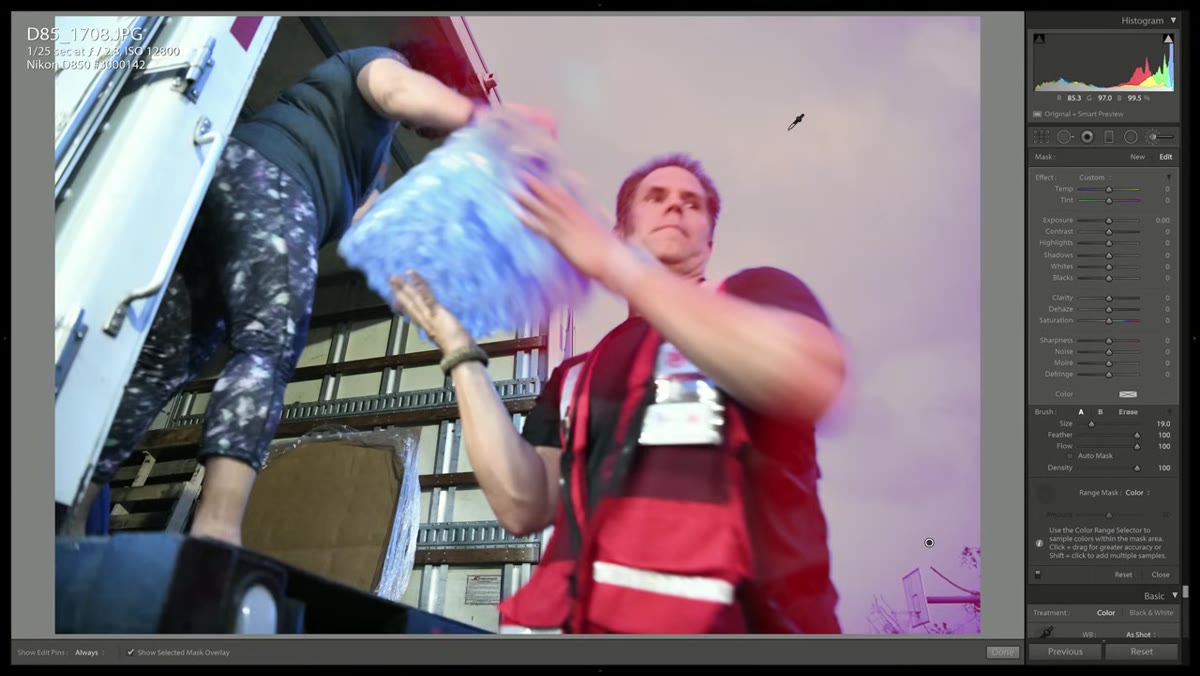 Eyedropper sampling sky color in the image
With Color mode active, a color range eyedropper appears. Click it directly on the area you want to isolate. In the sky example, a single click starts pulling the teal-shifted sky tones into the selection. If the sky varies in hue across the frame, hold Shift and click additional areas to expand the sampled range. Shift-clicking adds to the selection rather than replacing it, so you can build a complete picture of the color spread you want to target.
Eyedropper sampling sky color in the image
With Color mode active, a color range eyedropper appears. Click it directly on the area you want to isolate. In the sky example, a single click starts pulling the teal-shifted sky tones into the selection. If the sky varies in hue across the frame, hold Shift and click additional areas to expand the sampled range. Shift-clicking adds to the selection rather than replacing it, so you can build a complete picture of the color spread you want to target.
Turn on the mask overlay while you do this so you can see exactly what’s being selected in real time. The feedback is immediate. Where Auto Mask was producing halos and artifacts around hair, the color range selection cleanly respects the boundary between the subject and the sky because those two areas are genuinely different colors.
Step 4: Refine the Selection with the Amount Slider
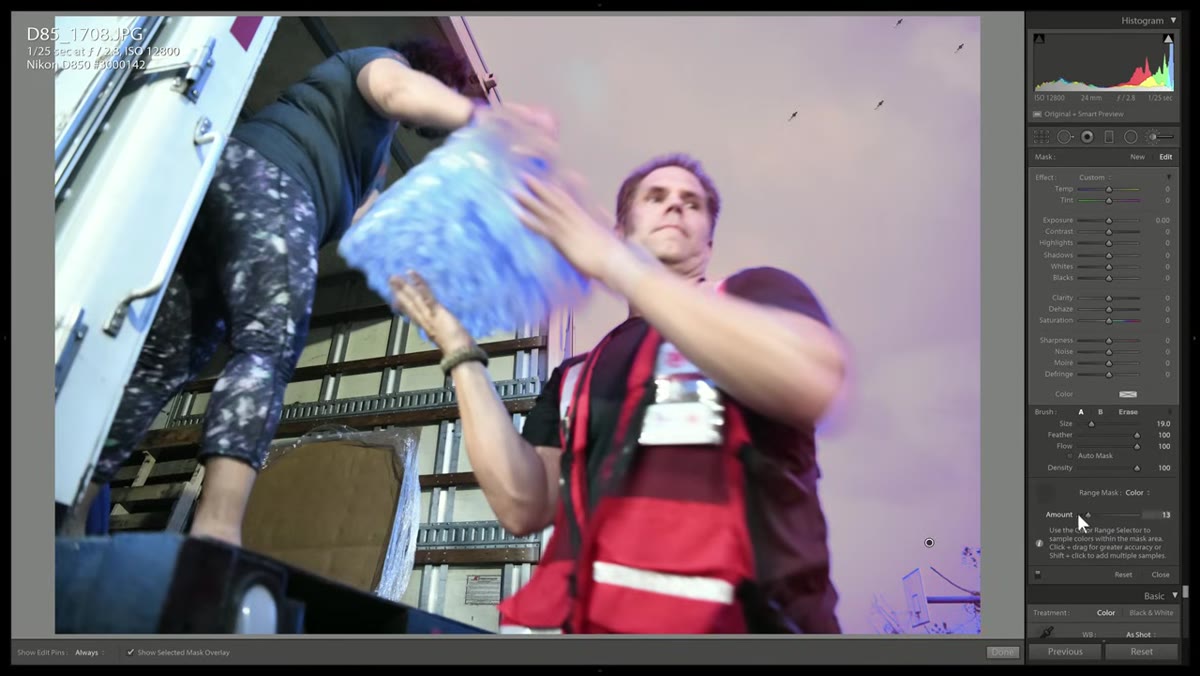 Amount slider being adjusted to fine-tune mask edges
Below the eyedropper you’ll find a single slider labeled Amount. Drag it right to expand how broadly Lightroom interprets your sampled color range, capturing more variation. Drag it left to tighten the selection toward only the most exact match. Think of it as feathering control combined with tolerance, similar to adjusting the fuzziness slider in Photoshop’s Select by Color Range dialog.
Amount slider being adjusted to fine-tune mask edges
Below the eyedropper you’ll find a single slider labeled Amount. Drag it right to expand how broadly Lightroom interprets your sampled color range, capturing more variation. Drag it left to tighten the selection toward only the most exact match. Think of it as feathering control combined with tolerance, similar to adjusting the fuzziness slider in Photoshop’s Select by Color Range dialog.
For a sky with subtle gradations, pushing the slider slightly right tends to pick up the transitional tones near the horizon without blowing out into the subject. For a very uniform color field, you can keep it conservative. The goal is clean edges without obvious banding where the adjustment starts and stops.
Step 5: Apply Your Corrections and Evaluate
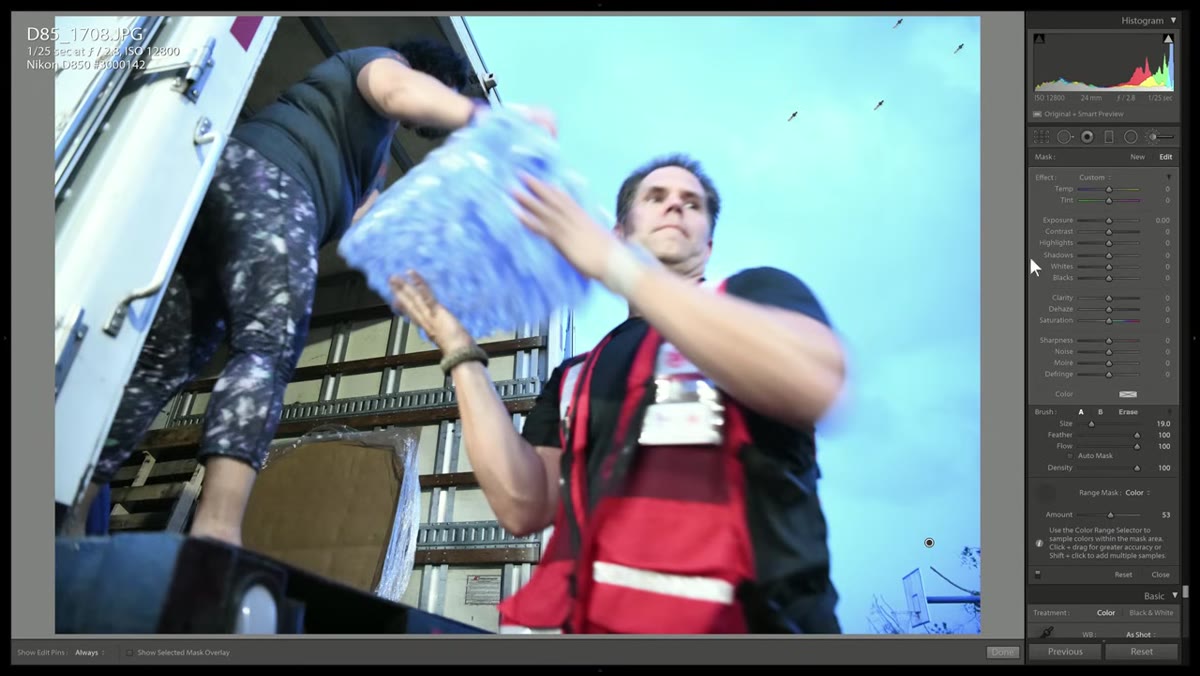 Color temperature and saturation sliders adjusted for sky
Turn off the mask overlay and make your actual tonal or color corrections using the Adjustment Brush’s parameter sliders. In the tutorial, Tony brings the color temperature toward a more neutral reading and pulls saturation down to remove the unnatural teal cast the artificial light created. The corrections land only on the sky because the range mask is containing them there.
Color temperature and saturation sliders adjusted for sky
Turn off the mask overlay and make your actual tonal or color corrections using the Adjustment Brush’s parameter sliders. In the tutorial, Tony brings the color temperature toward a more neutral reading and pulls saturation down to remove the unnatural teal cast the artificial light created. The corrections land only on the sky because the range mask is containing them there.
Take a moment to zoom in on the edges of your subject, particularly anywhere hair or fine detail meets the adjusted region. This is where traditional brush-based masking tends to fail. Clean edges here mean the range mask has done its job correctly.
Step 6: Switch to Luminance Masking for Tonal Selections
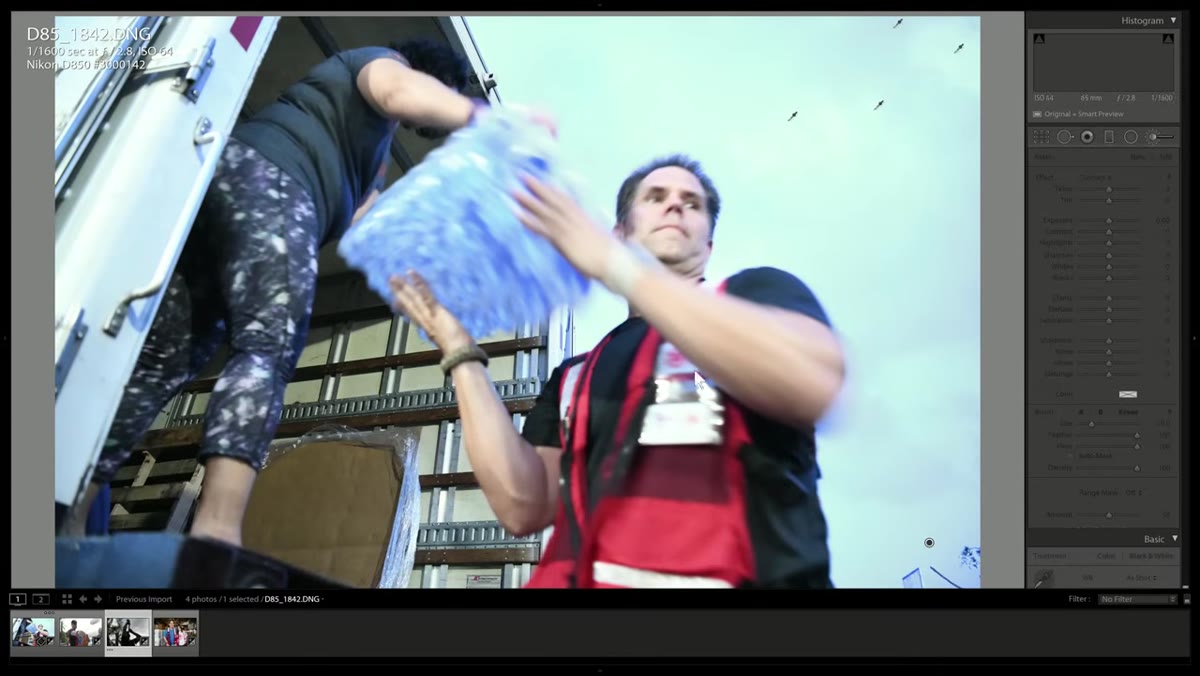 Second image loaded, Luminance selected in Range Mask dropdown
Color range masking works when your target area is defined by hue. Luminance masking works when it’s defined by brightness. For the second photograph in the tutorial, the subject is backlit against a bright sky, creating extreme contrast between the dark foreground and the blown-out background. Paint your adjustment brush over the relevant region, then set the Range Mask dropdown to Luminance instead of Color.
Second image loaded, Luminance selected in Range Mask dropdown
Color range masking works when your target area is defined by hue. Luminance masking works when it’s defined by brightness. For the second photograph in the tutorial, the subject is backlit against a bright sky, creating extreme contrast between the dark foreground and the blown-out background. Paint your adjustment brush over the relevant region, then set the Range Mask dropdown to Luminance instead of Color.
Two handles appear on a luminance gradient, representing the shadow and highlight boundaries of your selection. Drag them inward or outward to define which brightness range your adjustment targets. You can choose to affect only the deep shadows, only the bright highlights, or any band in between. For recovering detail in a bright sky without lifting the shadows, you’d pin the selection to the upper end of the luminance range.
What I’d Add from My Own Work
Lightroom’s range masking and Photoshop’s luminosity masks are solving the same problem from different starting points. In my compositing work, I build luminosity masks in Photoshop when I need surgical precision across multiple layers, color channel separations, and blend-if controls. But for a single-image correction where I need to hit just the highlights or just a specific hue, Lightroom’s version is genuinely faster to reach. The lesson I took from this tutorial is not that one tool replaces the other. It’s that the decision about which one to open should be deliberate, not habitual.
If you sketch your edit before you start (which I’d argue everyone should), you usually know at the planning stage whether you’re dealing with a color problem or a tonal problem. That distinction tells you which masking mode to reach for, and increasingly, it tells me whether I even need to leave Lightroom at all.
The single most useful idea in this tutorial is that precision doesn’t require precision brushwork. You can paint loosely and let the image’s own color and tonal data do the refinement. That’s a significant shift in how you approach masking, and it’s worth watching Tony walk through both examples to see how the selection builds in real time.
Watch the full tutorial on YouTube and pay particular attention to the moment he turns on the mask overlay during the color sampling. Seeing the selection form live is what makes the logic click.
Comments (3)
I've watched a dozen tutorials on this and yours is the clearest by far.
This saved me so much time on my last edit. Wish I'd found this sooner.
I tried this on a client project yesterday and the results were way better than expected.
Leave a Comment