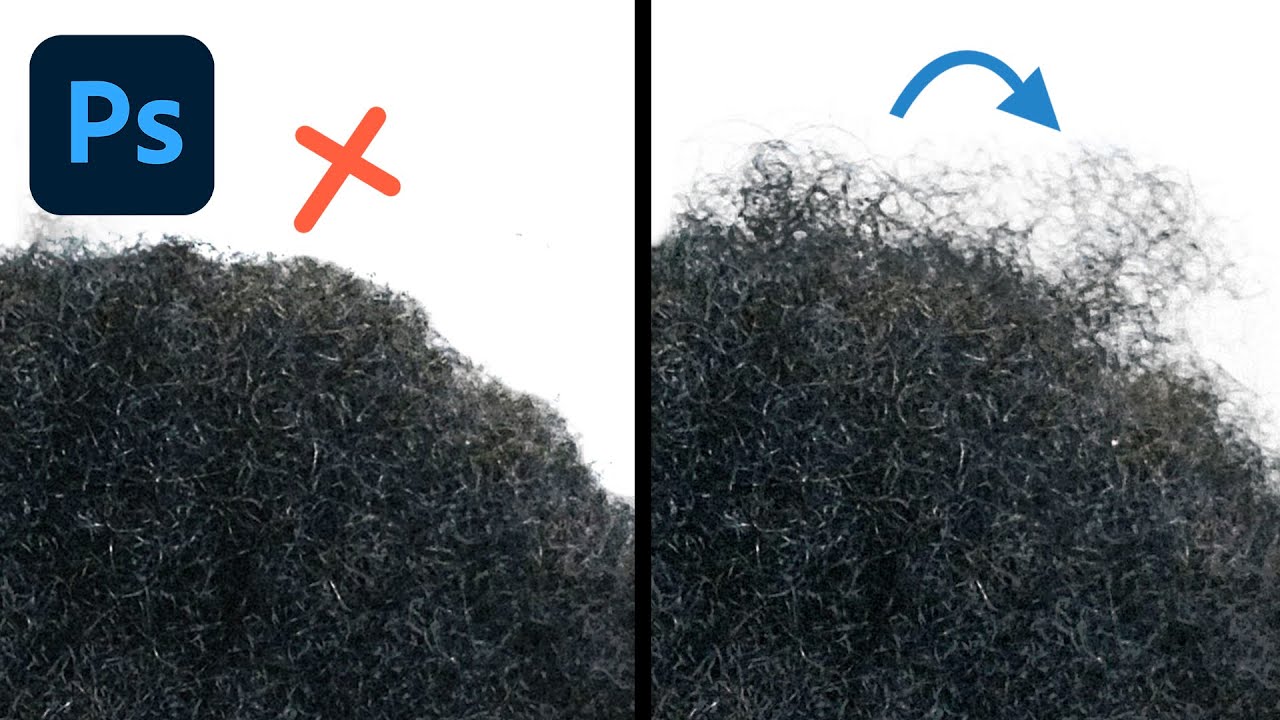
Hair is where composites go to die. I don’t mean that dramatically. I mean that I have spent entire afternoons on a single subject’s flyaways, burning hours with Select and Mask, painting black and white on layer masks pixel by pixel, trying to coax something that looks like actual hair and not a helmet. It’s the detail that breaks the illusion in a movie poster or a book cover. Readers might not consciously notice a slightly soft edge on a jacket sleeve, but they will feel something is wrong the moment hair looks pasted. That feeling is what I’m always working against.
This is why I keep coming back to channel-based masking. It’s one of those techniques that feels almost too elegant once you understand what it’s actually doing. In this Aaron Nace (PHLEARN) tutorial, Watch the full tutorial on YouTube, Aaron walks through using individual color channels to build a selection that captures hair detail no automatic tool can match. What follows is my breakdown of that process, with the notes I’d want if I were sitting down to use this for the first time on a real project.
Step 1: Get a Rough Starting Selection with Select Subject
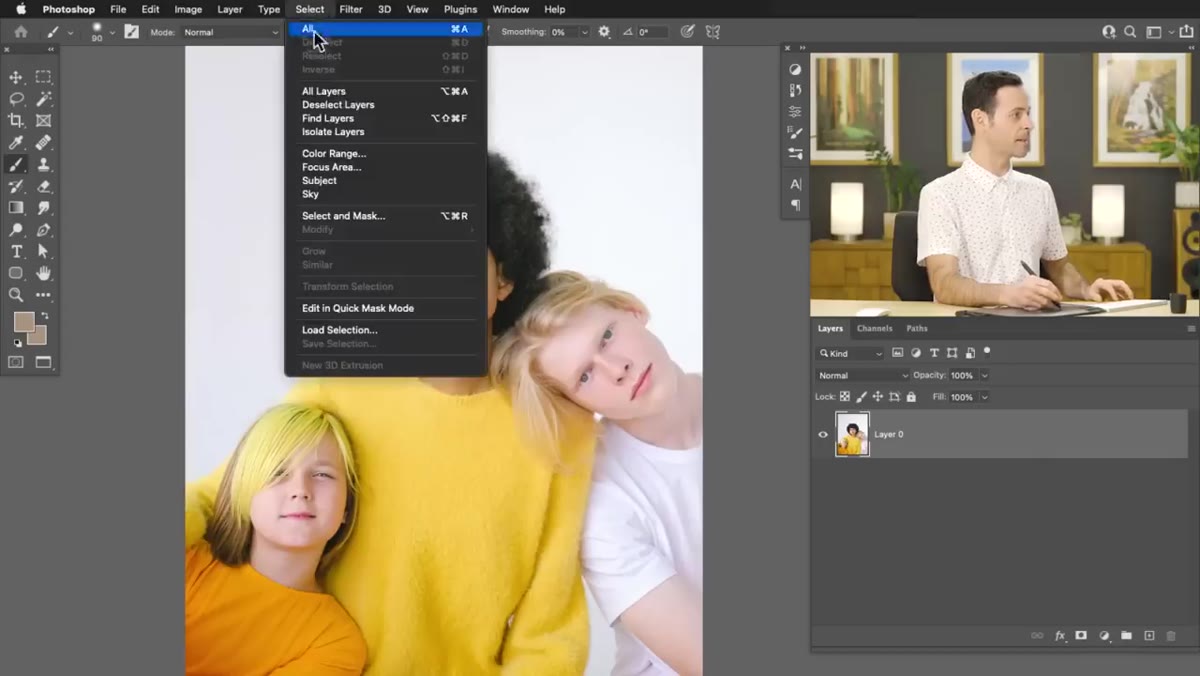 Photoshop Select menu open, Subject option highlighted
Before channels enter the picture, you need a working selection to build from. Go to Select, then Select Subject. Photoshop’s AI-driven selection tool does a genuinely solid job on the broad strokes. The body, clothing, and general outline will land close to right. This is your base, not your finish line.
Photoshop Select menu open, Subject option highlighted
Before channels enter the picture, you need a working selection to build from. Go to Select, then Select Subject. Photoshop’s AI-driven selection tool does a genuinely solid job on the broad strokes. The body, clothing, and general outline will land close to right. This is your base, not your finish line.
Once the selection loads, add a layer mask by clicking the layer mask icon at the bottom of the Layers panel. Then create a solid color fill layer directly below your subject and set it to white. This gives you a clean surface to evaluate the edges. When you zoom into the hair, you’ll see the problem clearly. The detail is there in the original image. It’s simply not in the cutout.
Step 2: Disable the Layer Mask Temporarily
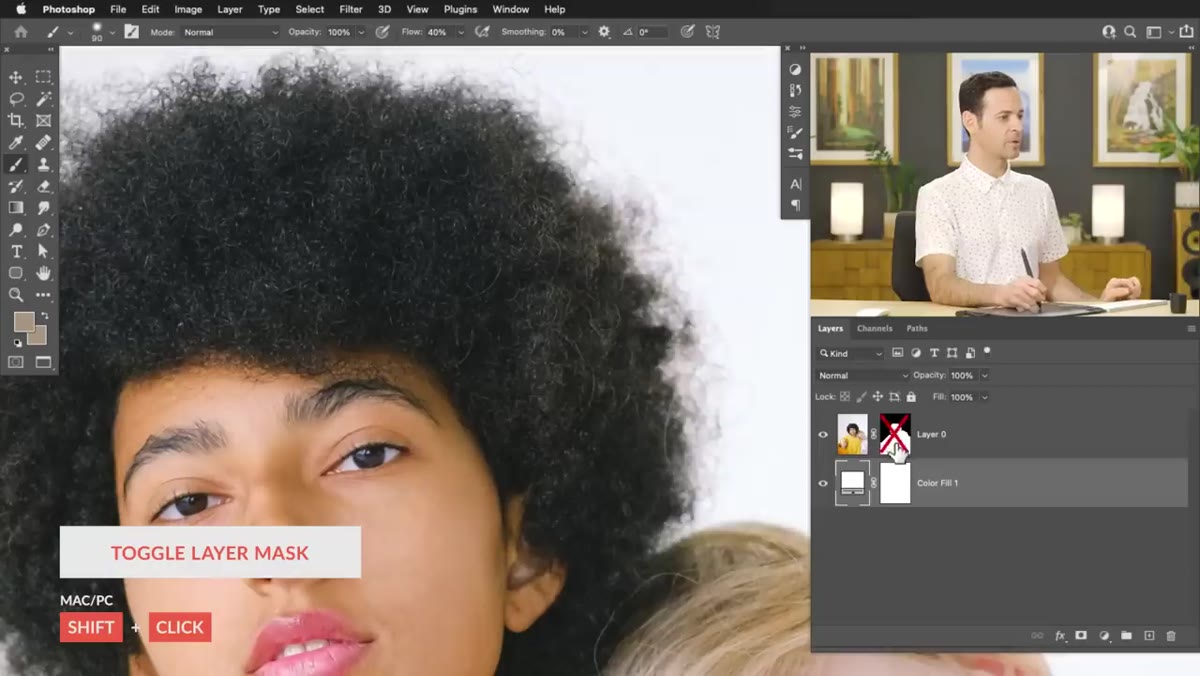 Layer mask with red X overlay, original image fully visible
To work with channels, you need to see the full, unmasked original image. Hold Shift and click directly on the layer mask thumbnail in the Layers panel. A red X will appear over the mask. This disables it without deleting it. Your subject’s original background comes back into view.
Layer mask with red X overlay, original image fully visible
To work with channels, you need to see the full, unmasked original image. Hold Shift and click directly on the layer mask thumbnail in the Layers panel. A red X will appear over the mask. This disables it without deleting it. Your subject’s original background comes back into view.
This is an important habit. You’re not throwing away the work you’ve already done. The rough mask is still there, waiting. You’re just setting it aside so you can use the original image data to build something more precise.
Step 3: Open the Channels Panel and Evaluate Each Channel
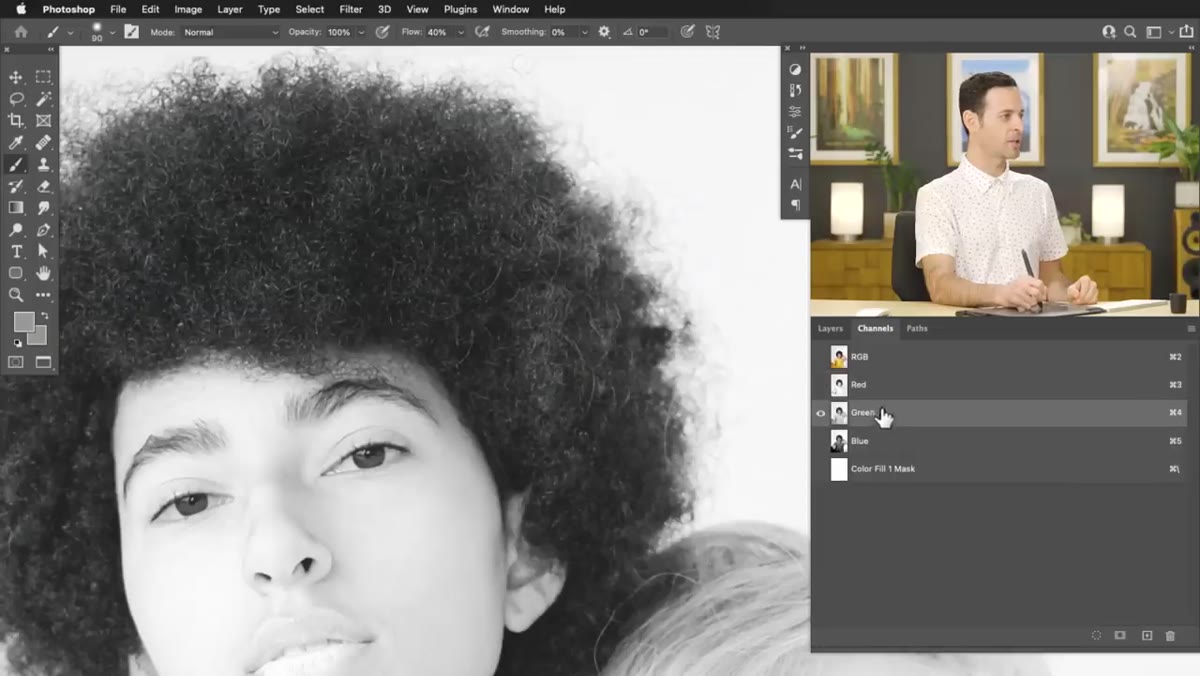 Channels panel open, red, green, blue channels visible
Go to Window, then Channels. You’ll see your RGB composite at the top, followed by separate Red, Green, and Blue channel thumbnails. Click each one individually and study what you’re looking at. The channels are showing you how much of each color exists in different parts of the image.
Channels panel open, red, green, blue channels visible
Go to Window, then Channels. You’ll see your RGB composite at the top, followed by separate Red, Green, and Blue channel thumbnails. Click each one individually and study what you’re looking at. The channels are showing you how much of each color exists in different parts of the image.
Skin reads bright in the Red channel because human skin carries a lot of red. It reads dark in the Blue channel for the same reason, just in reverse. For hair masking, you’re hunting for the channel where your subject’s hair shows the strongest contrast against the background. In most portrait situations with a lighter background, the Blue channel will be your best option. The hair will be noticeably darker than the backdrop, which is exactly the separation you need to build a selection.
Step 4: Duplicate the Best Channel
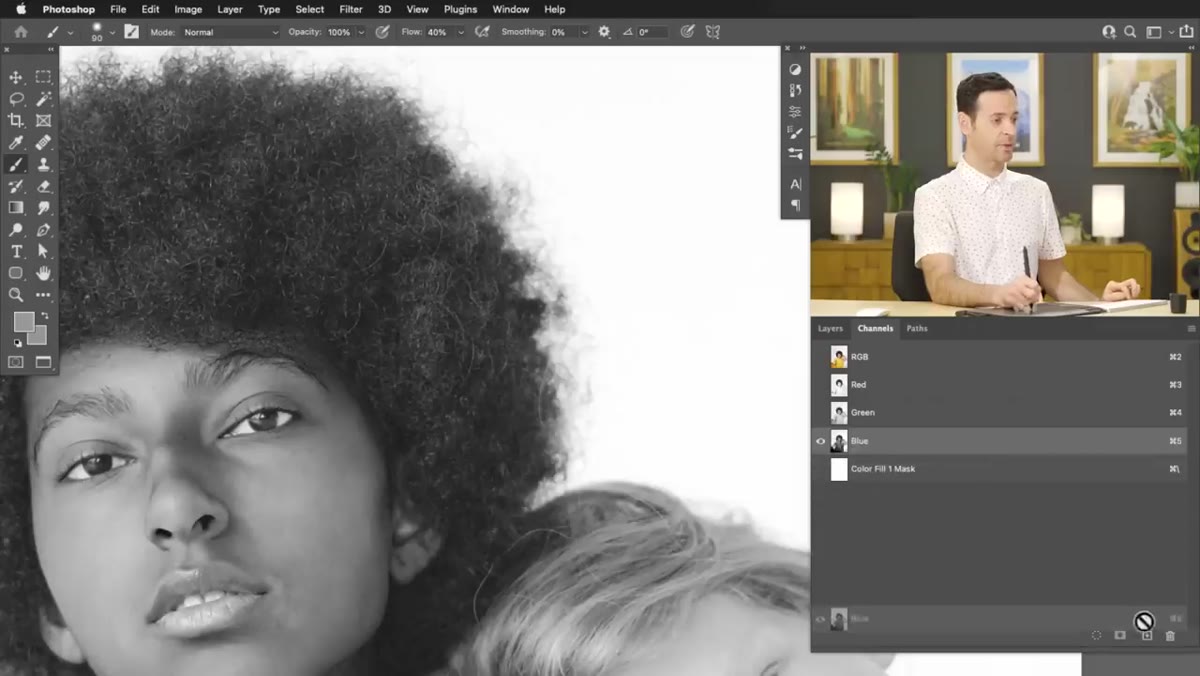 Blue channel being dragged to the New Channel icon
Once you’ve identified your highest-contrast channel (Blue, in most cases), drag that channel thumbnail down to the small plus icon at the bottom of the Channels panel. This creates a duplicate called “Blue copy.” From this point forward, you’re working on the copy only. The original channels are untouched, so your color information stays intact.
Blue channel being dragged to the New Channel icon
Once you’ve identified your highest-contrast channel (Blue, in most cases), drag that channel thumbnail down to the small plus icon at the bottom of the Channels panel. This creates a duplicate called “Blue copy.” From this point forward, you’re working on the copy only. The original channels are untouched, so your color information stays intact.
This duplicate is your working mask. It’s not an image anymore in the practical sense. It’s raw material for a selection, and you’re going to push its contrast until it can do the job.
Step 5: Push the Contrast with Levels
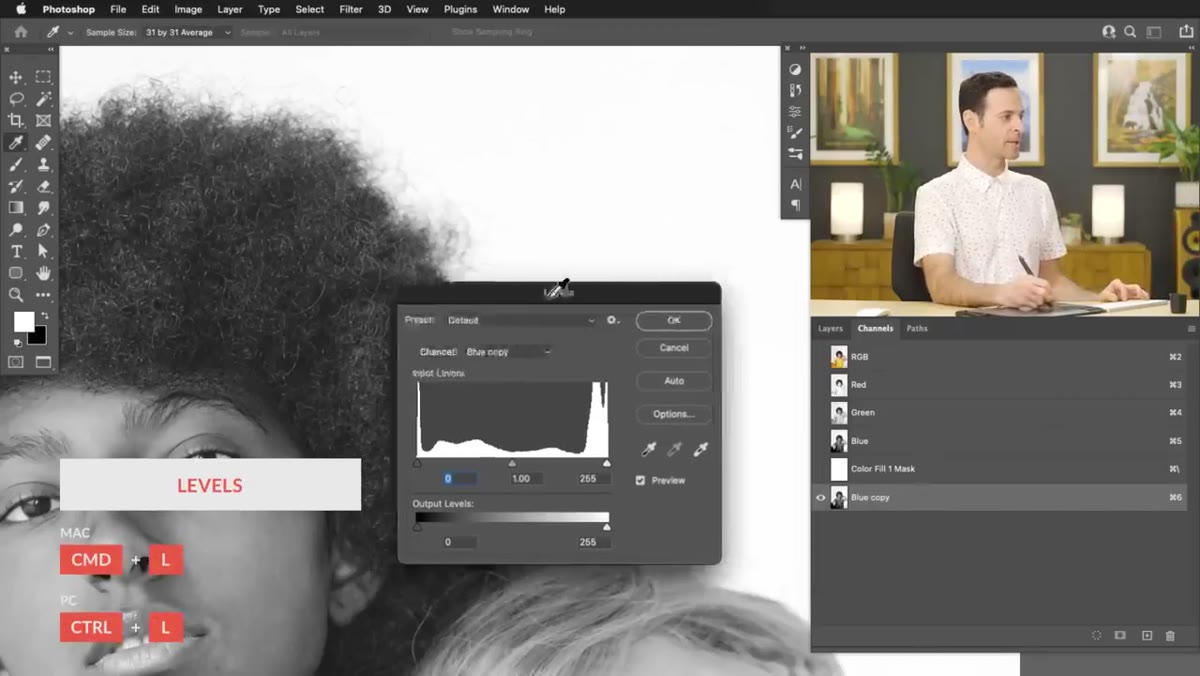 Levels dialog open on Blue copy channel, sliders being adjusted
With your Blue copy channel selected, press Ctrl+L (or Cmd+L on Mac) to open Levels. You’ll see a histogram of the channel’s tonal range. Pull the left shadow input slider inward to push the darker areas darker. Then pull the right highlight input slider inward slightly to push the lighter background closer to white.
Levels dialog open on Blue copy channel, sliders being adjusted
With your Blue copy channel selected, press Ctrl+L (or Cmd+L on Mac) to open Levels. You’ll see a histogram of the channel’s tonal range. Pull the left shadow input slider inward to push the darker areas darker. Then pull the right highlight input slider inward slightly to push the lighter background closer to white.
You’re not going for a pretty image here. You’re going for a mask. The goal is hair that reads as close to pure black as possible and a background that reads as close to pure white as possible. Don’t overcook it. If you crush the midtones too hard, you’ll lose edge detail in the fine strands you’re trying to recover. A moderate adjustment that improves contrast without destroying texture is the right call. Hit OK when it looks clean.
Step 6: Load the Channel as a Selection
 Dotted selection marquee appearing around subject after Ctrl+click
Here’s where it comes together. Hold Ctrl (or Cmd on Mac) and click directly on the Blue copy thumbnail in the Channels panel. Photoshop will immediately convert the tonal information in that channel into an active selection. Bright areas become selected. Dark areas are excluded. You can also click the small “Load channel as selection” icon at the bottom of the panel if you prefer the menu approach.
Dotted selection marquee appearing around subject after Ctrl+click
Here’s where it comes together. Hold Ctrl (or Cmd on Mac) and click directly on the Blue copy thumbnail in the Channels panel. Photoshop will immediately convert the tonal information in that channel into an active selection. Bright areas become selected. Dark areas are excluded. You can also click the small “Load channel as selection” icon at the bottom of the panel if you prefer the menu approach.
You now have a selection built from the actual light and color data of the original photograph, capturing the fine edge detail between individual strands of hair and the background. This is a fundamentally different quality of selection than anything a single-click tool will give you.
A Note From My Own Practice
I use this technique on projects where the turnaround pressure is real, and I’ve learned one thing the tutorial doesn’t spell out explicitly: the Blue channel isn’t always the answer. On subjects photographed against warm or neutral backgrounds, or in images with strong color grading already applied, Green sometimes gives you cleaner contrast. I always check all three before committing to a duplicate. Thirty seconds of evaluation saves a lot of backtracking.
I also keep my channel mask as a saved alpha channel in the PSD rather than immediately applying it. On complex projects, lighting or background changes late in the process can require rebuilding parts of the mask. Having the original channel work preserved means I’m not starting from scratch.
The deepest value in this approach is that it uses the photograph’s own data to make decisions, rather than asking an algorithm to guess. When I first learned channel masking early in my career, it reframed how I thought about every image I worked with. Every photograph contains information we’re not looking at directly, and channels are one of the clearest ways to access it.
Watch the full tutorial on YouTube and follow along with the sample PSD Aaron links in the description. Work through it on his image first, then bring the method to something from your own library.
Comments
Leave a Comment