Every composite artist has a version of this moment: you erase something, move on, do thirty more things, and then realize you erased too much. The original pixels are gone. Your only options are undo everything or live with it. Early in my career, I made that mistake more times than I’d like to admit. It’s the kind of workflow decision that seems harmless until it costs you an hour of work on a deadline.
Layer masks are the fix. They let you hide parts of a layer without actually deleting anything, which means you can always come back, refine, or reverse a decision. In this Aaron Nace (PHLEARN) tutorial, Aaron walks through the full mechanics of layer masks from the ground up, and even if you’ve used them before, watching someone articulate the logic clearly has a way of tightening up habits you didn’t know were loose. This is my breakdown of what he covers, with the context that actually matters if you’re using these techniques for compositing work.
The core concept is simple enough to say in one sentence: painting black on a layer mask hides pixels, and painting white reveals them. But the implications of that for a non-destructive workflow are enormous.
Step 1: Create a New Layer and Make a Test Shape
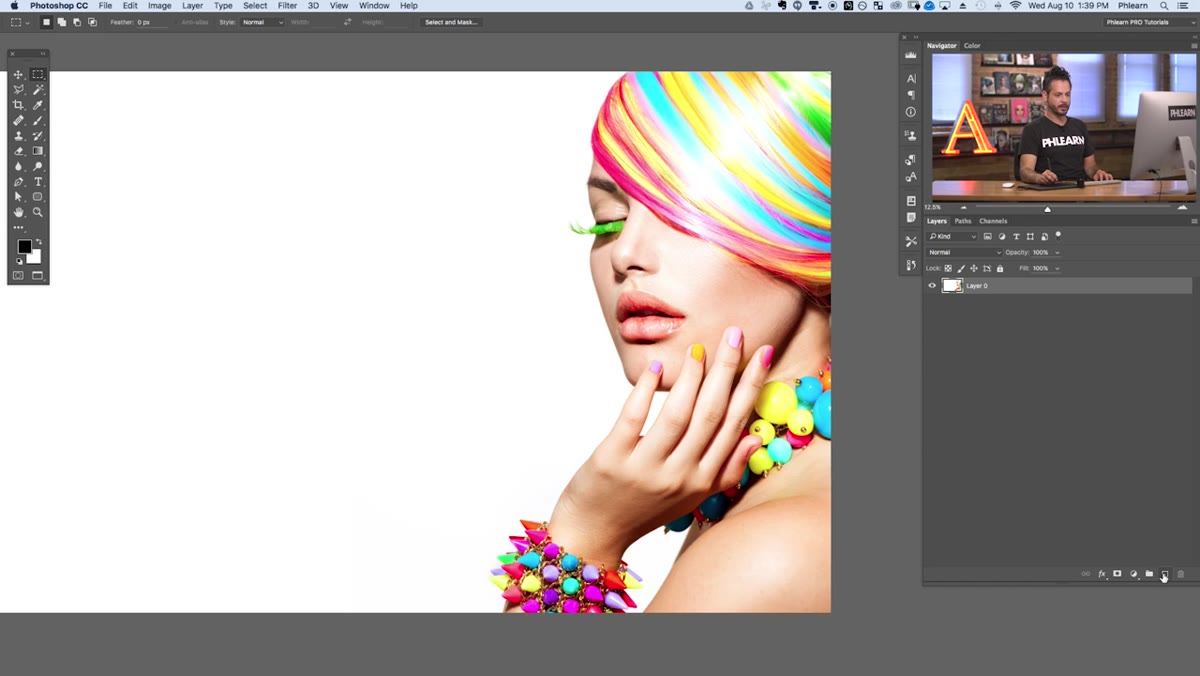 New layer created above background in Layers panel
Start by creating a new layer above your base image. Aaron uses the new layer icon at the bottom of the Layers panel. From there, he grabs the Elliptical Marquee tool, holds Shift to constrain the proportions, and draws a circle on the canvas. The goal at this stage is just to have something concrete to work with. A filled shape on its own layer is the clearest possible way to see what a mask is doing.
New layer created above background in Layers panel
Start by creating a new layer above your base image. Aaron uses the new layer icon at the bottom of the Layers panel. From there, he grabs the Elliptical Marquee tool, holds Shift to constrain the proportions, and draws a circle on the canvas. The goal at this stage is just to have something concrete to work with. A filled shape on its own layer is the clearest possible way to see what a mask is doing.
Once the selection is active, go to Edit, then Fill. In the Fill dialog, choose Color from the Contents dropdown, then pick any solid color from the Color Picker, or sample directly from your image with the eyedropper. Aaron samples a yellow from the subject’s clothing. Hit OK, then Ctrl+D (Command+D on Mac) to deselect. You now have a solid-colored circle sitting on its own layer, fully visible, ready to be masked.
Step 2: Understand Why the Eraser Tool Is a Trap
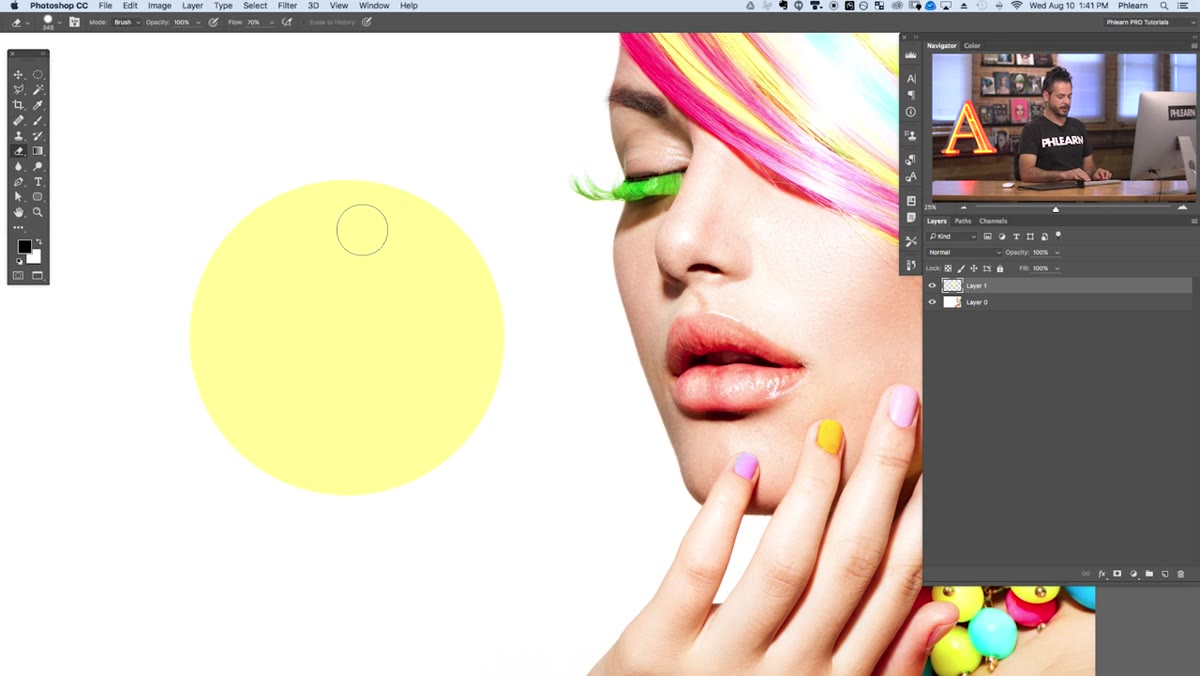 Eraser tool removing part of yellow circle destructively
Before introducing the mask, Aaron demonstrates exactly what you lose by using the Eraser tool. He selects it, brushes away part of the circle, and the pixels disappear. It looks fine. The problem reveals itself the moment you want any of it back.
Eraser tool removing part of yellow circle destructively
Before introducing the mask, Aaron demonstrates exactly what you lose by using the Eraser tool. He selects it, brushes away part of the circle, and the pixels disappear. It looks fine. The problem reveals itself the moment you want any of it back.
This is the part I’d emphasize to anyone learning compositing: the Eraser tool isn’t wrong for every situation, but it is permanent. If you erase something and then do significant work afterward, stepping back through History to recover those pixels means throwing away everything that came after. On a complex composite with fifty layers, that’s not a real option. The Eraser tool makes a decision final before you’re actually ready to make it final. Aaron’s framing is direct: eraser equals destructive, layer mask equals non-destructive. Keep that distinction front and center.
Step 3: Add a Layer Mask to Your Layer
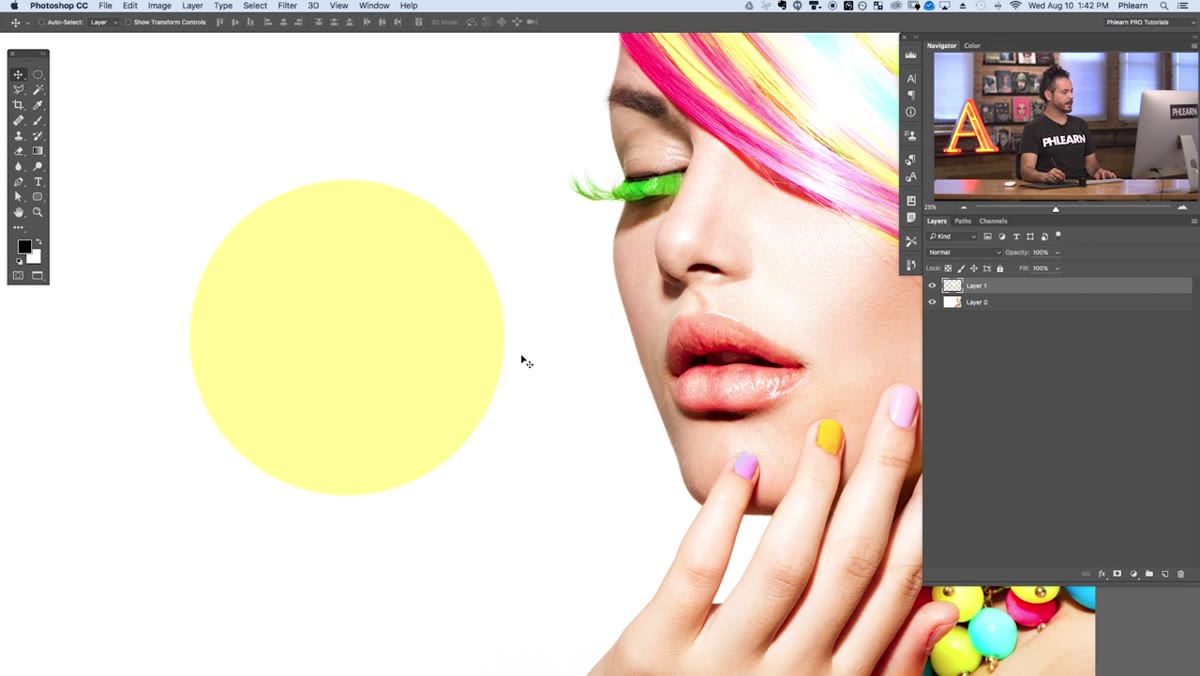 Layer mask icon clicked, white mask thumbnail appears in panel
With the circle layer selected, click the Add Layer Mask icon at the bottom of the Layers panel. It looks like a rectangle with a circle cut out of it. When you click it, a white thumbnail appears next to your layer thumbnail in the Layers panel. White means fully visible. The mask is there, but it isn’t doing anything yet because white reveals everything.
Layer mask icon clicked, white mask thumbnail appears in panel
With the circle layer selected, click the Add Layer Mask icon at the bottom of the Layers panel. It looks like a rectangle with a circle cut out of it. When you click it, a white thumbnail appears next to your layer thumbnail in the Layers panel. White means fully visible. The mask is there, but it isn’t doing anything yet because white reveals everything.
Notice that the mask thumbnail is now selected, not the layer itself. This matters. When you paint, you need to be painting on the mask, not on the layer. Photoshop highlights the active thumbnail with a small border. Get in the habit of checking which thumbnail is active before you pick up a brush. This is one of those micro-habits that prevents a lot of confusion.
Step 4: Paint Black to Hide, White to Reveal
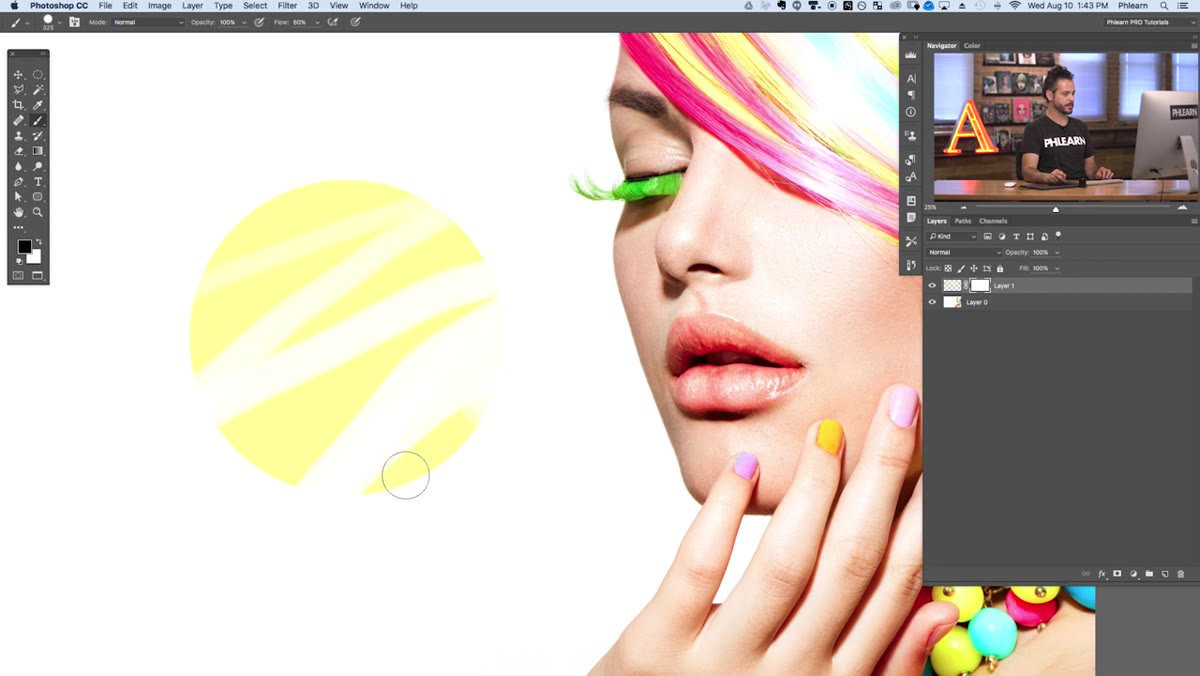 Black brush painted on mask hiding portion of yellow circle
Select the Brush tool. Set your foreground color to black. Make sure the mask thumbnail is selected in the Layers panel. Now paint on the canvas over the part of your shape you want to hide. The pixels don’t disappear. They’re concealed. The underlying layer data is completely intact.
Black brush painted on mask hiding portion of yellow circle
Select the Brush tool. Set your foreground color to black. Make sure the mask thumbnail is selected in the Layers panel. Now paint on the canvas over the part of your shape you want to hide. The pixels don’t disappear. They’re concealed. The underlying layer data is completely intact.
Switch your foreground color to white and paint back over the same area. The hidden pixels return, exactly as they were. This is the entire mechanism, and it’s worth spending five minutes just doing this back and forth until it feels completely natural. On compositing projects, I do this constantly. Cutting a subject out of a background, softening a hard edge, pulling back an adjustment in one specific zone. The brush size and hardness you choose on the mask determines how sharp or gradual the transition looks. A hard brush gives you a crisp edge. A soft, low-hardness brush feathers the transition, which is almost always what you want when blending a subject into a new environment.
Step 5: Use Masks on Adjustment Layers
 Adjustment layer with mask thumbnail shown in Layers panel
Aaron mentions this early, and it deserves its own step because it changes how you approach color grading in compositing work. Every adjustment layer in Photoshop, whether it’s a Curves, Hue/Saturation, or Color Balance layer, comes with a mask already attached. That white mask thumbnail you see next to every adjustment layer is the same thing you just built manually.
Adjustment layer with mask thumbnail shown in Layers panel
Aaron mentions this early, and it deserves its own step because it changes how you approach color grading in compositing work. Every adjustment layer in Photoshop, whether it’s a Curves, Hue/Saturation, or Color Balance layer, comes with a mask already attached. That white mask thumbnail you see next to every adjustment layer is the same thing you just built manually.
This means you can apply a color correction globally, then paint black on its mask to exclude specific areas. I use this constantly when compositing figures into scenes. I’ll add a Curves layer to warm the entire image, then mask it off the subject’s face where I want to preserve the skin tone separately. Adjustment layers with targeted masks are how you build color coherence in a composite without flattening yourself into a corner.
What I’d Add From My Own Practice
One thing Aaron doesn’t get into here, but which becomes important fast: you can view the mask directly by Alt-clicking (Option-clicking on Mac) the mask thumbnail. The canvas switches to show the mask in grayscale. White areas are visible, black areas are hidden, and any gray areas are semi-transparent. I look at my masks this way regularly when I’m cutting out complex subjects. Harsh, uneven edges show up immediately in that view in a way that’s hard to catch when you’re looking at the composited result. It’s also how I catch if I’ve accidentally painted on the layer instead of the mask. That gray view doesn’t lie.
The most important thing to internalize from this tutorial isn’t a specific setting or tool location. It’s the principle: never destroy pixels you might need later. A layer mask keeps every decision reversible. For anyone doing compositing work at any serious level, that’s not a nice-to-have. It’s the foundation everything else is built on.
Watch the full tutorial on YouTube and follow along in Photoshop while Aaron walks through it. The hands-on time matters more than the watching.
Comments (2)
I tried this on a client project yesterday and the results were way better than expected.
The tip about stop erasing pixels how layer was the missing piece for me. Thank you.
Leave a Comment