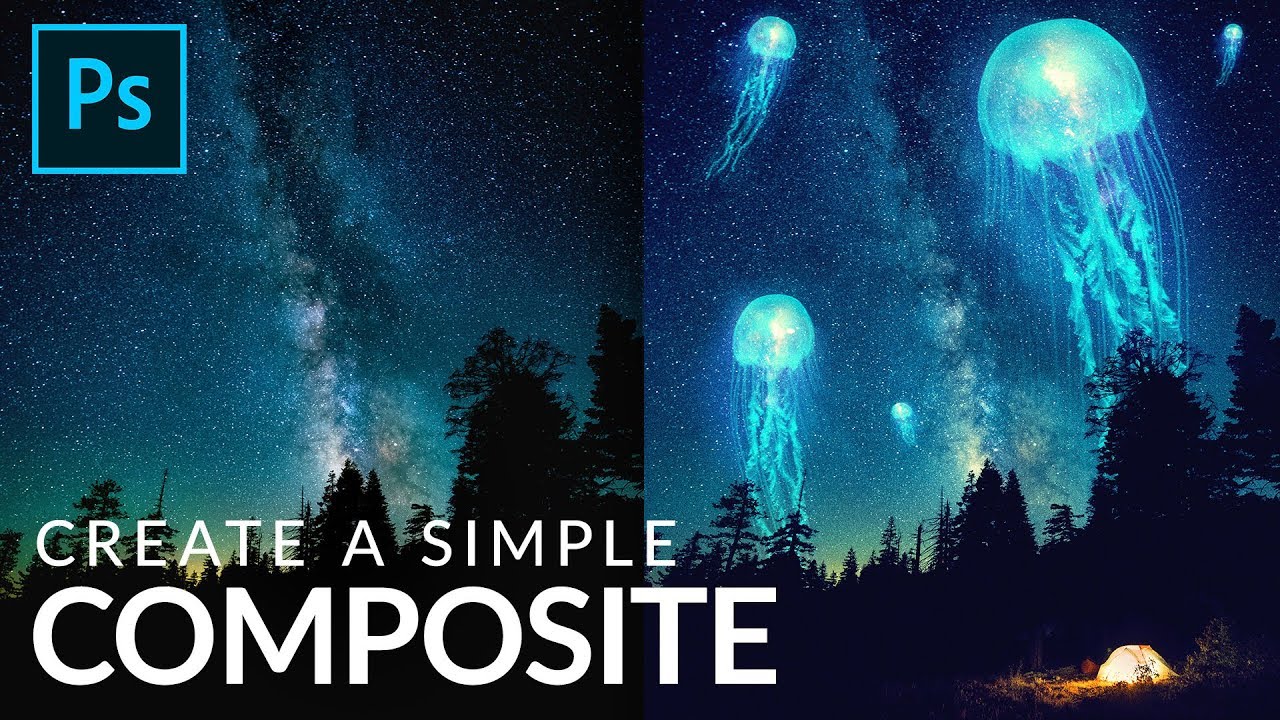
Every composite I’ve ever built for a movie poster or album cover started with a deceptively simple question: how do I make this thing look like it belongs here? That question sounds easy until you’re three hours into a file with forty layers and the edges of your subject are still screaming “this was cut out in Photoshop.” Over the years I’ve learned that the most elegant solutions are almost always structural. Get the blend mode right early. Mask loosely before you mask precisely. Let the light do the heavy lifting.
That’s why I keep coming back to tutorials that strip compositing down to first principles. In this Aaron Nace (PHLEARN) tutorial, Watch the full tutorial on YouTube, he builds a surreal sky-jellyfish composite using four images, a handful of tools, and a workflow that any working artist can learn from. I’ve been doing this professionally for over a decade, and I still picked up something worth keeping. Here’s the full walkthrough.
Step 1: Gather Your Source Images and Open Them Together
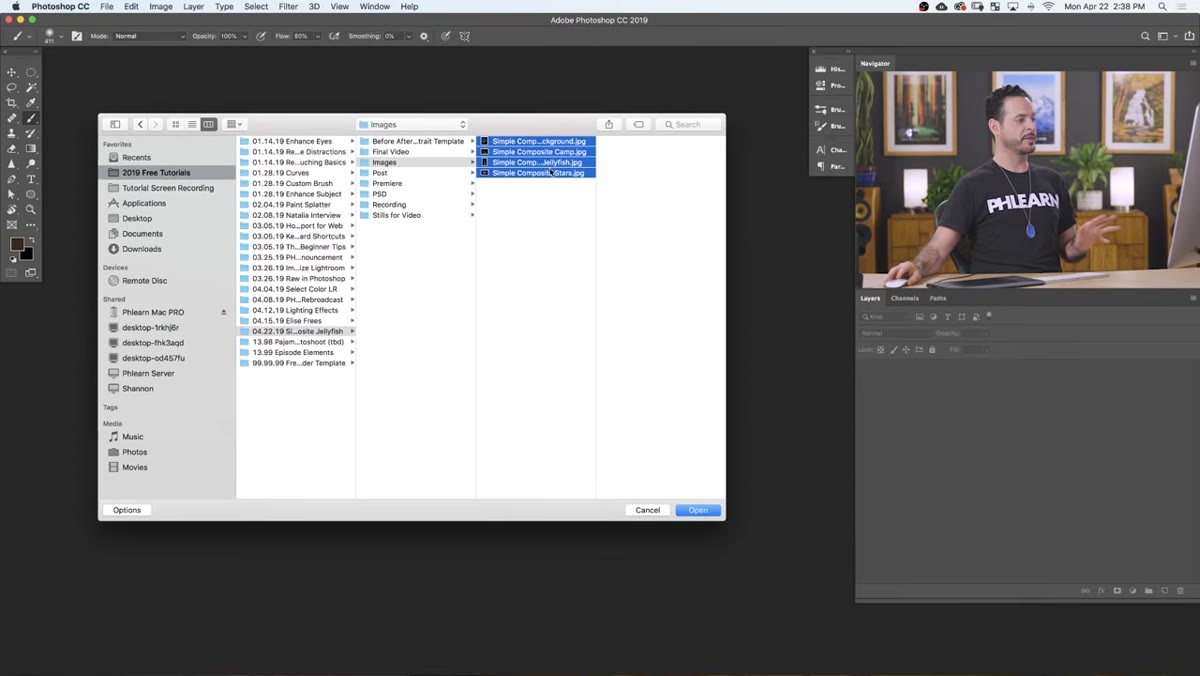 Four source images open as separate documents in Photoshop
Aaron works with four images: a background sky scene, a jellyfish shot on a dark background, a tent scene, and an additional sky texture. Before you do anything creative, you need to know what you’re working with. Open all your source files at once rather than one at a time. This gives you a chance to read them together, to see which elements share a tonal range and which ones are going to fight each other. In my own process I sketch the composite on paper first, but if you’re following a looser approach, at least zoom each image to 100% and note where the light is coming from in each one. A jellyfish lit from above won’t sit convincingly in a sky where the light is coming from the left.
Four source images open as separate documents in Photoshop
Aaron works with four images: a background sky scene, a jellyfish shot on a dark background, a tent scene, and an additional sky texture. Before you do anything creative, you need to know what you’re working with. Open all your source files at once rather than one at a time. This gives you a chance to read them together, to see which elements share a tonal range and which ones are going to fight each other. In my own process I sketch the composite on paper first, but if you’re following a looser approach, at least zoom each image to 100% and note where the light is coming from in each one. A jellyfish lit from above won’t sit convincingly in a sky where the light is coming from the left.
Step 2: Move Your Subject onto the Background Using the Move Tool
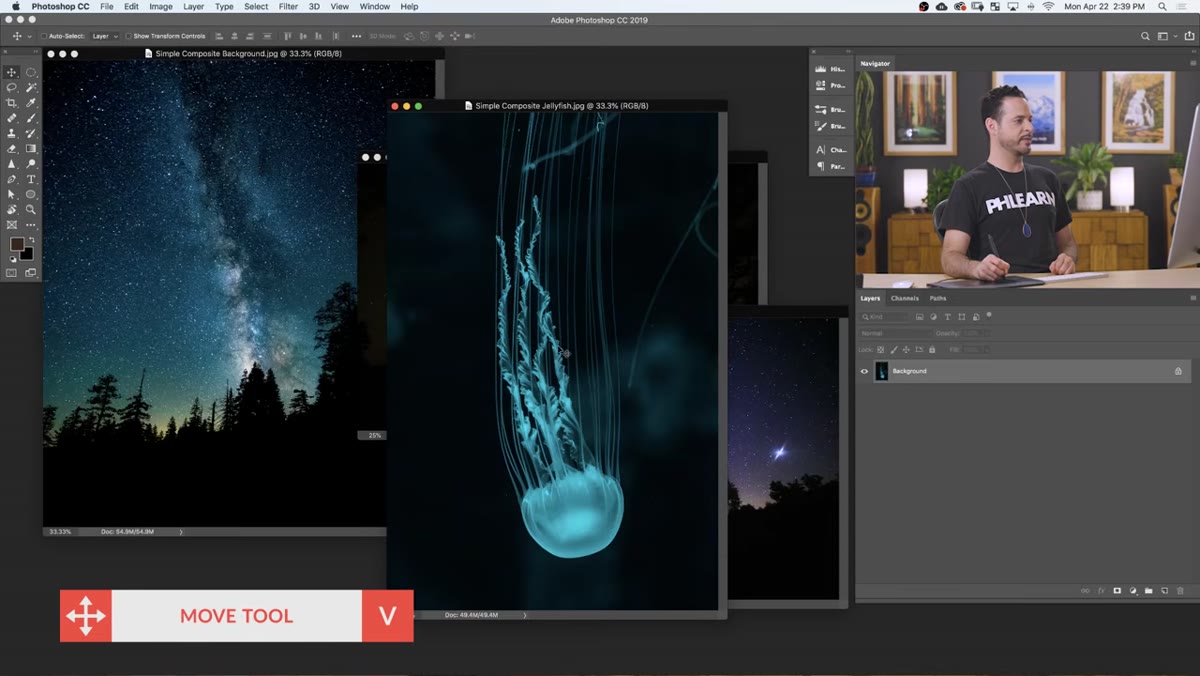 Jellyfish layer being dragged onto the background document
Click the Move tool (V), then click and drag the jellyfish directly from its document window onto the background document. It will land as a new layer, sitting on top of your background. Zoom out a bit with Command/Ctrl and the minus key so you can see both layers in context. At this stage don’t worry about positioning it perfectly. You’re just establishing that it exists in the same file. The rough placement gives you a sense of scale, and scale decisions made early save you from rebuilding everything later.
Jellyfish layer being dragged onto the background document
Click the Move tool (V), then click and drag the jellyfish directly from its document window onto the background document. It will land as a new layer, sitting on top of your background. Zoom out a bit with Command/Ctrl and the minus key so you can see both layers in context. At this stage don’t worry about positioning it perfectly. You’re just establishing that it exists in the same file. The rough placement gives you a sense of scale, and scale decisions made early save you from rebuilding everything later.
Step 3: Add a Layer Mask to Control the Edges
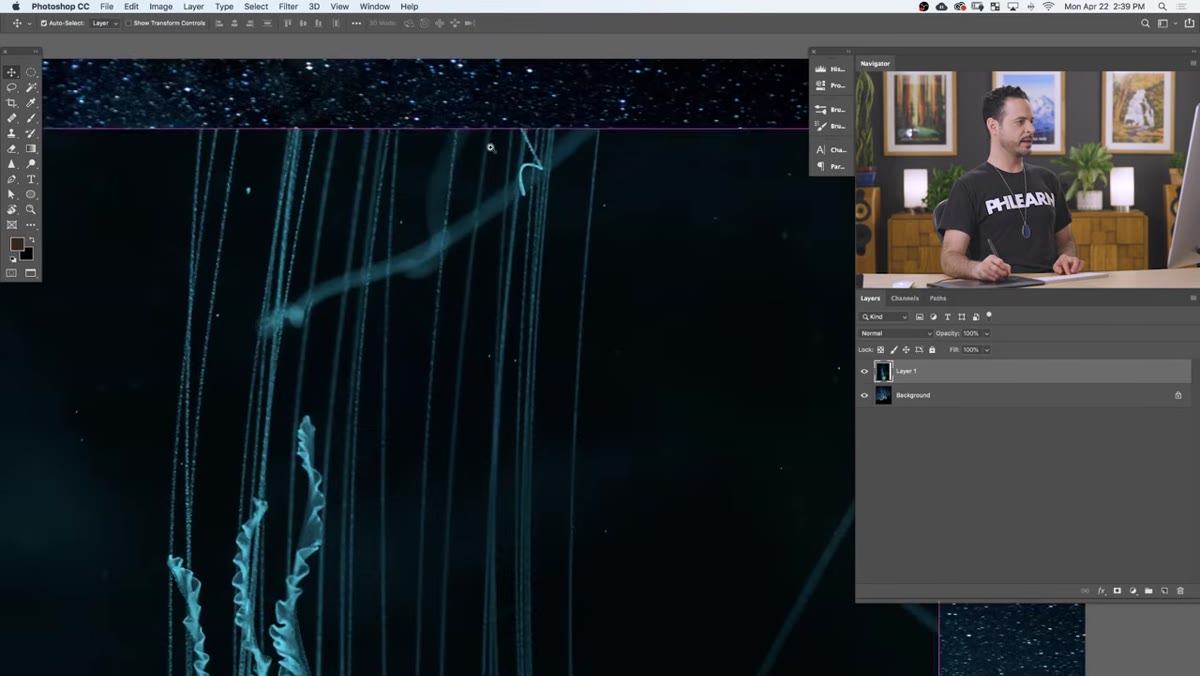 Layer mask added to jellyfish layer, brush painting black to hide edges
With the jellyfish layer selected, click the Layer Mask icon at the bottom of the Layers panel. Switch your foreground color to black, pick a soft round brush, and paint over any area of the jellyfish layer where the edge cuts too abruptly into the background. You’re not trying to do a precise extraction here. The goal is to feather the boundary so the layer fades rather than stops. Aaron specifically calls out that a hard edge is the fastest way to give away a composite, and he’s right. I’d add: err on the side of hiding too much. You can always reduce brush opacity to 30-40% and work gradually rather than painting a hard black stroke that you’ll have to undo.
Layer mask added to jellyfish layer, brush painting black to hide edges
With the jellyfish layer selected, click the Layer Mask icon at the bottom of the Layers panel. Switch your foreground color to black, pick a soft round brush, and paint over any area of the jellyfish layer where the edge cuts too abruptly into the background. You’re not trying to do a precise extraction here. The goal is to feather the boundary so the layer fades rather than stops. Aaron specifically calls out that a hard edge is the fastest way to give away a composite, and he’s right. I’d add: err on the side of hiding too much. You can always reduce brush opacity to 30-40% and work gradually rather than painting a hard black stroke that you’ll have to undo.
Step 4: Change the Blend Mode to Screen
 Blend mode dropdown changed from Normal to Screen in Layers panel
This is the move that makes the whole thing work. With the jellyfish layer selected, open the blend mode dropdown at the top of the Layers panel (it defaults to Normal) and select Screen. Screen mode mathematically eliminates dark values. Any pixel that is black on your layer becomes fully transparent. Pixels that are light stay visible. Because your jellyfish was photographed against a dark background, switching to Screen essentially removes that background without any selection work at all. This is one of those techniques that feels like cheating the first time you use it, but it’s just understanding how blend modes interact with luminance data. Any subject shot on black, including fire, light leaks, and certain smoke shots, can be composited this way.
Blend mode dropdown changed from Normal to Screen in Layers panel
This is the move that makes the whole thing work. With the jellyfish layer selected, open the blend mode dropdown at the top of the Layers panel (it defaults to Normal) and select Screen. Screen mode mathematically eliminates dark values. Any pixel that is black on your layer becomes fully transparent. Pixels that are light stay visible. Because your jellyfish was photographed against a dark background, switching to Screen essentially removes that background without any selection work at all. This is one of those techniques that feels like cheating the first time you use it, but it’s just understanding how blend modes interact with luminance data. Any subject shot on black, including fire, light leaks, and certain smoke shots, can be composited this way.
Step 5: Transform and Flip the Jellyfish to Fit the Scene
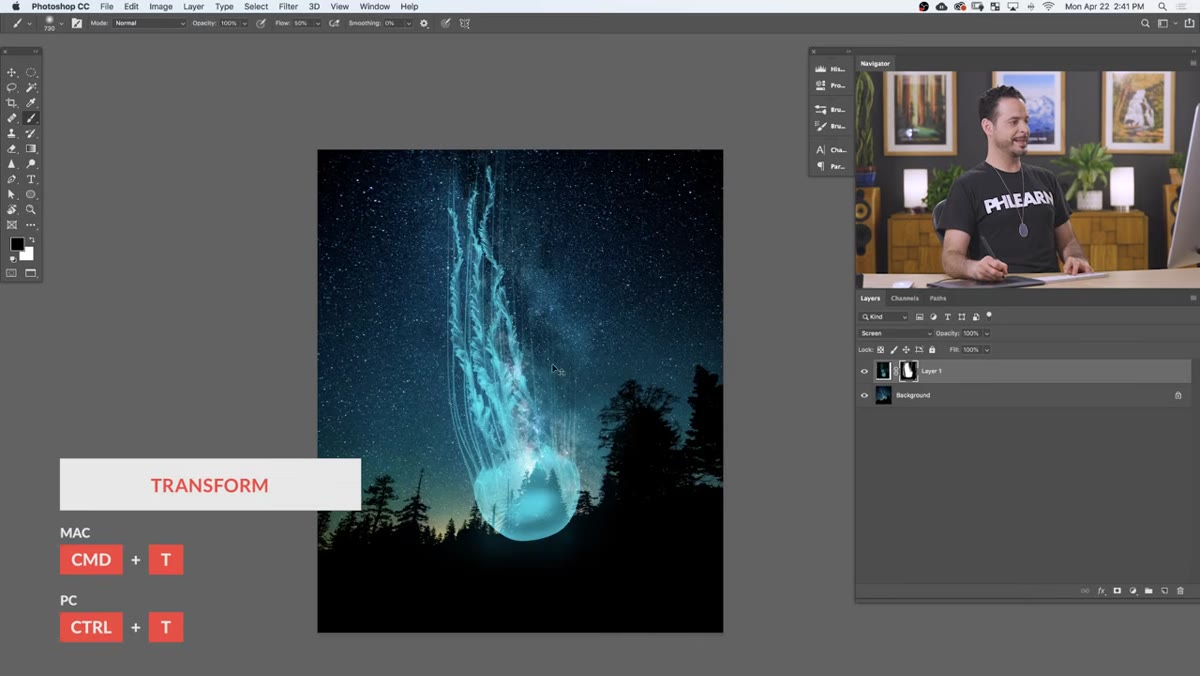 Free Transform active with right-click menu showing Flip Vertical option
Hit Command/Ctrl + T to enter Free Transform. Aaron flips the jellyfish vertically (right-click inside the transform boundary, choose Flip Vertical) so the tentacles point upward rather than down, which reads more naturally as something floating in a sky. He then flips it horizontally as well to change its orientation relative to the background light. Hold Shift while dragging a corner handle to scale proportionally. Don’t skip the flip step just because it feels arbitrary. Orientation relative to the implied light source is one of the things your eye reads subconsciously, and a subject facing away from the light will always feel slightly off even if the viewer can’t articulate why.
Free Transform active with right-click menu showing Flip Vertical option
Hit Command/Ctrl + T to enter Free Transform. Aaron flips the jellyfish vertically (right-click inside the transform boundary, choose Flip Vertical) so the tentacles point upward rather than down, which reads more naturally as something floating in a sky. He then flips it horizontally as well to change its orientation relative to the background light. Hold Shift while dragging a corner handle to scale proportionally. Don’t skip the flip step just because it feels arbitrary. Orientation relative to the implied light source is one of the things your eye reads subconsciously, and a subject facing away from the light will always feel slightly off even if the viewer can’t articulate why.
Step 6: Duplicate and Warp to Create Variation
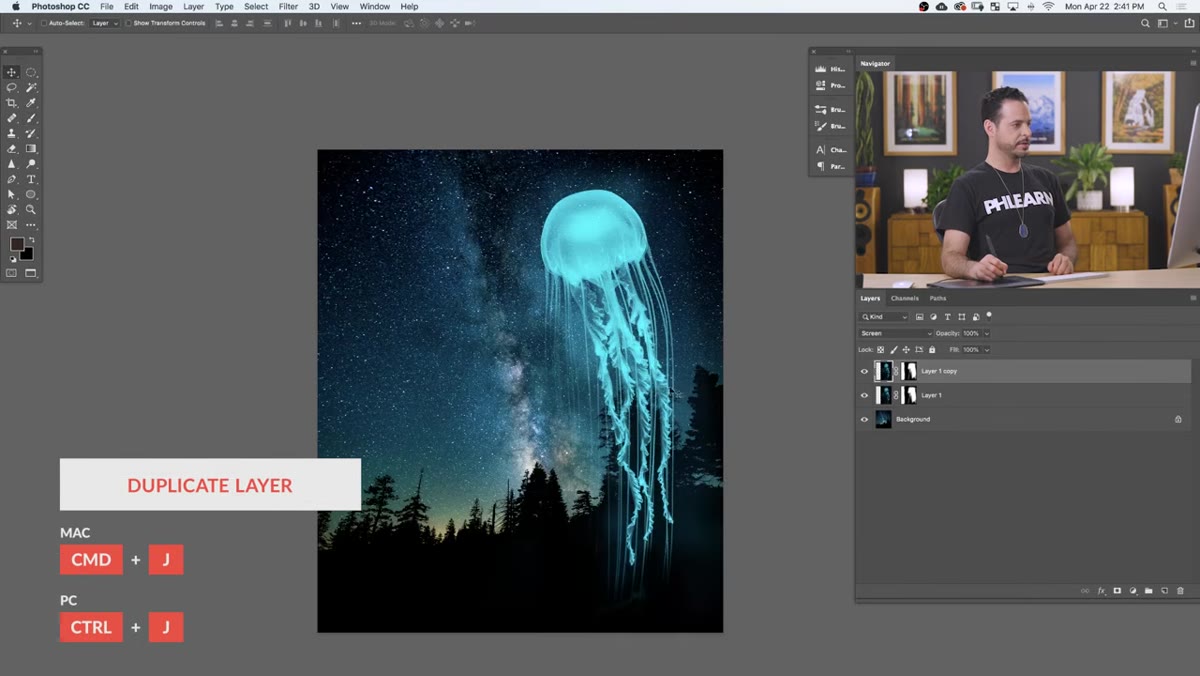 Duplicated jellyfish layer scaled down, Warp tool applied to change shape
Hit Command/Ctrl + J to duplicate the jellyfish layer. Scale the copy down using Free Transform so you have one large and one smaller version, which immediately creates a sense of depth through size variation. Then right-click inside the transform boundary again and choose Warp. The Warp tool lets you push and pull the mesh grid to subtly reshape the layer. Aaron uses this to prevent the two jellyfish from looking like obvious clones of each other, which is the right instinct. Any time you duplicate an element in a composite, your job is to make it look like it isn’t a duplicate. Warp is one tool. Adjusting hue slightly, rotating, or running a light blur on the farther copy are others.
Duplicated jellyfish layer scaled down, Warp tool applied to change shape
Hit Command/Ctrl + J to duplicate the jellyfish layer. Scale the copy down using Free Transform so you have one large and one smaller version, which immediately creates a sense of depth through size variation. Then right-click inside the transform boundary again and choose Warp. The Warp tool lets you push and pull the mesh grid to subtly reshape the layer. Aaron uses this to prevent the two jellyfish from looking like obvious clones of each other, which is the right instinct. Any time you duplicate an element in a composite, your job is to make it look like it isn’t a duplicate. Warp is one tool. Adjusting hue slightly, rotating, or running a light blur on the farther copy are others.
What I’d Do Differently as a Next Step
Aaron closes the tutorial with color grading and grain, which are the right finishing moves. I’d push the grain step a bit harder than most beginners will. The single biggest tell in a composite isn’t usually the masking or the shadows. It’s the noise structure. When you pull a jellyfish from one camera and a background from another, the grain pattern from each sensor is completely different. Unifying them with a single film grain layer, placed at the top of your stack in Overlay or Soft Light mode, is what makes the image feel like it came from one camera. I use this on every professional job. Even if the client never consciously notices grain, they feel the difference between a composite that has it and one that doesn’t.
The real takeaway from this tutorial is that Screen mode plus a loose mask plus a flip can do work that beginners assume requires complex selections and hours of cleanup. Start with the blend mode, let it eliminate the problem background, and then refine. That sequence changes how fast you work. Watch the full tutorial on YouTube to see Aaron walk through the color and grain steps that complete the effect.
Comments
Leave a Comment