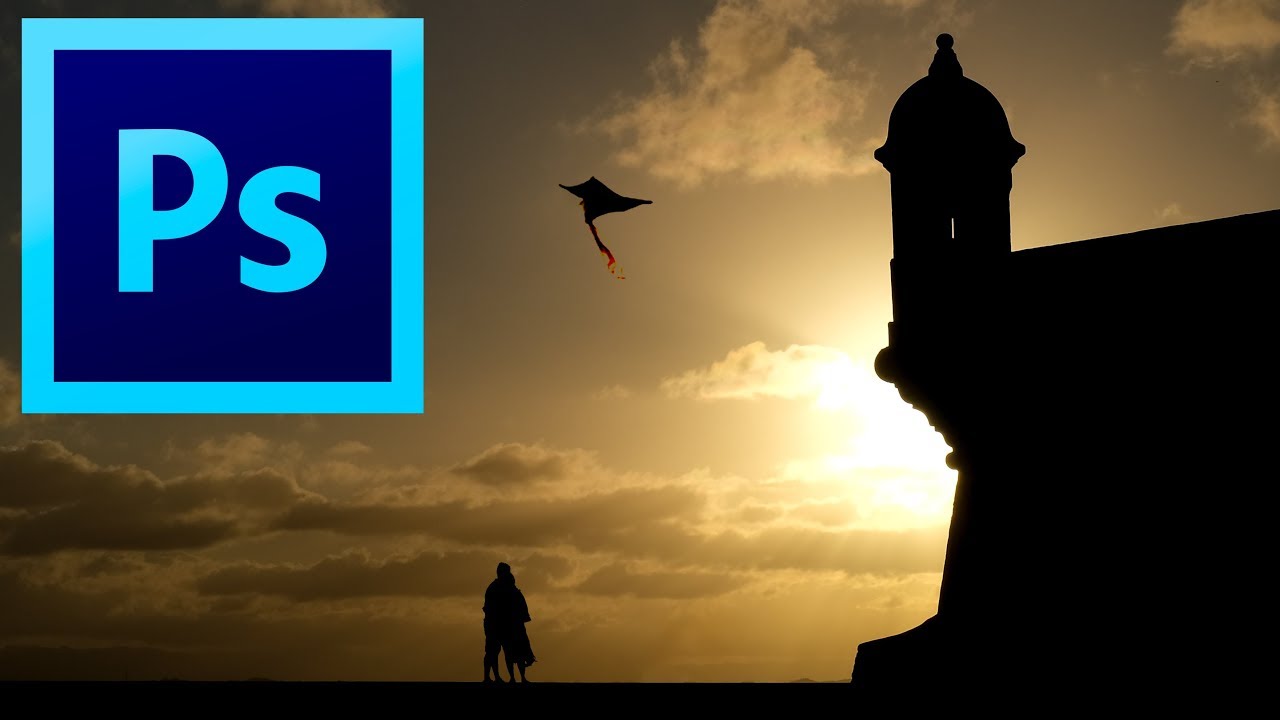
There is a specific kind of frustration that every photographer who also composites knows well. You are standing in front of a genuinely beautiful moment, you can feel it, and you already know that no single frame is going to hold all of it. The light is right. The architecture is right. But the people are in the wrong spot, and the kite you wanted is three frames too early. You come home with forty shots that are each 80 percent of the image you wanted. That leftover 20 percent is where compositing lives.
That tension is exactly what Tony Northrup works through in a sharp, efficient tutorial where he reconstructs a sunset scene at El Morro fortress in Old San Juan, Puerto Rico. He had the architecture, the crowd, the kites, the golden light. What he did not have was a single frame where all of it landed together. So he built it. Watch the full tutorial on YouTube before or after reading this breakdown. What follows is a step-by-step reconstruction of his method, with notes from my own experience as someone who does this kind of work for a living.
The technique he uses is elegant precisely because it is restrained. He is not building a fantasy. He is editing toward the truth of what was actually there, just reorganizing the elements so the image reflects the experience rather than a single frozen moment. I sketch every composite before I open Photoshop, and if I had sketched this one, it would have taken about thirty seconds. Three layers. Two swaps. That simplicity is the whole point.
Step 1: Select Your Source Images and Open Them as Layers in Photoshop
Start in Lightroom (or Bridge) with the images you want to combine. Tony selects his three source shots, right-clicks, and chooses “Edit In > Open as Layers in Photoshop.” This is the cleanest way to begin any multi-image composite because Photoshop automatically aligns the files in one document. If your shots were taken from a tripod or even a relatively stable handheld position with consistent framing, the layers will stack without any manual alignment work. Shoot with this step in mind. When I know I am going to composite silhouettes at golden hour, I keep my focal length consistent and lock my exposure so the backgrounds match.
Step 2: Identify Your Base Layer and Plan Your Element Swaps
With all three images open as layers, toggle the visibility of each layer using the eye icon in the Layers panel to decide which image will serve as your foundation. Tony’s base layer is the shot with the strongest background: the fortress silhouette, the starburst sun, the clean sky. The elements he wants to remove from it, a figure that is not reading well as a silhouette and an airplane, are both replaceable with better versions from the other frames. Before you touch a single tool, make this decision deliberately. Your base layer should have the strongest light and the cleanest background. Individual subjects are always easier to move than backgrounds.
Step 3: Remove Unwanted Elements with Content-Aware Fill
Hide the upper layers so you are working on the base layer alone. Select the Lasso tool (keyboard shortcut: L) and draw a loose selection around any element you want to remove. It does not need to be precise. Tony circles the figure in the foreground and the airplane in one pass each, then goes to Edit > Fill (Shift+F5) and chooses Content-Aware from the dropdown. Photoshop analyzes the surrounding pixels and patches the selected area. On complex backgrounds it sometimes duplicates a nearby element in a way that looks wrong. If that happens, just undo and try the selection again with a slightly different shape or size. A second attempt almost always produces a cleaner result. The goal here is a background plate with nothing in it but architecture and sky.
Step 4: Select Your Replacement Subject from the Second Layer
Make the next layer visible and active. This is the image that contains the subjects you want to borrow. Tony is after a couple standing together, facing the sun, reading clearly as a silhouette because their body shapes are distinct and their posture tells a story. Use the Lasso tool again and draw a rough selection around them. Sloppy is fine at this stage because the next step handles the edge cleanup non-destructively. What matters is that you include the full figures without cutting off feet or hands.
Step 5: Apply a Layer Mask to Isolate the Subject
With your selection active on the layer containing the couple, click the Add Layer Mask button at the bottom of the Layers panel (it looks like a rectangle with a circle cut out of it). Photoshop converts your selection into a black-and-white mask. White areas reveal the layer content, black areas hide it. Because silhouettes have almost no interior detail, the rough edges of your lasso selection will not matter much. The figure is dark against a bright background, which means the transition is clean by nature. This is one of the real advantages of working with silhouettes in compositing: the masking work is forgiving in a way that lit subjects simply are not.
Step 6: Move and Position the Masked Subject
Switch to the Move tool (V) and drag the masked couple into position over the base layer. Because both images were shot from roughly the same position in the same light, the ground plane and perspective will feel consistent without any warping. Place the figures where you want them in the frame, replacing the less effective silhouette from the original shot. If the scale feels slightly off, use Edit > Free Transform (Ctrl/Cmd+T) to resize. With silhouettes, small scale adjustments rarely break the realism because there is no texture or lighting detail to contradict the change.
Step 7: Repeat the Process for Any Additional Elements
Apply the same logic to any remaining swaps. Tony pulls a kite from his third image and places it in the sky where the airplane was. Same method: lasso selection, layer mask, move into position. The kite is a small, isolated shape against open sky, which makes it one of the easier elements to composite cleanly. Stack your complexity. Swap backgrounds last, midground subjects second, and isolated sky elements like birds, kites, or planes last because they require the least precision.
What I Do Differently at This Stage
When working on client projects like movie posters or album art, I always do a final pass checking two things Tony does not need to worry about here because he is working entirely in consistent natural light: shadow direction and edge luminosity. Even in silhouette work, the rim of a dark figure will pick up ambient color from the sky around it. If you are pulling a figure from one image and placing it in front of a sky from a different frame, make sure that rim color matches. A cool blue-rimmed silhouette dropped onto a warm orange sky will betray the composite immediately. I paint a thin edge correction on a new layer set to Color blend mode to unify them. Five minutes of work that most viewers will never notice but will feel.
The single most important idea in this tutorial is also the most philosophical one: compositing is not always fabrication. Sometimes it is just editing toward the truth of what was actually in front of you, using the tools available to still photography that video editors have always taken for granted. Tony was standing at El Morro. The couple, the kite, the fortress, the light were all real. He just needed a few more frames to hold all of it at once.
Watch the full tutorial on YouTube to see the full sequence in motion, including how Tony handles the final adjustments to make all three layers feel like one coherent image.
Comments (1)
The tip about silhouette compositing in phot was the missing piece for me. Thank you.
Leave a Comment