There’s a particular kind of frustration that comes from having great source material and no clean path to a finished image. I’ve sat in front of stacks of bracketed exposures, moon phase shots, and multi-frame sequences thinking the same thing: the story is right there, but pulling it together means firing up Photoshop, masking everything by hand, and committing to an hour of work before I even know if the layout is going to hold. For someone who does this professionally, that’s fine. For someone who just shot their first eclipse and wants a composite that shows the full arc of phases, it’s a real barrier.
That’s what made me stop on this Matt Kloskowski tutorial. He builds a full eclipse phase composite entirely inside Lightroom. No Photoshop. No layer juggling. Just cropping, syncing, and a clever use of the Print module that most photographers have never touched for this purpose. Watch the full tutorial on YouTube if you want to follow along with the original footage. What I’m going to do here is walk through every step with the kind of detail you need to actually replicate it.
The technique works because Lightroom has more layout power than most people give it credit for. Once you understand that the Print module is really just a flexible grid builder that can export to JPEG, the whole approach clicks into place.
Step 1: Gather and Review Your Phase Shots
 Grid of eclipse phase photos displayed in Lightroom
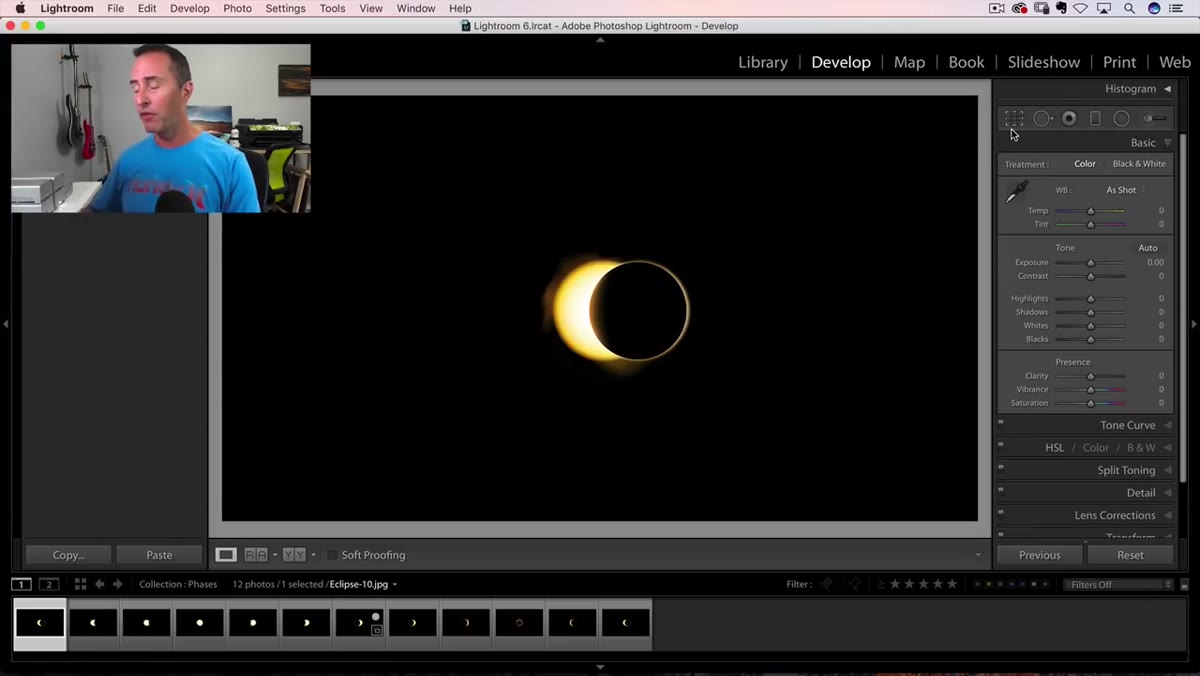
Bring all of your eclipse phase images into a single Lightroom collection before you start. You want them in the order the phases actually occurred so that when you lay them out, the sequence reads naturally from left to right. Kloskowski shoots for variety in his phases, and that’s the right instinct. The more distinct each frame is, the more dynamic the final composite feels. If you have partial overlaps where two frames look nearly identical, pull the weaker one now rather than later.
Grid of eclipse phase photos displayed in Lightroom
Bring all of your eclipse phase images into a single Lightroom collection before you start. You want them in the order the phases actually occurred so that when you lay them out, the sequence reads naturally from left to right. Kloskowski shoots for variety in his phases, and that’s the right instinct. The more distinct each frame is, the more dynamic the final composite feels. If you have partial overlaps where two frames look nearly identical, pull the weaker one now rather than later.
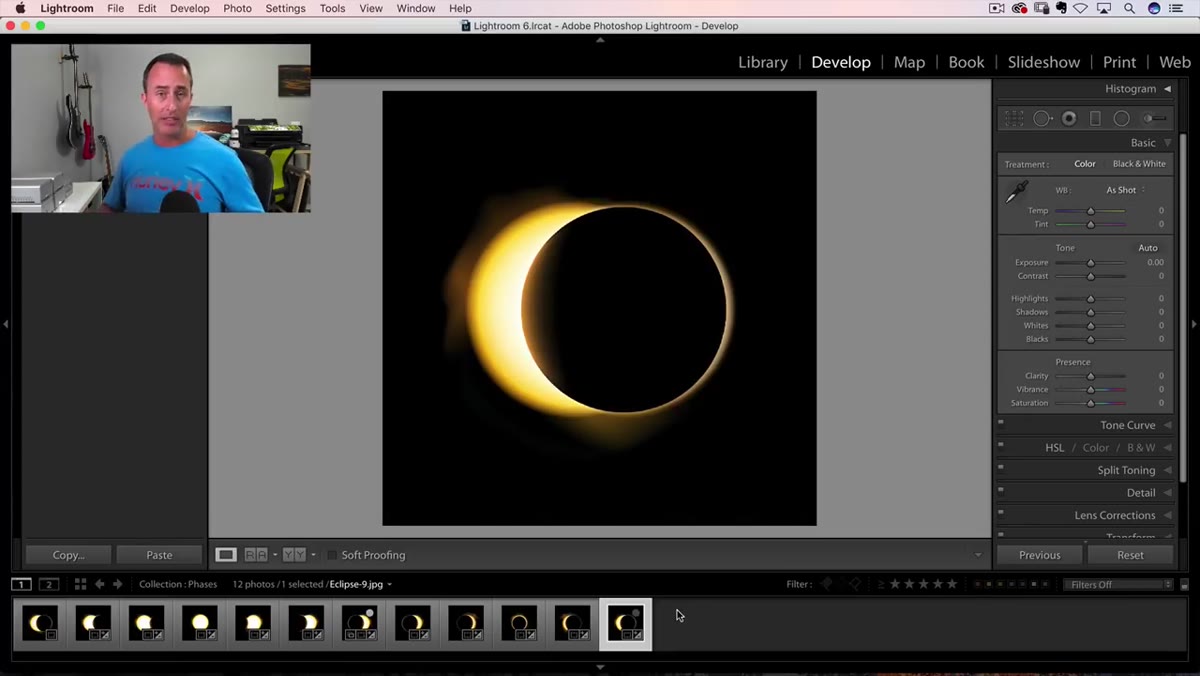
Step 2: Crop Every Image to a Square
 Crop tool open with aspect ratio set to 1:1
Open your first image in the Develop module and hit the crop tool. Set the aspect ratio to 1:1 to lock it into a perfect square. Here’s the part that saves you real time: hold Option plus Shift (Alt plus Shift on Windows) as you drag the crop handle. This pulls the crop inward from the center, keeping the sun roughly centered in the frame without you having to manually reposition. You don’t want to crop too tight. Leave breathing room around the solar disk so each phase has some visual space around it.
Crop tool open with aspect ratio set to 1:1
Open your first image in the Develop module and hit the crop tool. Set the aspect ratio to 1:1 to lock it into a perfect square. Here’s the part that saves you real time: hold Option plus Shift (Alt plus Shift on Windows) as you drag the crop handle. This pulls the crop inward from the center, keeping the sun roughly centered in the frame without you having to manually reposition. You don’t want to crop too tight. Leave breathing room around the solar disk so each phase has some visual space around it.
Once that first crop is set, shift-click to select all of your remaining phase images in the filmstrip at the bottom.
Step 3: Sync the Crop Across All Images
 Sync dialog box with only Crop checkbox selected
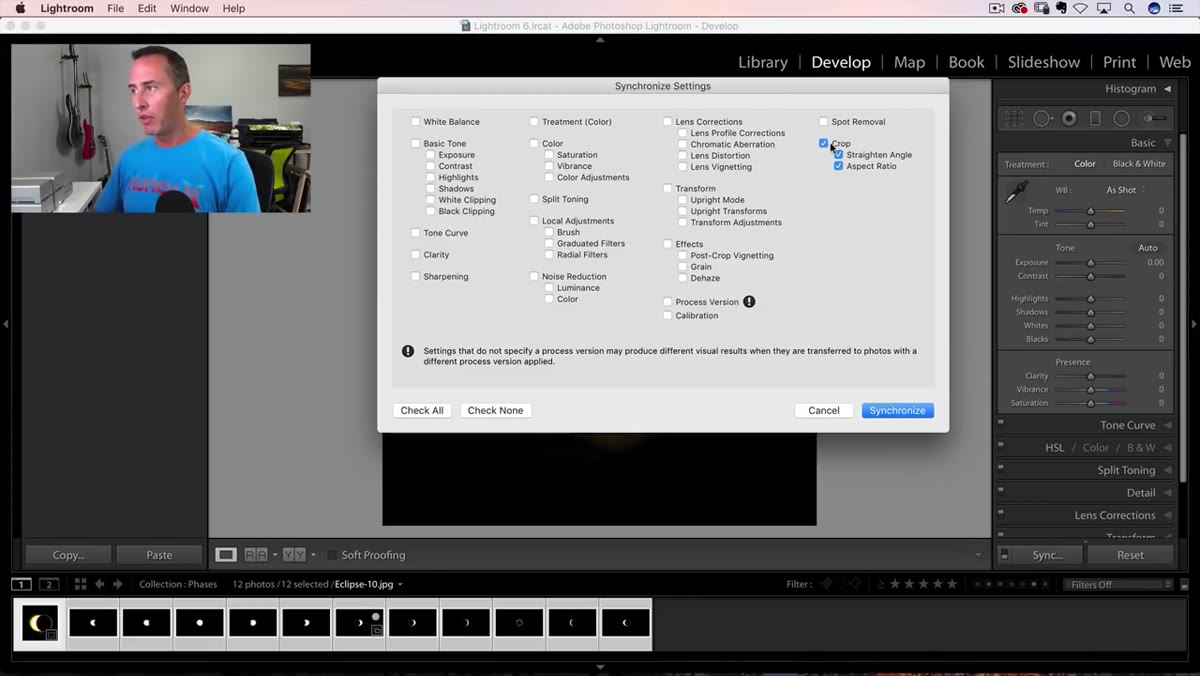
With all images selected, click the Sync button in the lower right of the Develop module. A dialog box will appear with a long list of settings you can synchronize. Click “Check None” first to clear everything, then manually turn on only the Crop option. Hit Synchronize. Lightroom will apply that same 1:1 crop to every image in your selection at once. What used to be a repetitive, click-by-click process across a dozen frames happens in about three seconds.
Sync dialog box with only Crop checkbox selected
With all images selected, click the Sync button in the lower right of the Develop module. A dialog box will appear with a long list of settings you can synchronize. Click “Check None” first to clear everything, then manually turn on only the Crop option. Hit Synchronize. Lightroom will apply that same 1:1 crop to every image in your selection at once. What used to be a repetitive, click-by-click process across a dozen frames happens in about three seconds.
Step 4: Fine-Tune the Crop Position on Each Frame
 Individual image with crop overlay being repositioned
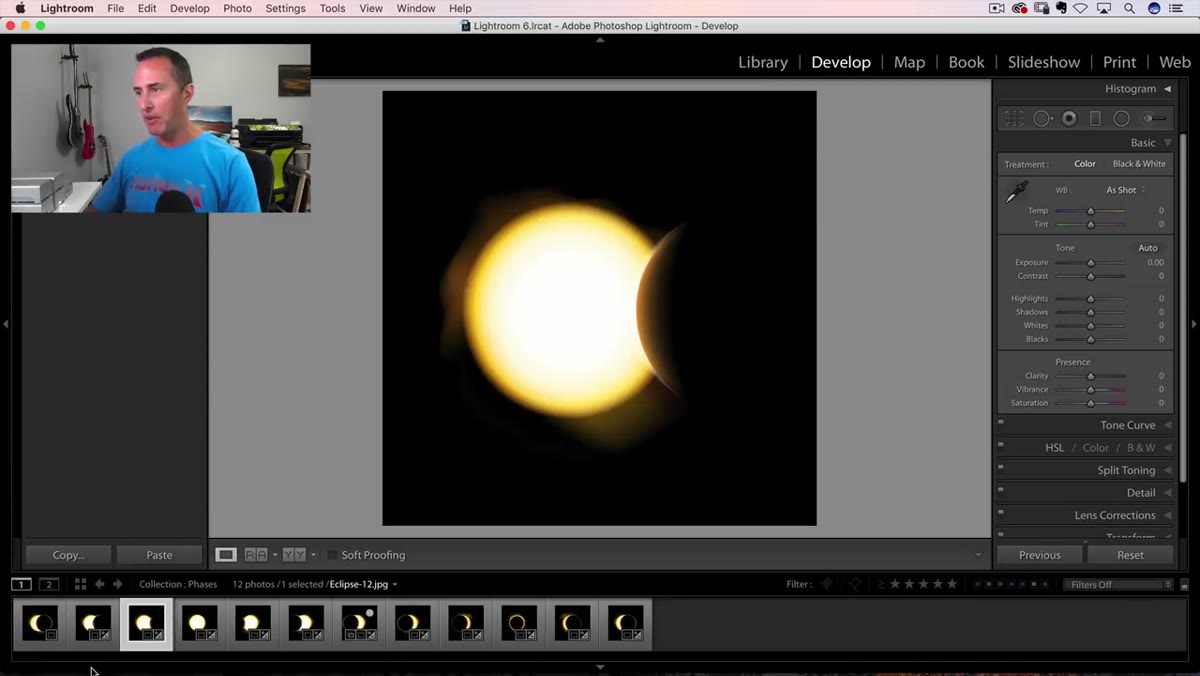
This is the step most tutorials skip over, and it matters. After syncing, the crop dimensions are identical across every image, but the sun won’t be perfectly centered in all of them. As the moon moved across the sun during the shoot, the disk shifted position in the frame. Go through each image individually and press R to activate the crop tool quickly. Then nudge the crop box so the subject is centered within that square. You’re not resizing anything, just repositioning. This keeps the final composite from looking sloppy, where one phase is drifting to the left and another is floating toward the top corner.
Individual image with crop overlay being repositioned
This is the step most tutorials skip over, and it matters. After syncing, the crop dimensions are identical across every image, but the sun won’t be perfectly centered in all of them. As the moon moved across the sun during the shoot, the disk shifted position in the frame. Go through each image individually and press R to activate the crop tool quickly. Then nudge the crop box so the subject is centered within that square. You’re not resizing anything, just repositioning. This keeps the final composite from looking sloppy, where one phase is drifting to the left and another is floating toward the top corner.
R is your shortcut throughout this step. Use it every time instead of clicking up to the toolbar.
Step 5: Switch to the Print Module and Choose Custom Package
 Print module open with Layout Style panel visible
Navigate to the Print module using the top menu bar. This is where the real layout work happens. In the upper right panel, you’ll see Layout Style with three options. Select Custom Package. This is the mode that gives you a free-form canvas where you can place individual cells at any size and position, as opposed to the rigid grid templates in the other two modes. Think of it as Lightroom’s version of a contact sheet builder, but with manual control over every element.
Print module open with Layout Style panel visible
Navigate to the Print module using the top menu bar. This is where the real layout work happens. In the upper right panel, you’ll see Layout Style with three options. Select Custom Package. This is the mode that gives you a free-form canvas where you can place individual cells at any size and position, as opposed to the rigid grid templates in the other two modes. Think of it as Lightroom’s version of a contact sheet builder, but with manual control over every element.
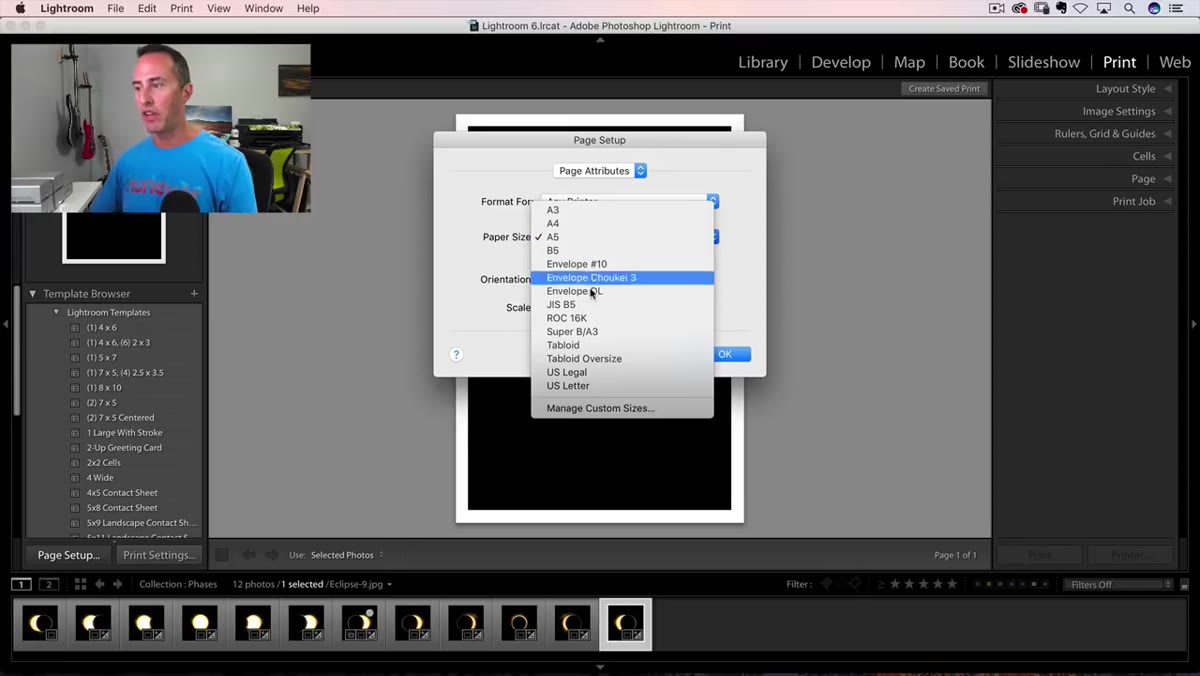
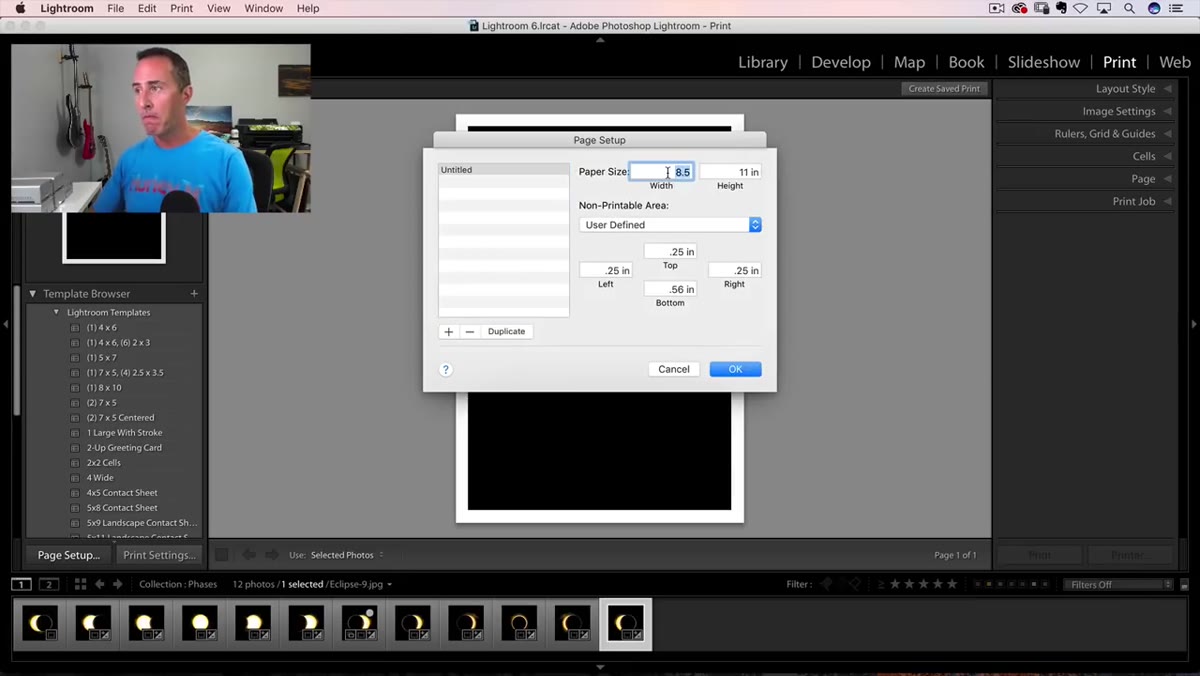
Step 6: Set a Custom Canvas Size
 Page Setup dialog with custom paper size being entered
Click Page Setup at the bottom of the left panel. Under Paper Size, create a custom size that fits your composite. For a horizontal row of phase images, a wide rectangular canvas works well. The exact dimensions depend on how many phases you’re including and how large you want each cell, but a ratio of roughly 3:1 or 4:1 width to height is a solid starting point. Set the orientation to landscape. This is also where you set your resolution if you’re planning to print rather than share online.
Page Setup dialog with custom paper size being entered
Click Page Setup at the bottom of the left panel. Under Paper Size, create a custom size that fits your composite. For a horizontal row of phase images, a wide rectangular canvas works well. The exact dimensions depend on how many phases you’re including and how large you want each cell, but a ratio of roughly 3:1 or 4:1 width to height is a solid starting point. Set the orientation to landscape. This is also where you set your resolution if you’re planning to print rather than share online.
Step 7: Place Your Images and Export as JPEG
 Multiple eclipse phase cells arranged in a row on the canvas
Drag each phase image from the filmstrip into the custom package canvas. Lightroom will create a cell for each one, and you can resize and reposition them manually by dragging the handles. Arrange them in chronological order across the canvas. Once the layout looks right, go to the bottom left and instead of hitting Print, look for the Print to File button. This exports the entire layout as a JPEG at whatever resolution you specified in Page Setup. You now have a finished composite you can share, post, or send to a lab without ever opening Photoshop.
Multiple eclipse phase cells arranged in a row on the canvas
Drag each phase image from the filmstrip into the custom package canvas. Lightroom will create a cell for each one, and you can resize and reposition them manually by dragging the handles. Arrange them in chronological order across the canvas. Once the layout looks right, go to the bottom left and instead of hitting Print, look for the Print to File button. This exports the entire layout as a JPEG at whatever resolution you specified in Page Setup. You now have a finished composite you can share, post, or send to a lab without ever opening Photoshop.
A Note on Where Lightroom Stops and Photoshop Picks Up
The honest caveat here is that this technique produces a clean, flat composite. It’s a layout, not a blend. If your eclipse shots were taken under different atmospheric conditions and the sky tones don’t match frame to frame, Lightroom can’t reconcile those differences the way Photoshop’s layer blending can. What I’d do before running through these steps is spend five minutes in the Develop module matching the overall tone and white balance across your sequence. Sync those basic adjustments using the same method as Step 3, checking only the panels you adjusted. It won’t be perfect, but it’ll give your composite a visual consistency that the Print module layout alone can’t provide. I’ve built plenty of composites where the seams were invisible on screen and glaring in print. Matching tone first is the insurance policy.
The single biggest takeaway from this approach is that the Print module is an underused compositing tool for photographers who live in Lightroom. It handles layout, sizing, and export without a round-trip to another application. For eclipse sequences, event timelines, or any multi-image story told in a grid, this workflow is fast, clean, and surprisingly capable.
Watch the full tutorial on YouTube to see Kloskowski walk through it in real time. Watching the crop sync happen live is particularly useful if the written steps above feel abstract.
Comments
Leave a Comment