
There’s a specific kind of frustration that comes from having a nearly perfect stock image for a composite and knowing you’re about to spend forty minutes in Photoshop just getting your subject separated from the background before the real work even begins. I’ve been there more times than I can count, working on movie posters and book covers where the source photography is good but never quite ready to drop into a scene. So when I watched Matt Kloskowski walk through what Adobe shipped in the October 2021 Lightroom update, I stopped what I was doing and watched it twice. Watch the full tutorial on YouTube before or after reading this breakdown.
What Kloskowski demonstrates isn’t a minor UI refresh. The new masking system inside Lightroom Classic replaces the old local corrections workflow with a genuinely layered approach to selections. AI-powered subject detection, invertible masks, stackable selections, and subtractive geometry tools all operate together in a single panel. For someone who sketches every composite on paper before touching a computer, I think about light sourcing and tone separation from the very first mark. Having that level of control inside Lightroom, during what I used to treat as a pure culling and color stage, changes the preparation pipeline completely.
The example Kloskowski uses throughout the tutorial is a portrait of a woman where he converts the subject to black and white, takes the background in an entirely different tonal direction, and splits it further using a graduated filter. No Photoshop. No manual brushwork. No layer masks. It sounds like a trick but it holds up technically. Here’s how the system works.
Step 1: Find the New Masking Panel
 The masking icon above the Basic panel in Lightroom Classic
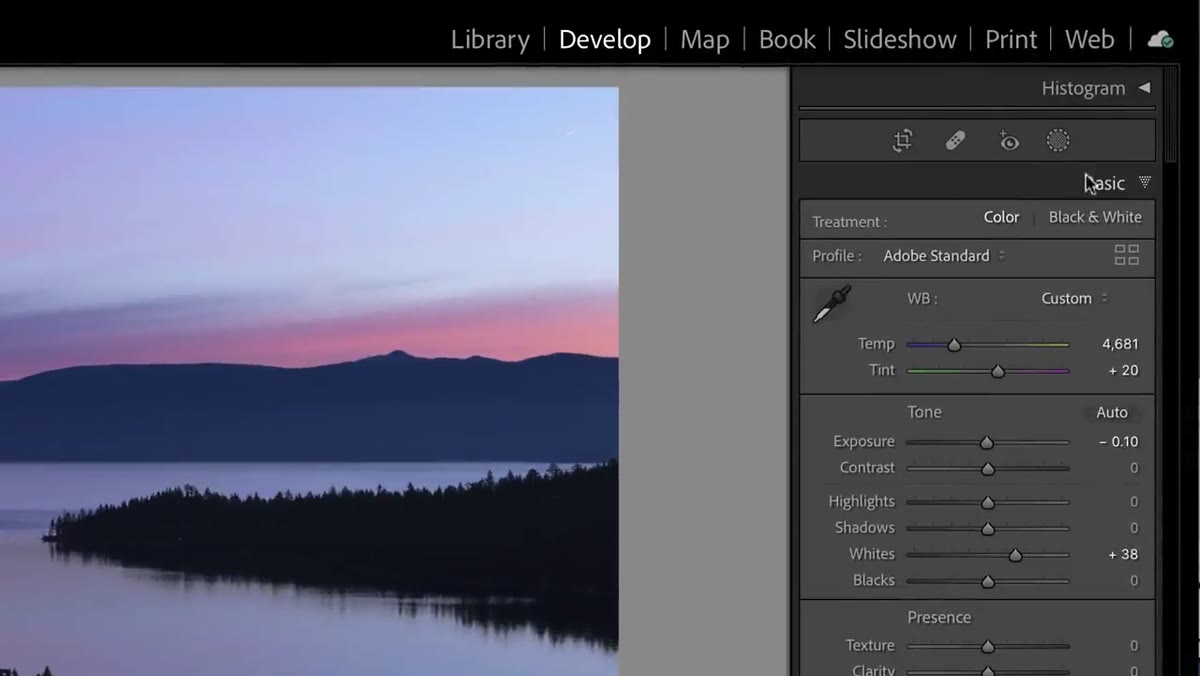
The entry point is a small icon sitting just above the Basic panel and just below the histogram. It used to be the gateway to local corrections but now opens a fully redesigned Masks panel. If you have adjustments from an older version of Lightroom, they carry over automatically and appear as separate listed items inside the panel. You don’t lose prior work.
The masking icon above the Basic panel in Lightroom Classic
The entry point is a small icon sitting just above the Basic panel and just below the histogram. It used to be the gateway to local corrections but now opens a fully redesigned Masks panel. If you have adjustments from an older version of Lightroom, they carry over automatically and appear as separate listed items inside the panel. You don’t lose prior work.
Keyboard shortcut users: pressing K still jumps you directly into the brush tool without clicking through the panel at all. Old habits hold here.
Step 2: Select Your Subject With One Click
 AI subject selection applied to a portrait in Lightroom Classic
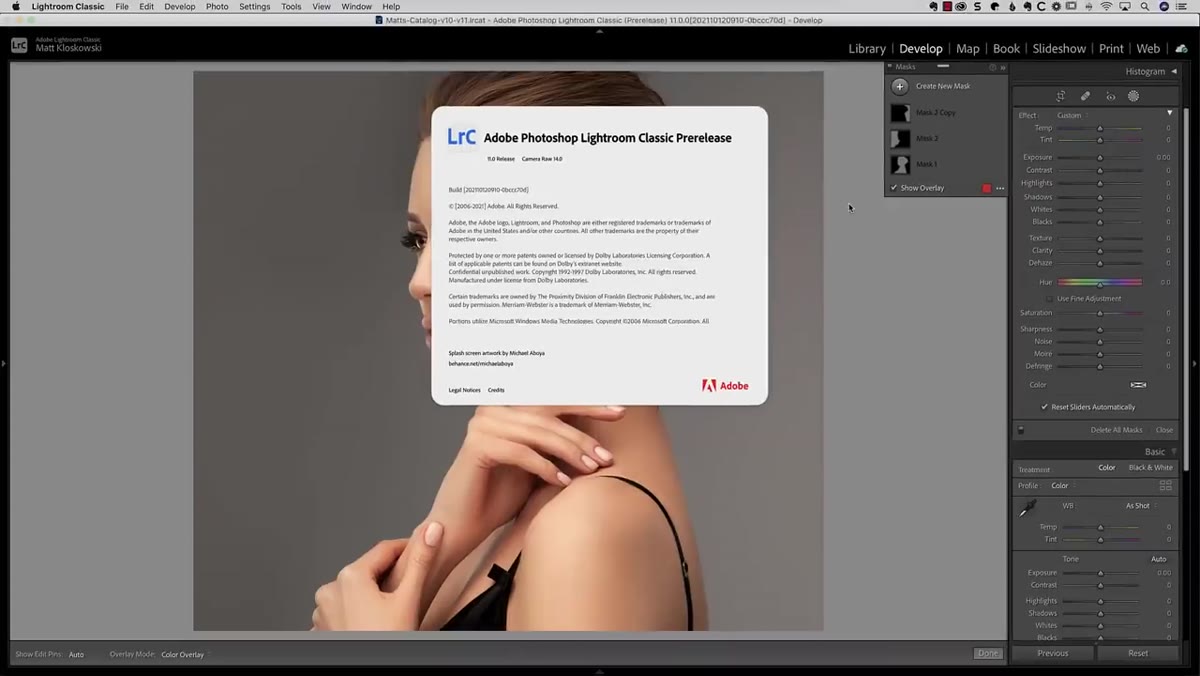
Inside the Masks panel, choose “Select Subject.” Lightroom’s AI analyzes the frame and generates a mask around the primary subject in the photo. For portraits with clean separation from the background, this works remarkably well on the first pass. Kloskowski applies it to a woman against a relatively simple background and the mask holds around her hair and shoulders without manual cleanup.
AI subject selection applied to a portrait in Lightroom Classic
Inside the Masks panel, choose “Select Subject.” Lightroom’s AI analyzes the frame and generates a mask around the primary subject in the photo. For portraits with clean separation from the background, this works remarkably well on the first pass. Kloskowski applies it to a woman against a relatively simple background and the mask holds around her hair and shoulders without manual cleanup.
This is the same underlying technology Adobe uses in Photoshop’s Select Subject, now running inside Lightroom’s develop module. For compositing prep, this is the step that used to cost me the most time. Getting a rough but accurate subject isolation this early in the process means I can make tonal decisions about the subject before I’ve committed to a scene.
Step 3: Apply Targeted Adjustments to the Subject
 Black and white conversion applied only to the selected subject
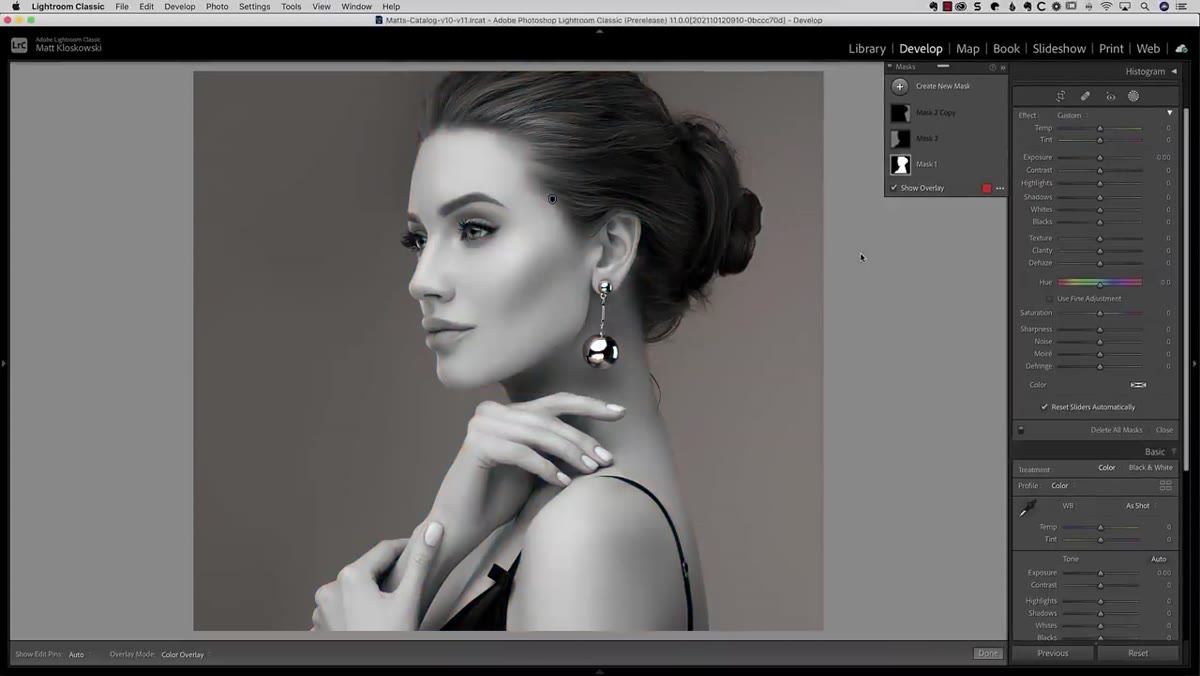
With the subject mask active, any adjustment you make in the panel below applies only to that selected region. Kloskowski desaturates the subject entirely, converting just her to black and white while the background stays in full color. The adjustment panel is the same one you’ve always used in Lightroom. Nothing about the tools changes. Only the scope of where they apply has changed.
Black and white conversion applied only to the selected subject
With the subject mask active, any adjustment you make in the panel below applies only to that selected region. Kloskowski desaturates the subject entirely, converting just her to black and white while the background stays in full color. The adjustment panel is the same one you’ve always used in Lightroom. Nothing about the tools changes. Only the scope of where they apply has changed.
For compositing purposes, I find this useful for testing how a subject will read against a tonal background without committing to a Photoshop comp. You can evaluate contrast relationships and luminosity matching right here in Lightroom while you’re still deciding which image to use.
Step 4: Add a Second Mask and Invert It for the Background
 A second mask layer created and inverted to isolate the background
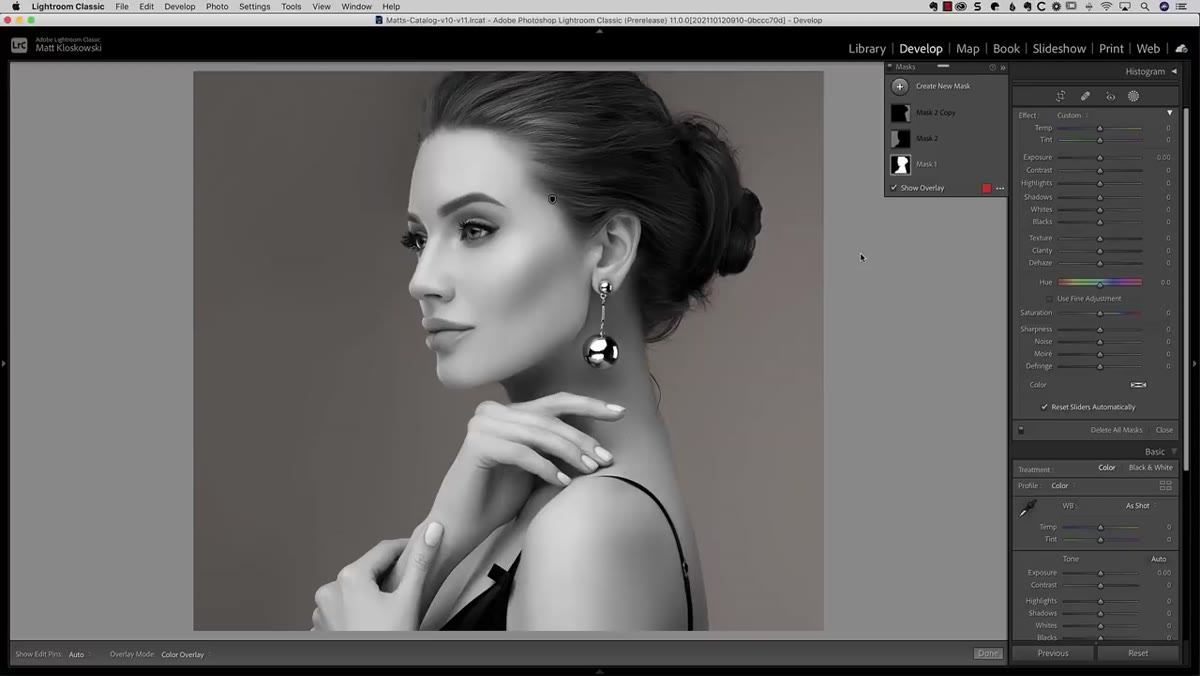
Create a new mask by clicking “Add New Mask” inside the panel. Select Subject again, but this time click the invert option. Lightroom flips the selection so everything except the subject is now targeted. You now have two independent mask layers: one controlling the subject, one controlling the background, and they are pixel-accurate inverses of each other with no manual selection work.
A second mask layer created and inverted to isolate the background
Create a new mask by clicking “Add New Mask” inside the panel. Select Subject again, but this time click the invert option. Lightroom flips the selection so everything except the subject is now targeted. You now have two independent mask layers: one controlling the subject, one controlling the background, and they are pixel-accurate inverses of each other with no manual selection work.
This is the structural shift that separates the new system from what Lightroom used to offer. Before October 2021, layering adjustments this way required brushing regions manually or stacking radial filters and hoping they played nicely together. Now the logic is explicit and the masks are labeled and visible.
Step 5: Subtract From a Mask Using a Graduated Filter
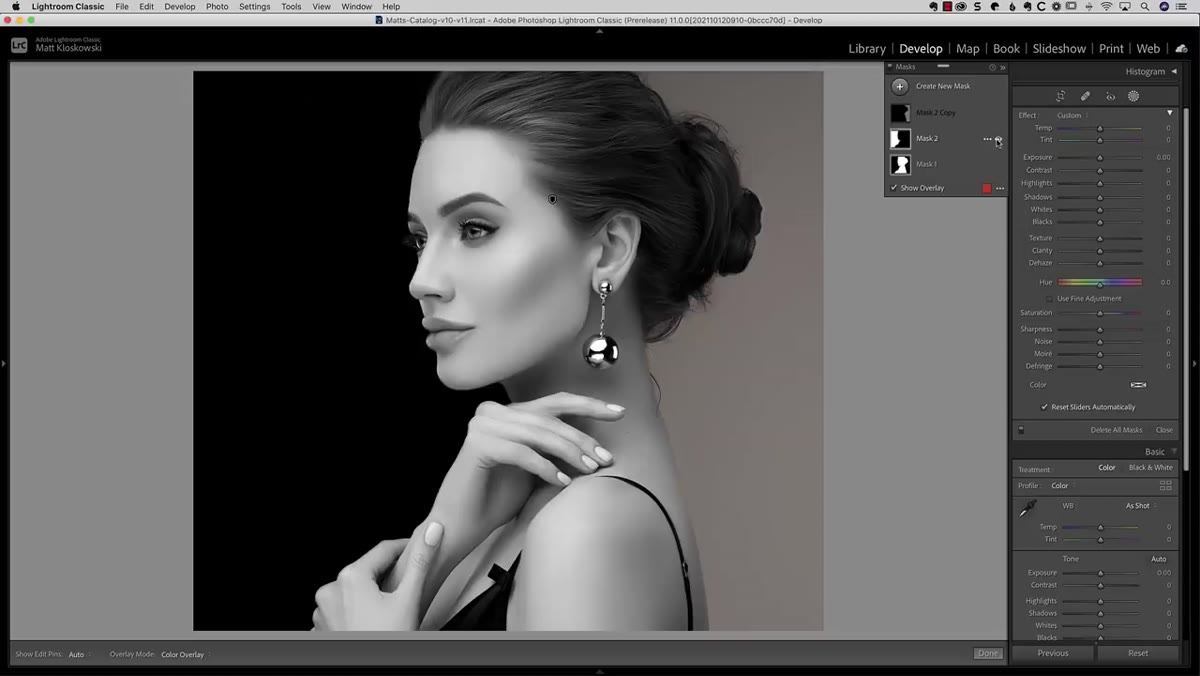 Graduated filter subtracted from the background mask in the panel
With the background mask active, use the “Subtract” option inside that mask’s settings and choose Graduated Filter. Draw the gradient across half the frame. Lightroom removes that graduated region from the background mask, meaning adjustments on the background mask now affect only the portion outside the gradient. Kloskowski uses this to push half the background to near black while the other half holds a different tone.
Graduated filter subtracted from the background mask in the panel
With the background mask active, use the “Subtract” option inside that mask’s settings and choose Graduated Filter. Draw the gradient across half the frame. Lightroom removes that graduated region from the background mask, meaning adjustments on the background mask now affect only the portion outside the gradient. Kloskowski uses this to push half the background to near black while the other half holds a different tone.
The subtract and add controls within individual masks are where the real power lives. You’re not just stacking masks on top of each other. You’re building boolean logic into a single mask layer using familiar tools.
Step 6: Duplicate a Mask and Invert It for Split Toning
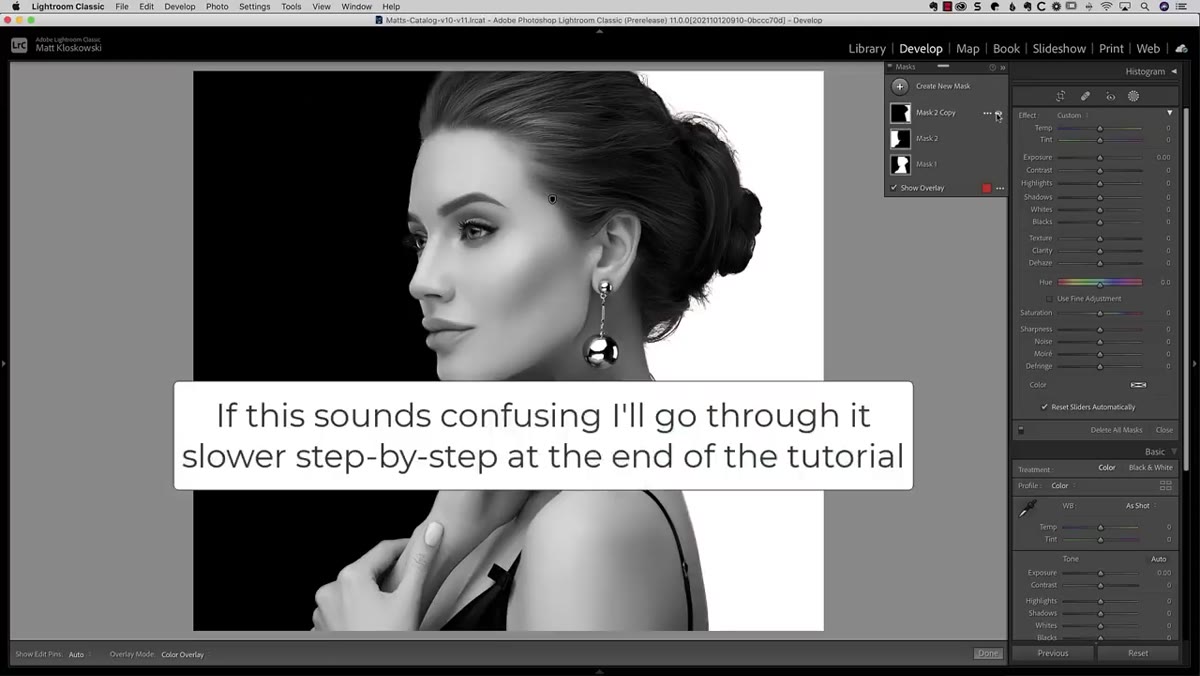 A duplicated mask inverted to control the opposite half of the background
Right-click any mask in the panel to duplicate it. Kloskowski takes the background mask, duplicates it, and inverts the duplicate. Now he has the opposite half of the background isolated. A second round of exposure and color adjustments pushes that region toward white. The result is a subject in black and white sitting against a background split between near-black on one side and near-white on the other.
A duplicated mask inverted to control the opposite half of the background
Right-click any mask in the panel to duplicate it. Kloskowski takes the background mask, duplicates it, and inverts the duplicate. Now he has the opposite half of the background isolated. A second round of exposure and color adjustments pushes that region toward white. The result is a subject in black and white sitting against a background split between near-black on one side and near-white on the other.
The whole sequence took a handful of clicks. No selection painting, no feathering sliders, no back-and-forth between Photoshop and Lightroom.
What I’d Do Differently as a Compositing Artist
The workflow Kloskowski shows is clean for a single-image edit. Where I’d push further is in using this system as a pre-visualization layer before a composite. When I’m assembling a scene with multiple subjects and a painted background, the hardest early decision is usually tonal hierarchy. Who reads darker, the subject or the environment? Where does the eye go first?
Running subject isolation and background tonal splits inside Lightroom, before anything touches Photoshop, gives you a rough tonal map of the image. I’ve started treating this stage the way I treat my paper sketches: it’s not the final answer, it’s the first argument. The AI selection won’t give you clean hair against a busy background without some cleanup downstream. But for early-stage compositing decisions, the level of control here is genuinely new territory for Lightroom.
The single most important idea in this tutorial is that Lightroom’s masking system now thinks in layers and logic rather than regions and brushes. That’s not a UI change. That’s a different mental model for how you approach an image.
Watch the full tutorial on YouTube to see Kloskowski walk through the complete panel, including the Select Sky tool and additional intersection and subtraction use cases not covered in this breakdown.
Comments (4)
Printing this out and pinning it next to my monitor. That good.
Wow, I had no idea you could do this. Mind blown.
Just used this on a wedding shoot edit. Client was thrilled.
This is the kind of content that keeps me coming back.
Leave a Comment