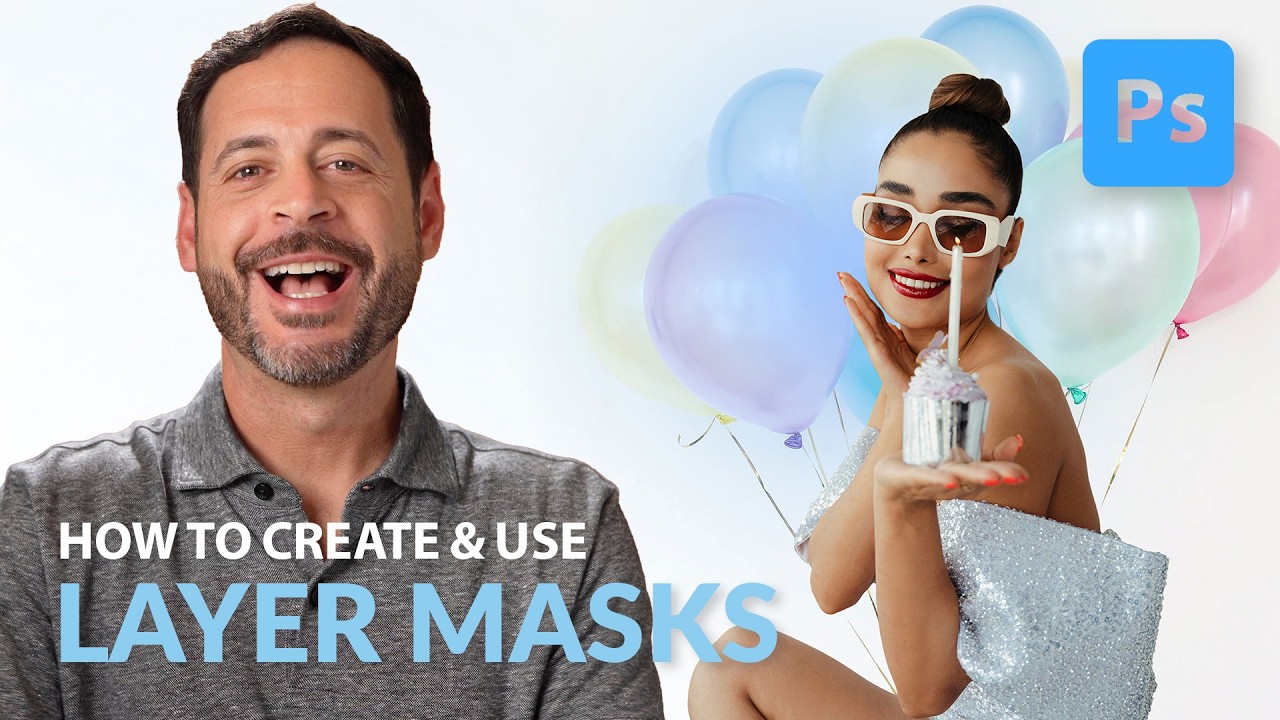
Every composite I’ve ever built starts with the same foundational problem: how do I isolate one element and place it convincingly into a world it was never photographed in? I’ve done it for movie posters, book covers, album art. And every single time, the answer comes back to the same tool. Layer masks. Not selections. Not erasers. Masks. The distinction matters more than most beginners realize, and getting it wrong early is the kind of habit that quietly undermines your work for years.
I came across this tutorial from Aaron Nace over at PHLEARN - Watch the full tutorial on YouTube - and what struck me immediately was how cleanly he explains the non-destructive logic behind masks. That logic is the whole game. A mask hides pixels without deleting them. That single principle is what separates a professional compositing workflow from one that constantly paints you into a corner. Aaron walks through creation, editing, and fine-tuning in a way that’s genuinely useful whether you’re new to this or just looking to tighten up your process. Here’s how I’d walk a working artist through the same material.
Step 1: Start With a Selection
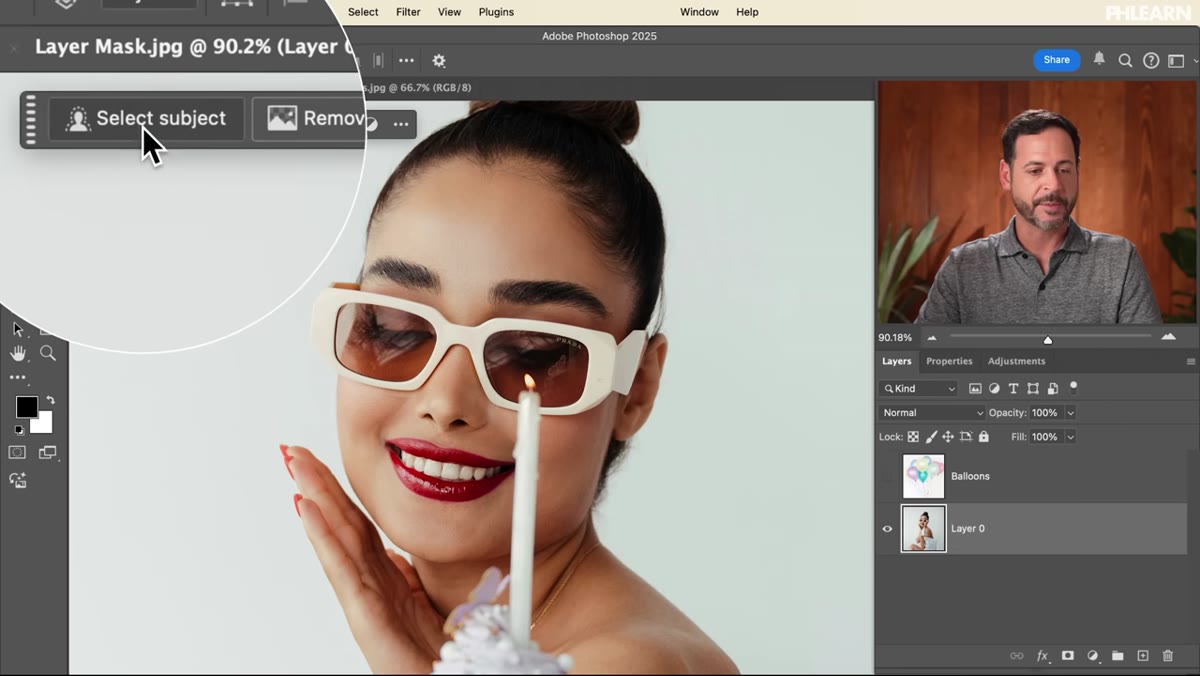 Selecting the subject using Select Subject in Photoshop
Before a layer mask exists, Photoshop needs to know what it’s working with. With your subject layer selected in the Layers panel, navigate to Select > Subject. Photoshop’s AI-driven subject selection does a remarkably solid job on clean shots with reasonable contrast between subject and background. Within a few seconds you’ll see the marching ants crawl around your subject’s outline, and that selection becomes the foundation your mask is built on.
Selecting the subject using Select Subject in Photoshop
Before a layer mask exists, Photoshop needs to know what it’s working with. With your subject layer selected in the Layers panel, navigate to Select > Subject. Photoshop’s AI-driven subject selection does a remarkably solid job on clean shots with reasonable contrast between subject and background. Within a few seconds you’ll see the marching ants crawl around your subject’s outline, and that selection becomes the foundation your mask is built on.
This step matters because the quality of your mask is only as good as your initial selection. For complex hair or fur I often refine this further using Select and Mask, but for most compositing work, Select Subject is a strong starting point that saves significant time.
Step 2: Create the Layer Mask
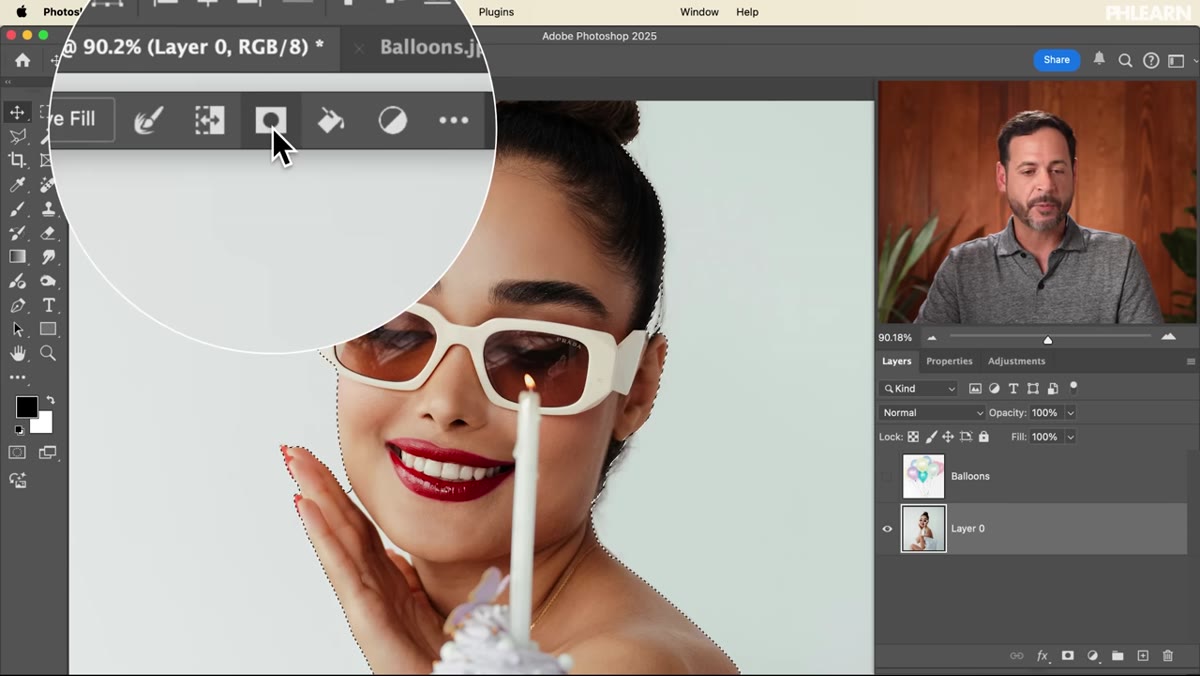 Clicking the layer mask icon in the contextual taskbar
With your selection active, you have two quick ways to generate a mask. You can click the layer mask icon in the contextual taskbar that appears at the top of your canvas, or you can find the same icon at the bottom of the Layers panel - it looks like a rectangle with a circle cut out of it. Click it, and Photoshop converts your selection into a mask attached directly to that layer.
Clicking the layer mask icon in the contextual taskbar
With your selection active, you have two quick ways to generate a mask. You can click the layer mask icon in the contextual taskbar that appears at the top of your canvas, or you can find the same icon at the bottom of the Layers panel - it looks like a rectangle with a circle cut out of it. Click it, and Photoshop converts your selection into a mask attached directly to that layer.
The result is immediate. Your subject appears cut out, the background drops away, and in the Layers panel you’ll now see two thumbnails side by side on that layer: the image itself, and the mask. White areas on the mask reveal the layer. Black areas conceal it. That’s the entire rule, and everything else builds from it.
Step 3: Understand What You’re Looking At in the Layers Panel
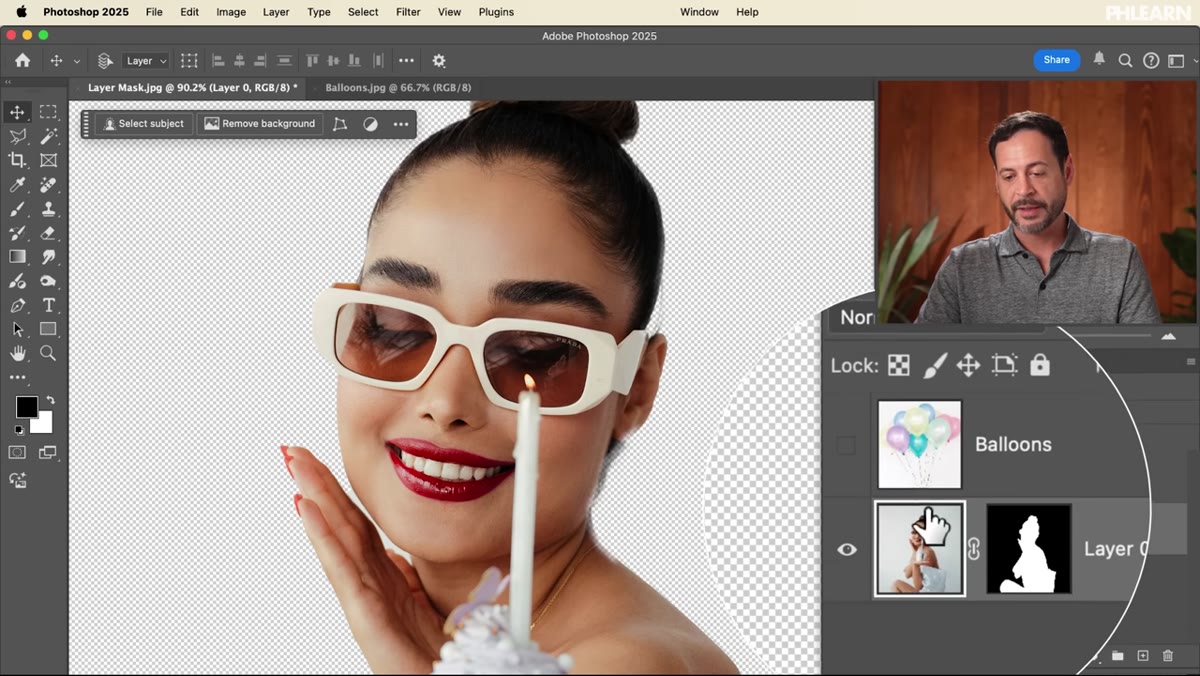 Layer thumbnail and mask thumbnail shown side by side in Layers panel
This is where a lot of people get tripped up. When you click the image thumbnail on a layer, you’re targeting the actual pixels. When you click the mask thumbnail, you’re targeting the mask itself. Each has a white bounding box that appears when selected, so it’s easy to tell which one is active. Aaron is careful to point this out, and rightly so, because painting on the wrong target is a frustrating and common mistake.
Layer thumbnail and mask thumbnail shown side by side in Layers panel
This is where a lot of people get tripped up. When you click the image thumbnail on a layer, you’re targeting the actual pixels. When you click the mask thumbnail, you’re targeting the mask itself. Each has a white bounding box that appears when selected, so it’s easy to tell which one is active. Aaron is careful to point this out, and rightly so, because painting on the wrong target is a frustrating and common mistake.
Click the mask thumbnail deliberately before doing any mask-editing work. The contextual options in the taskbar will shift to show mask-specific controls when the mask is active. Keep your eye on which element has focus.
Step 4: Use the View Modes to Read Your Mask
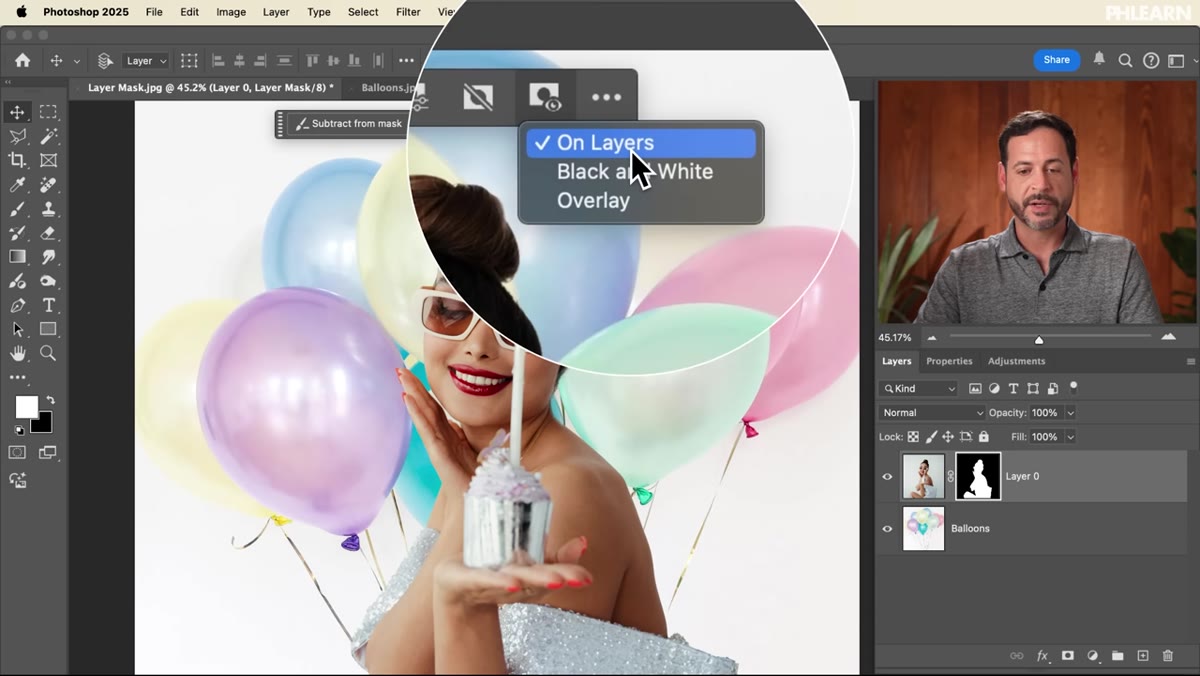 Black and white mask view showing subject as white on black
Photoshop gives you several ways to visualize your mask beyond the standard composite view. With the mask thumbnail selected, look to the View options in the toolbar. The Black and White view strips away your image and shows you the raw mask - pure white where your subject is visible, pure black where it’s hidden. This is where you catch edge problems, stray pixels, and soft transitions that look fine in the composite but will fail in print.
Black and white mask view showing subject as white on black
Photoshop gives you several ways to visualize your mask beyond the standard composite view. With the mask thumbnail selected, look to the View options in the toolbar. The Black and White view strips away your image and shows you the raw mask - pure white where your subject is visible, pure black where it’s hidden. This is where you catch edge problems, stray pixels, and soft transitions that look fine in the composite but will fail in print.
The Overlay view is equally useful in a different way. It shows your image normally but tints the masked-out areas in red, similar to the old Quick Mask mode. For checking how closely your mask follows a complex edge, Overlay is often the faster diagnostic tool. Toggle between these views while refining rather than guessing from the composite alone.
Step 5: Adjust Density and Feathering in the Properties Panel
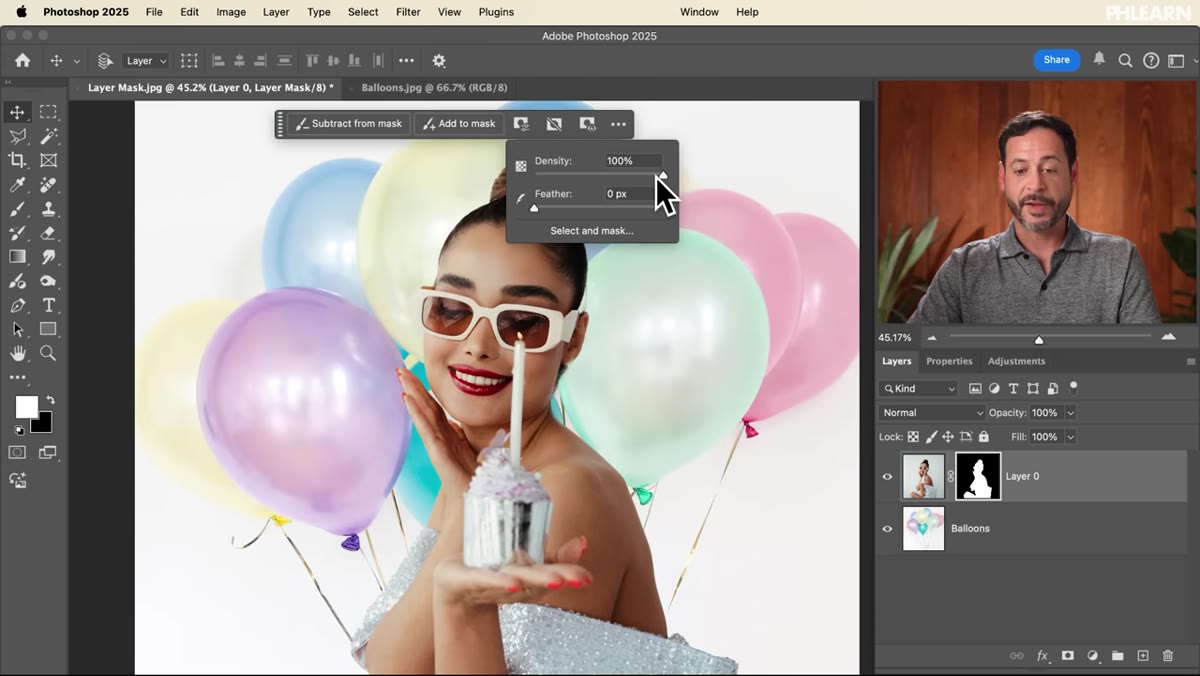 Properties panel showing Density and Feathering sliders
With the mask selected, open the Properties panel (Window > Properties) and you’ll find two sliders that do quiet but powerful work. Density controls how opaque the mask’s black areas are. Pull it down and the hidden regions become semi-transparent, letting underlying layers bleed through. This is useful when you want a ghost-like blend rather than a hard cutout.
Properties panel showing Density and Feathering sliders
With the mask selected, open the Properties panel (Window > Properties) and you’ll find two sliders that do quiet but powerful work. Density controls how opaque the mask’s black areas are. Pull it down and the hidden regions become semi-transparent, letting underlying layers bleed through. This is useful when you want a ghost-like blend rather than a hard cutout.
Feathering softens the edge of the entire mask globally. A small feather value, even just 0.5 to 1.5 pixels, can make a digitally sharp cutout feel like it was photographed in the same environment as the background. I use it conservatively - too much and your subject starts to look like it’s dissolving. Think of it as the difference between a subject that belongs in a scene and one that was dropped into it.
Step 6: Paint Directly on the Mask to Add or Remove Detail
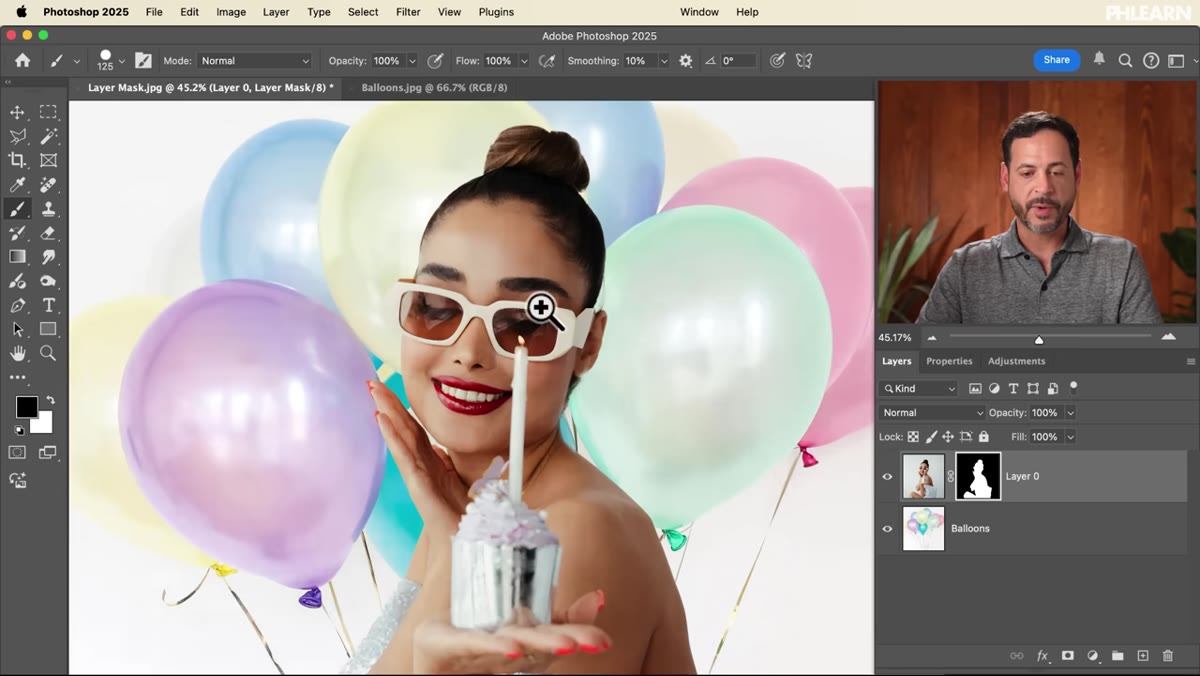 Painting on the mask with white brush to restore hidden areas
Click the Add or Subtract options in the contextual taskbar while your mask is selected, and Photoshop automatically activates the Brush tool with the correct foreground color. White paint reveals. Black paint conceals. That’s it. You can adjust your brush size with the bracket keys, lower the opacity for gradual transitions, and work with a soft or hard edge depending on the boundary you’re refining.
Painting on the mask with white brush to restore hidden areas
Click the Add or Subtract options in the contextual taskbar while your mask is selected, and Photoshop automatically activates the Brush tool with the correct foreground color. White paint reveals. Black paint conceals. That’s it. You can adjust your brush size with the bracket keys, lower the opacity for gradual transitions, and work with a soft or hard edge depending on the boundary you’re refining.
This is where non-destructive logic pays off. Nothing you paint onto a mask touches the actual image data. If you paint too aggressively and lose part of your subject, switch to white and paint it back. The original pixels are always there underneath, waiting.
What I’d Add From My Own Practice
Aaron’s tutorial covers the core workflow cleanly. What I’d layer on top, especially for compositing work where the stakes are higher, is this: mask quality reveals itself most brutally in transitions, not centers. The middle of your subject almost always looks fine. It’s the hairline, the shoulder against a bright sky, the translucent fabric edge where a mask either earns its keep or gives you away. Before I consider any mask finished, I zoom to 100 percent and walk the entire perimeter of the subject looking for halos, hard digital edges, or fringing that doesn’t match the lighting of the destination background.
I also make it a habit to temporarily disable the mask - hold Shift and click the mask thumbnail - to see the raw image and remind myself what I’m working with. It recalibrates your eye in a way that’s hard to get from the composite view alone.
Layer masks are the closest thing to a universal truth in compositing. Every technique I’ve developed over years of working on commercial projects runs through them in some form. The non-destructive nature of masks isn’t just convenient, it’s the architecture that lets you iterate, revisit, and get it right without starting over. If that principle isn’t already baked into how you work, this tutorial is the clearest entry point I’ve found. Watch the full tutorial on YouTube and give yourself an hour to follow along on a real image from your own library. The difference will show up in your very next composite.
Comments (2)
Love how you break down complex stuff into manageable steps.
Great article! I actually covered something related on my site — the retouching angle is really complementary to this.
Leave a Comment