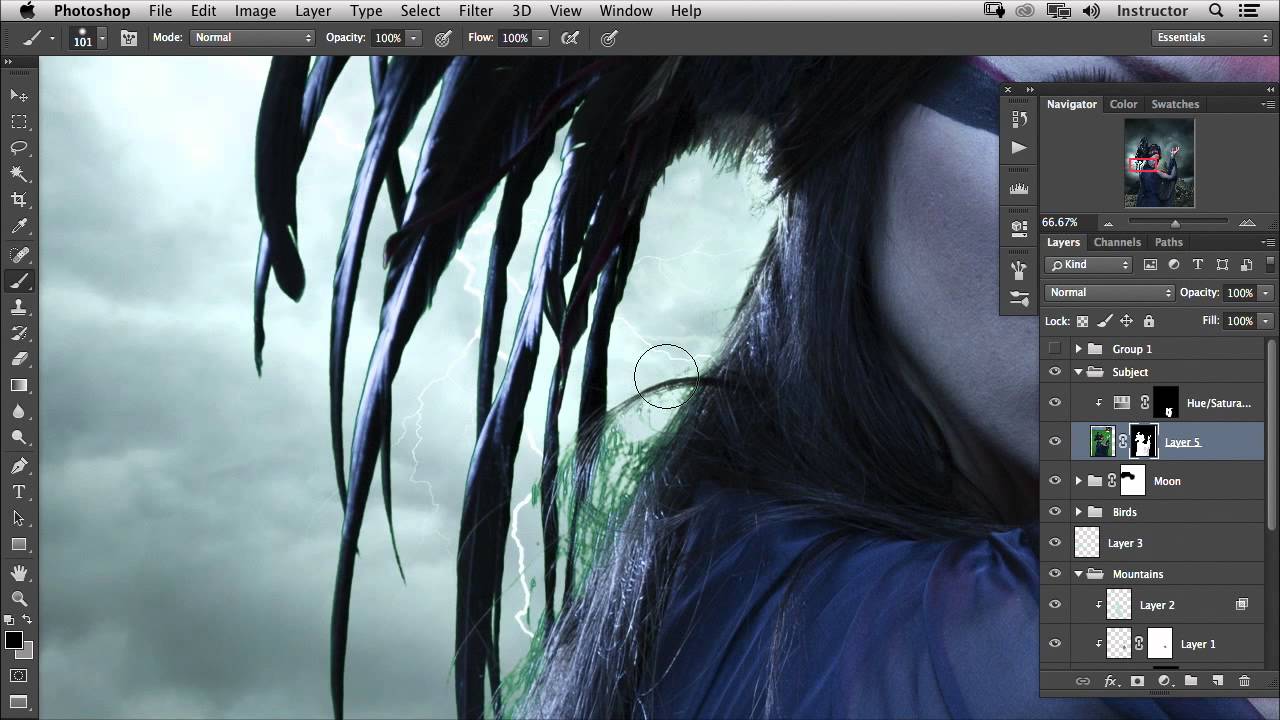
There is a specific kind of frustration that lives in the gap between a good selection and a great one. I’ve felt it hundreds of times, standing over a composite where the subject looks pasted rather than placed, because the edge around their hair is just slightly wrong. Too soft, too hard, or carrying a color fringe that screams “cutout.” On movie poster work especially, that edge is everything. The client doesn’t always know why something looks off, but they feel it, and you know exactly why. That problem, pulling a clean, believable selection through complex hair, is what Aaron Nace tackles directly in this CreativeLive tutorial. Watch the full tutorial on YouTube
What I respect about Nace’s approach is that he doesn’t pretend one method solves everything. He starts with Select Color Range, gets a usable result, and then honestly says: we can do better. That willingness to restart, to treat the first pass as a draft rather than a commitment, is something I had to learn the hard way. The technique he demonstrates, using a duplicated channel as a luminosity-based selection source, is one of the cleanest ways to handle wispy hair against a backdrop, and the walkthrough he gives is precise enough to follow on your own footage.
Step 1: Disable the Existing Layer Mask to Start Clean
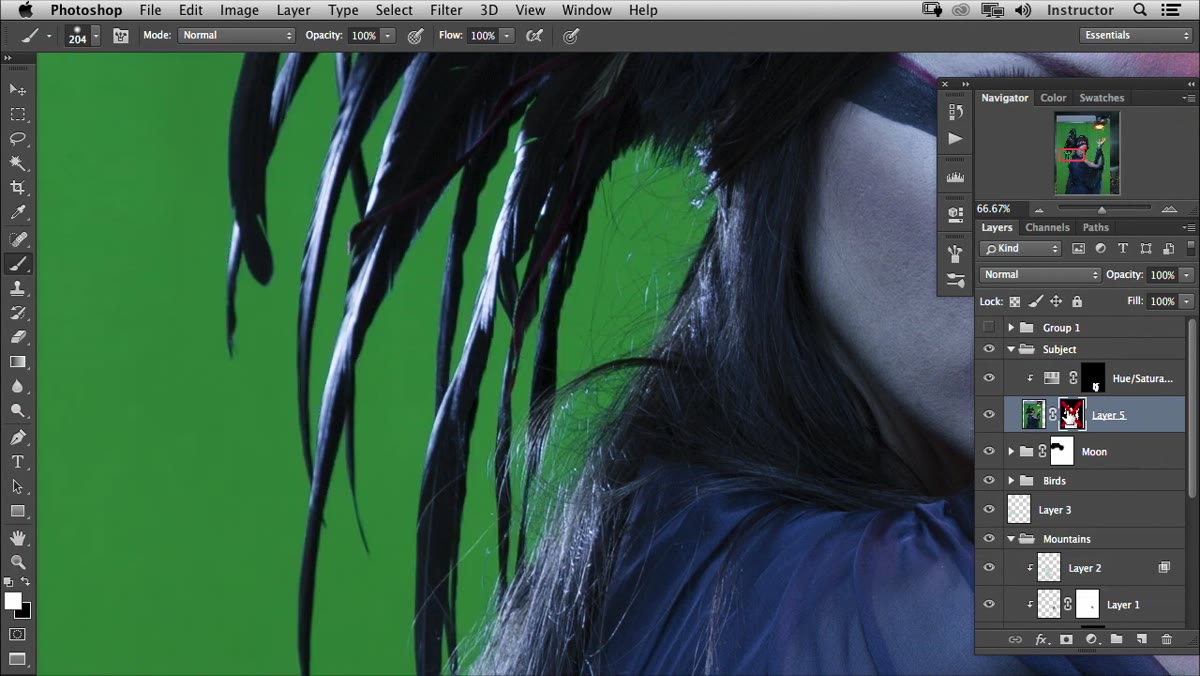 Shift-clicking a layer mask to disable it in Photoshop
Before going back into the channels, Nace disables the current layer mask rather than deleting it. He does this by holding Shift and clicking directly on the mask thumbnail in the Layers panel. The mask turns red to indicate it’s disabled but preserved. This matters because you’re not throwing away your earlier work, you’re just sidelining it while you build something better. Starting from a messy mask compounds the problem. Starting from the original image gives you clean information to work with.
Shift-clicking a layer mask to disable it in Photoshop
Before going back into the channels, Nace disables the current layer mask rather than deleting it. He does this by holding Shift and clicking directly on the mask thumbnail in the Layers panel. The mask turns red to indicate it’s disabled but preserved. This matters because you’re not throwing away your earlier work, you’re just sidelining it while you build something better. Starting from a messy mask compounds the problem. Starting from the original image gives you clean information to work with.
Step 2: Identify the Best Channel for Contrast
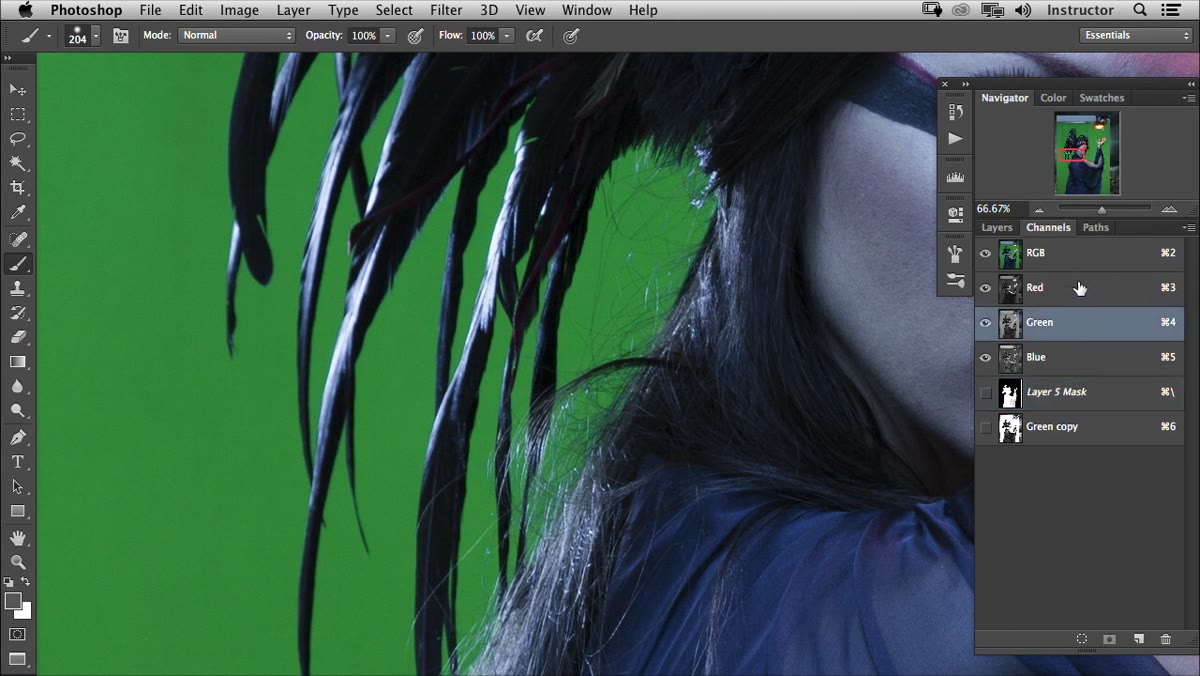 The Channels panel open with the Green channel selected
Open your Channels panel (Window, Channels) and click through each channel individually, Red, Green, and Blue, to preview them in grayscale. You’re looking for the channel where the contrast between your subject and the backdrop is highest. In Nace’s example, the Green channel gives the sharpest separation, with the backdrop reading significantly lighter than the subject’s hair. This varies by image. On a shoot with a blue backdrop you’d likely favor the Blue channel. The goal is maximum difference between the areas you want to keep and the areas you want to remove.
The Channels panel open with the Green channel selected
Open your Channels panel (Window, Channels) and click through each channel individually, Red, Green, and Blue, to preview them in grayscale. You’re looking for the channel where the contrast between your subject and the backdrop is highest. In Nace’s example, the Green channel gives the sharpest separation, with the backdrop reading significantly lighter than the subject’s hair. This varies by image. On a shoot with a blue backdrop you’d likely favor the Blue channel. The goal is maximum difference between the areas you want to keep and the areas you want to remove.
Step 3: Duplicate the Chosen Channel
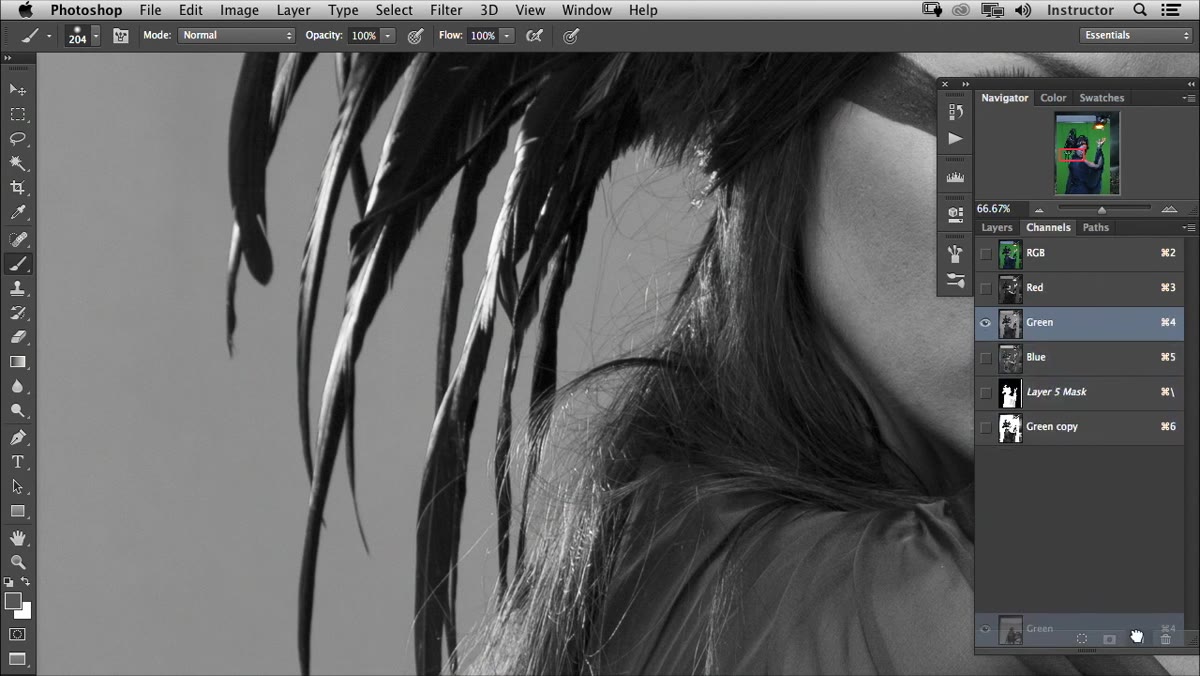 Dragging the Green channel to the New Channel icon to duplicate it
Once you’ve identified your strongest channel, drag it down to the New Channel icon at the bottom of the Channels panel. This creates an Alpha channel, a grayscale copy you can edit destructively without touching the original color data. Never work on the channel itself. The duplicate is your working copy, and everything you do from this point forward happens here.
Dragging the Green channel to the New Channel icon to duplicate it
Once you’ve identified your strongest channel, drag it down to the New Channel icon at the bottom of the Channels panel. This creates an Alpha channel, a grayscale copy you can edit destructively without touching the original color data. Never work on the channel itself. The duplicate is your working copy, and everything you do from this point forward happens here.
Step 4: Push the Contrast with Levels
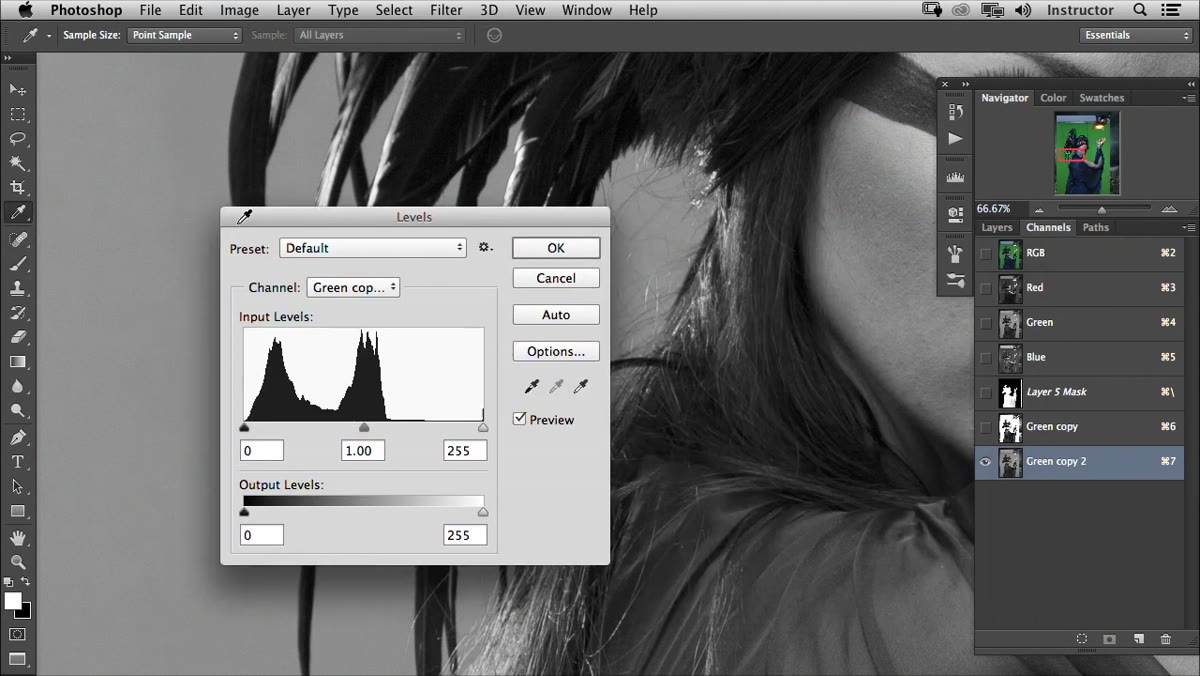 Levels dialog open on the duplicated channel with white point being adjusted
With your duplicated channel selected, open Levels (Command+L on Mac, Ctrl+L on PC). Drag the white point input slider inward toward the histogram until the backdrop reads as pure white. Nace adjusts this so that anything representing the backdrop becomes fully selected while the hair and subject remain dark. You want a clean, high-contrast separation here. Don’t worry about clipping some midtone information in the hair yet. You’re building a selection you’ll refine, not a final mask. Hit OK when the backdrop is white and the subject is clearly darker.
Levels dialog open on the duplicated channel with white point being adjusted
With your duplicated channel selected, open Levels (Command+L on Mac, Ctrl+L on PC). Drag the white point input slider inward toward the histogram until the backdrop reads as pure white. Nace adjusts this so that anything representing the backdrop becomes fully selected while the hair and subject remain dark. You want a clean, high-contrast separation here. Don’t worry about clipping some midtone information in the hair yet. You’re building a selection you’ll refine, not a final mask. Hit OK when the backdrop is white and the subject is clearly darker.
Step 5: Load the Channel as a Selection and Paint into the Mask
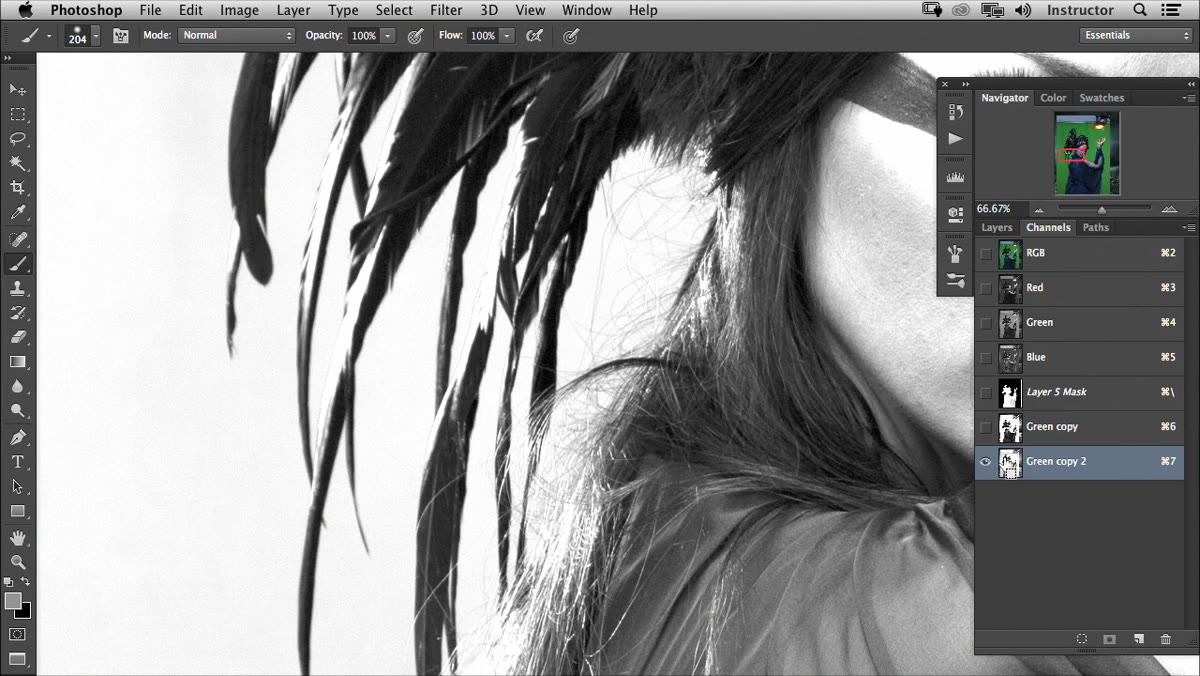 Painting black on a layer mask with a channel-based selection active
Command-click (or Ctrl-click) directly on the duplicated channel thumbnail to load it as a selection. The bright areas become selected. In Nace’s scenario, that means the backdrop is selected, and he wants those areas to become invisible on the mask. Switch to your layer in the Layers panel, click the existing mask thumbnail to target it, then choose the Brush tool and paint with black. Because you’re painting inside a selection, the brush only affects the selected region. This is where the technique earns its precision. Every stroke is constrained by the luminosity data you pulled from the channel, so even tiny strands of hair stay protected while the backdrop gets cleaned up. Use Command+H to hide the selection marching ants without losing the selection itself.
Painting black on a layer mask with a channel-based selection active
Command-click (or Ctrl-click) directly on the duplicated channel thumbnail to load it as a selection. The bright areas become selected. In Nace’s scenario, that means the backdrop is selected, and he wants those areas to become invisible on the mask. Switch to your layer in the Layers panel, click the existing mask thumbnail to target it, then choose the Brush tool and paint with black. Because you’re painting inside a selection, the brush only affects the selected region. This is where the technique earns its precision. Every stroke is constrained by the luminosity data you pulled from the channel, so even tiny strands of hair stay protected while the backdrop gets cleaned up. Use Command+H to hide the selection marching ants without losing the selection itself.
Step 6: Inverse the Selection to Restore Hair Detail
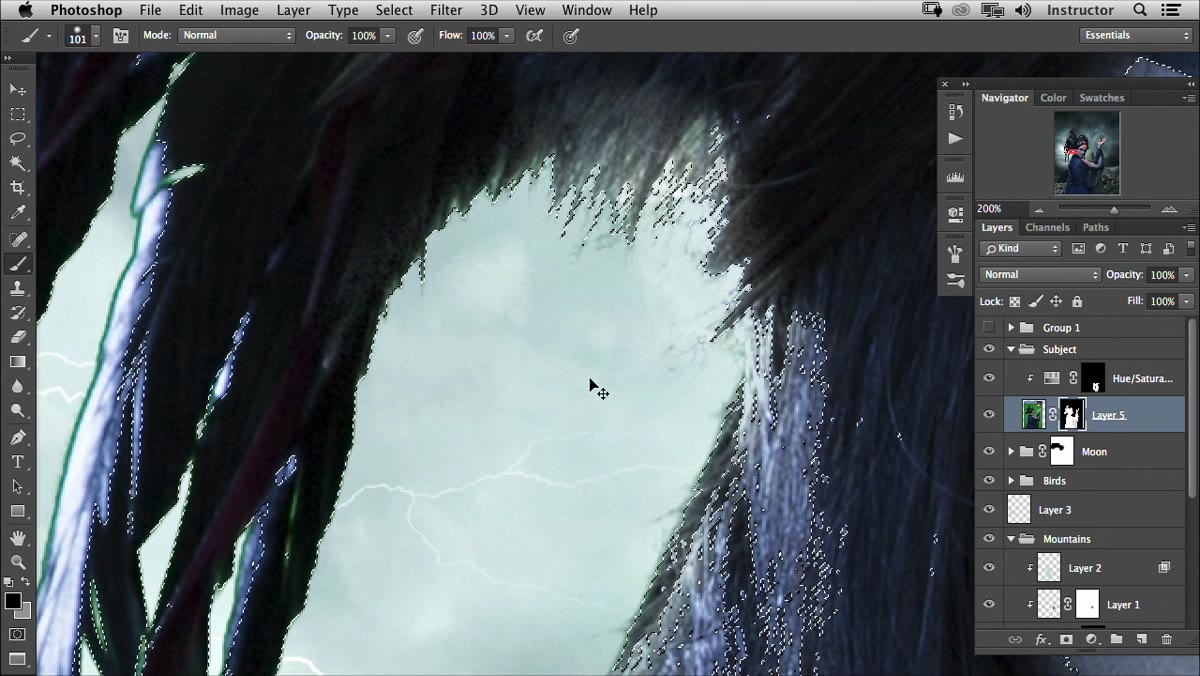 Painting white on a layer mask after inversing the selection to recover hair
If the selection removes too much, pulling hair into the hidden region, inverse it. Shift+Command+I (or Shift+Ctrl+I) flips the selection so that what was protected is now editable and vice versa. Switch your brush to white and paint back on the mask. White reveals, black conceals. This toggle gives you surgical control: you can add back individual strands, recover detail in a section that went too dark, and work through the edge without touching the rest of the image. Nace demonstrates this recovering the finest hair filaments, the kind that would be completely destroyed by a standard lasso or even a refined edge selection.
Painting white on a layer mask after inversing the selection to recover hair
If the selection removes too much, pulling hair into the hidden region, inverse it. Shift+Command+I (or Shift+Ctrl+I) flips the selection so that what was protected is now editable and vice versa. Switch your brush to white and paint back on the mask. White reveals, black conceals. This toggle gives you surgical control: you can add back individual strands, recover detail in a section that went too dark, and work through the edge without touching the rest of the image. Nace demonstrates this recovering the finest hair filaments, the kind that would be completely destroyed by a standard lasso or even a refined edge selection.
Step 7: Fix the Color Fringe with a Targeted Adjustment or Color Layer
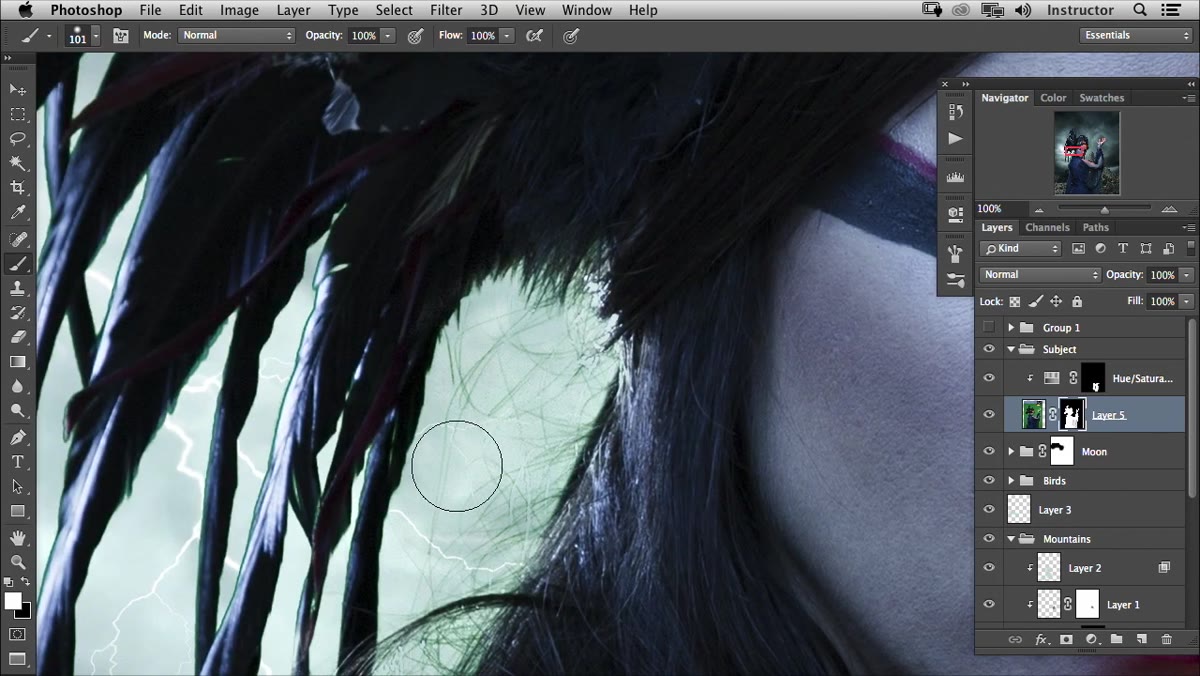 A new layer set to Color blend mode used to repaint the hair edge color
Channel-based selections are excellent for luminosity but they can carry over green or blue fringing from a colored backdrop. Nace addresses this two ways. The first is a Hue/Saturation adjustment layer targeting the fringe color and shifting its hue to match the subject’s natural tone. The second, more precise option: create a new empty layer above the subject, set its blend mode to Color, sample the correct hair color with the eyedropper, and paint directly over the fringe area. The Color blend mode changes only hue and saturation without affecting luminosity, so you’re correcting the cast without flattening the texture.
A new layer set to Color blend mode used to repaint the hair edge color
Channel-based selections are excellent for luminosity but they can carry over green or blue fringing from a colored backdrop. Nace addresses this two ways. The first is a Hue/Saturation adjustment layer targeting the fringe color and shifting its hue to match the subject’s natural tone. The second, more precise option: create a new empty layer above the subject, set its blend mode to Color, sample the correct hair color with the eyedropper, and paint directly over the fringe area. The Color blend mode changes only hue and saturation without affecting luminosity, so you’re correcting the cast without flattening the texture.
What I’d Add From My Own Work
The channel mask approach Nace demonstrates is almost always my starting point when I’m compositing a subject against a replaced sky or a painted environment. But one thing I’ve learned from book cover work, where the printer will expose every artifact, is to check your mask at 200 to 400 percent zoom against a solid neutral gray background before you call it done. I keep a gray fill layer in a dedicated “mask check” group that I toggle on during review. Fringes you’d never catch against the final background become obvious against gray. The mask you think is clean often isn’t. That extra five minutes of checking has saved me from a lot of reprints.
The core principle behind this entire tutorial is one worth holding onto: your image already contains the selection data you need. The channels are a map of the light in your scene, and once you know how to read them, you stop fighting the software and start working with what’s already there.
Watch the full tutorial on YouTube to see Nace walk through the full sequence in real time. Watching his brush strokes and how he reads the mask as he works adds context that no written breakdown can fully replicate.
Comments (1)
I tried this on a client project yesterday and the results were way better than expected.
Leave a Comment