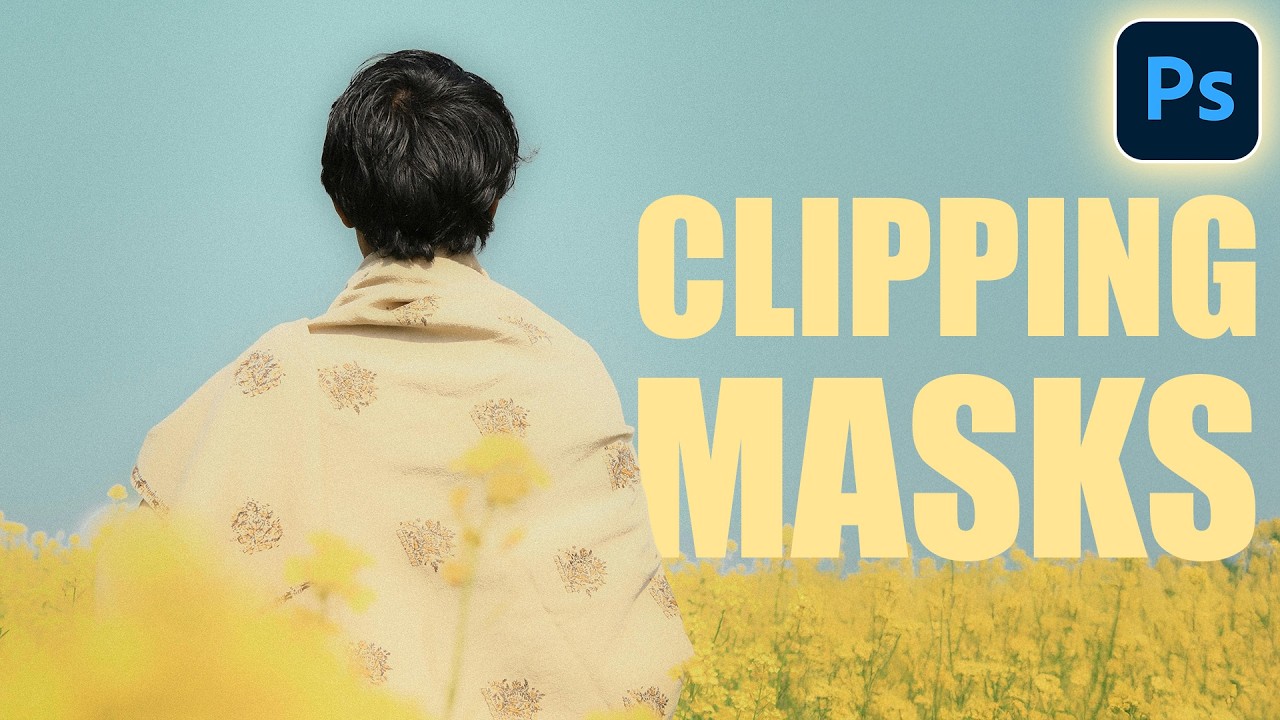
There is a specific kind of frustration that comes from building a text effect in Photoshop and then deciding, halfway through, that you want different wording. If you built that effect using a layer mask derived from your original text selection, you are starting over. I have been there more times than I want to admit, usually late at night with a film score running in the background and a deadline that does not care about my regret. Clipping masks solve this problem cleanly, and once you understand the logic behind them, they become one of those tools you reach for almost automatically.
In this Aaron Nace (PHLEARN) tutorial, Watch the full tutorial on YouTube, the technique is demonstrated using a portrait photograph, bold display text, and two flower images layered inside the letterforms. The example is simple by design. But the underlying principle scales directly to production work, whether you are building a movie poster title treatment, a book cover typographic element, or any composite where imagery needs to be contained within a shape that might still change.
What makes clipping masks worth understanding at a deeper level is the non-destructive relationship they create between layers. The base layer defines the visible boundary. Every layer clipped to it inherits that boundary automatically. Change the base, and everything above it updates without any manual rework. That is not a small thing when a client asks for a revision at 11pm.
Step 1: Set Up Your Base Image and Add Bold Text
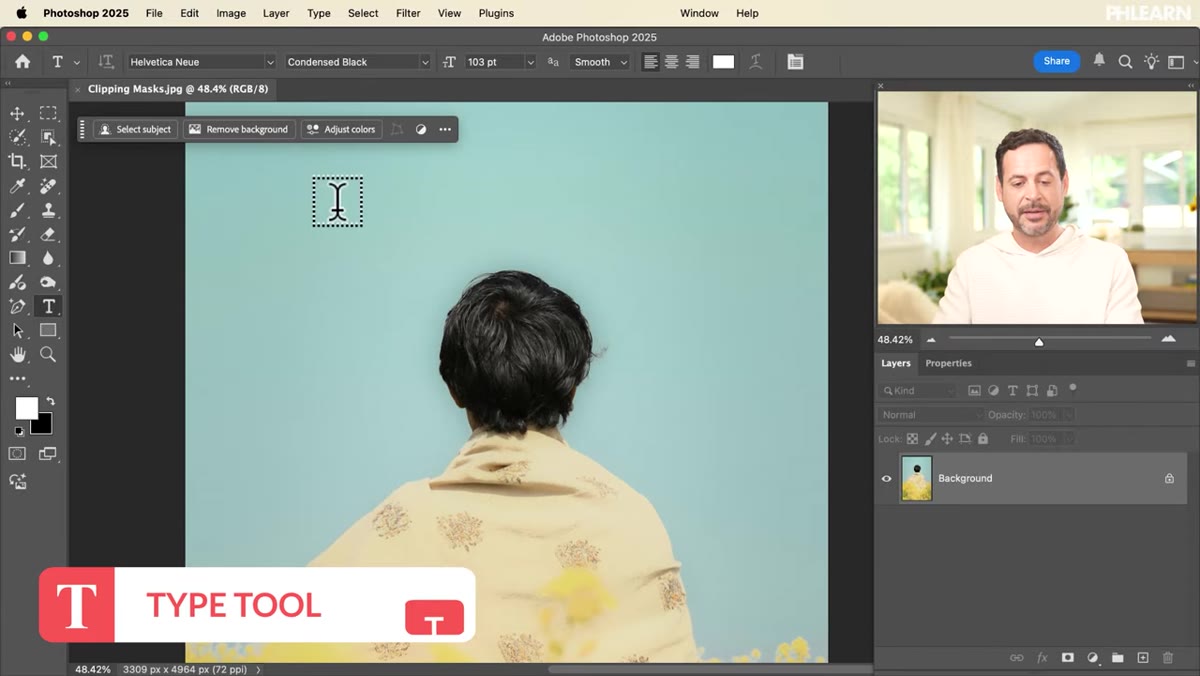 Type tool active, large bold text being placed over portrait
Start with your background image open in Photoshop. Press T to activate the Type tool, click where you want your text to appear, and type your word. The font choice here is not arbitrary. Use something with thick, heavy letterforms, a bold serif or a chunky display sans-serif. Thin fonts will swallow your imagery and defeat the purpose. Scale the text up significantly using the contextual taskbar at the bottom of the screen. You want letterforms large enough that a full photograph can live comfortably inside them.
Type tool active, large bold text being placed over portrait
Start with your background image open in Photoshop. Press T to activate the Type tool, click where you want your text to appear, and type your word. The font choice here is not arbitrary. Use something with thick, heavy letterforms, a bold serif or a chunky display sans-serif. Thin fonts will swallow your imagery and defeat the purpose. Scale the text up significantly using the contextual taskbar at the bottom of the screen. You want letterforms large enough that a full photograph can live comfortably inside them.
Once the text is sized, press Ctrl+A (Windows) or Cmd+A (Mac) to select the entire canvas, switch to the Move tool with V, and use the alignment options in the toolbar to center the text both horizontally and vertically, or just horizontally if your composition calls for it. Getting this positioned correctly before you start stacking layers saves you repositioning work later.
Step 2: Import Your Fill Images
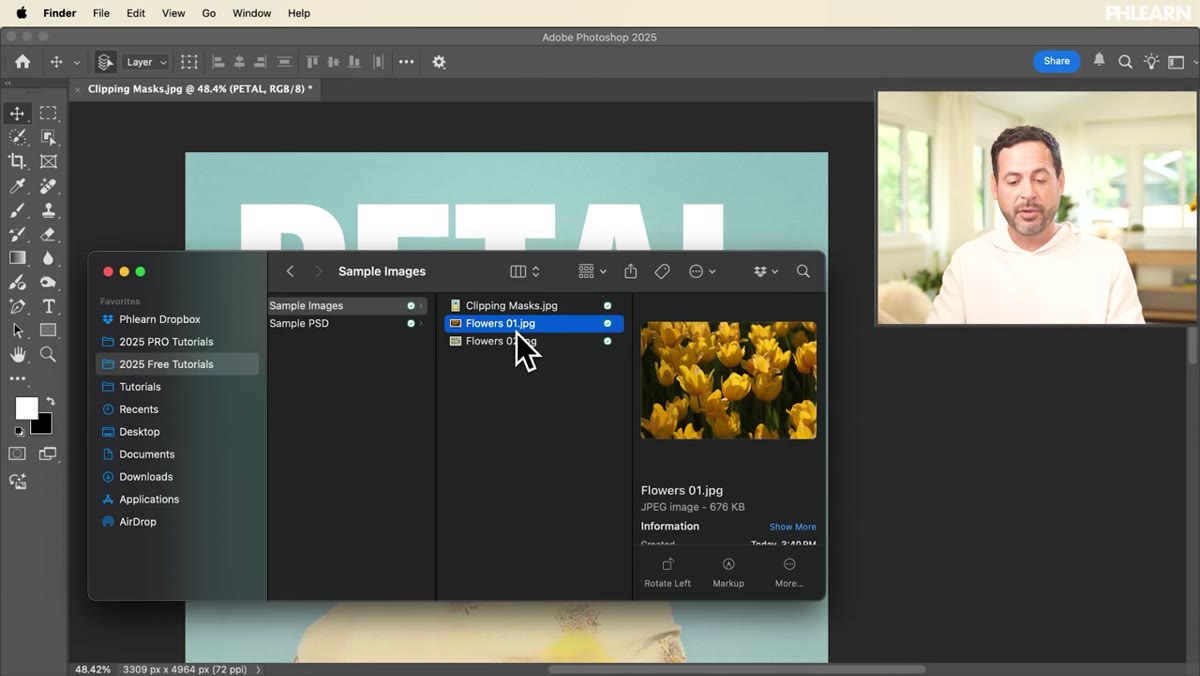 Two flower images being dragged from Finder into Photoshop
With your text layer in place, bring in the images you want to use as fill. You can drag them directly from Finder (Mac) or File Explorer (Windows) straight into the Photoshop canvas. If you are importing multiple files at once, hold Ctrl or Cmd while selecting them, then drag the group in together. Photoshop will place each one as a Smart Object, which is actually ideal because it preserves full resolution and lets you scale without degrading quality.
Two flower images being dragged from Finder into Photoshop
With your text layer in place, bring in the images you want to use as fill. You can drag them directly from Finder (Mac) or File Explorer (Windows) straight into the Photoshop canvas. If you are importing multiple files at once, hold Ctrl or Cmd while selecting them, then drag the group in together. Photoshop will place each one as a Smart Object, which is actually ideal because it preserves full resolution and lets you scale without degrading quality.
Press Enter after each placement to confirm it. Do not worry about sizing or positioning them precisely yet. At this stage, just get them into the layer stack. Toggle their visibility off using the eye icon so your canvas stays readable while you build the clipping structure.
Step 3: Understand the Layer Order Before You Clip
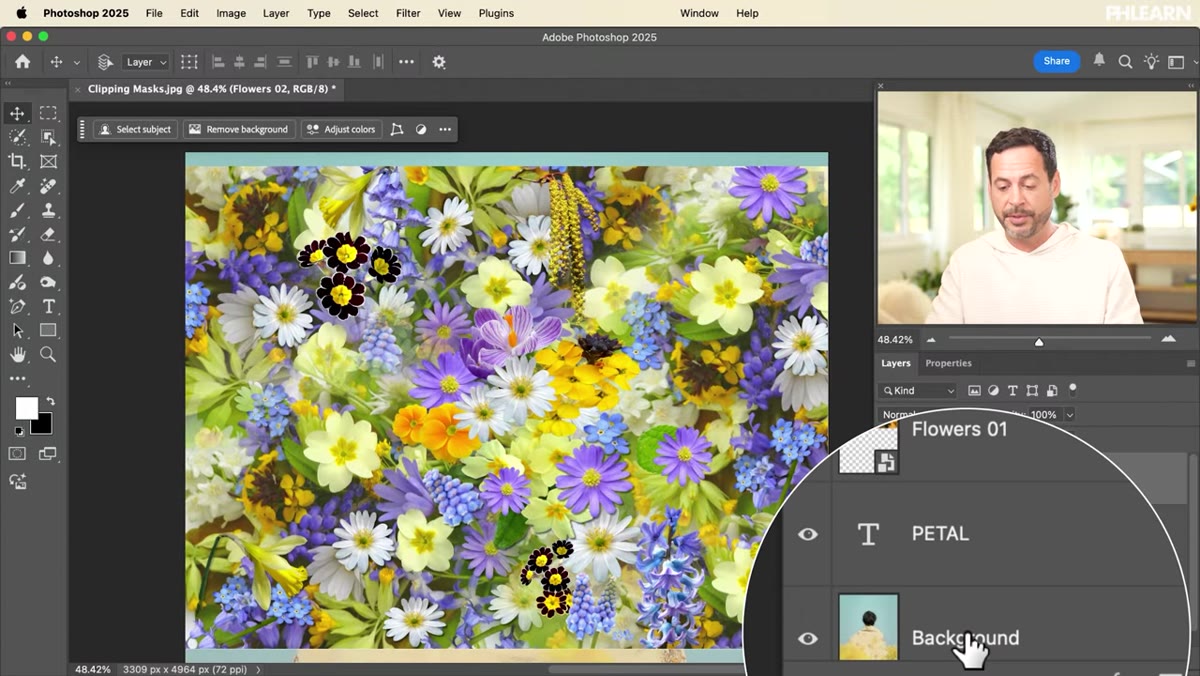 Layer panel showing background, text layer, and two flower layers stacked above
Before applying any clipping masks, look at your layer panel and confirm the order. From bottom to top, you should have your background photograph, your text layer, and then your fill images above that. This order is not negotiable. The clipping mask system works by having upper layers clip downward to the first non-clipped layer beneath them. If your text layer is sitting above your fill images, the clipping will not work as expected.
Layer panel showing background, text layer, and two flower layers stacked above
Before applying any clipping masks, look at your layer panel and confirm the order. From bottom to top, you should have your background photograph, your text layer, and then your fill images above that. This order is not negotiable. The clipping mask system works by having upper layers clip downward to the first non-clipped layer beneath them. If your text layer is sitting above your fill images, the clipping will not work as expected.
Think of the text layer as the stencil. Everything you stack above it can be clipped to show only through that stencil’s shape. The background layer beneath it is unaffected and remains fully visible. Getting this stack right before you start clipping prevents confusion about why a layer is or is not appearing where you expect.
Step 4: Apply the Clipping Mask
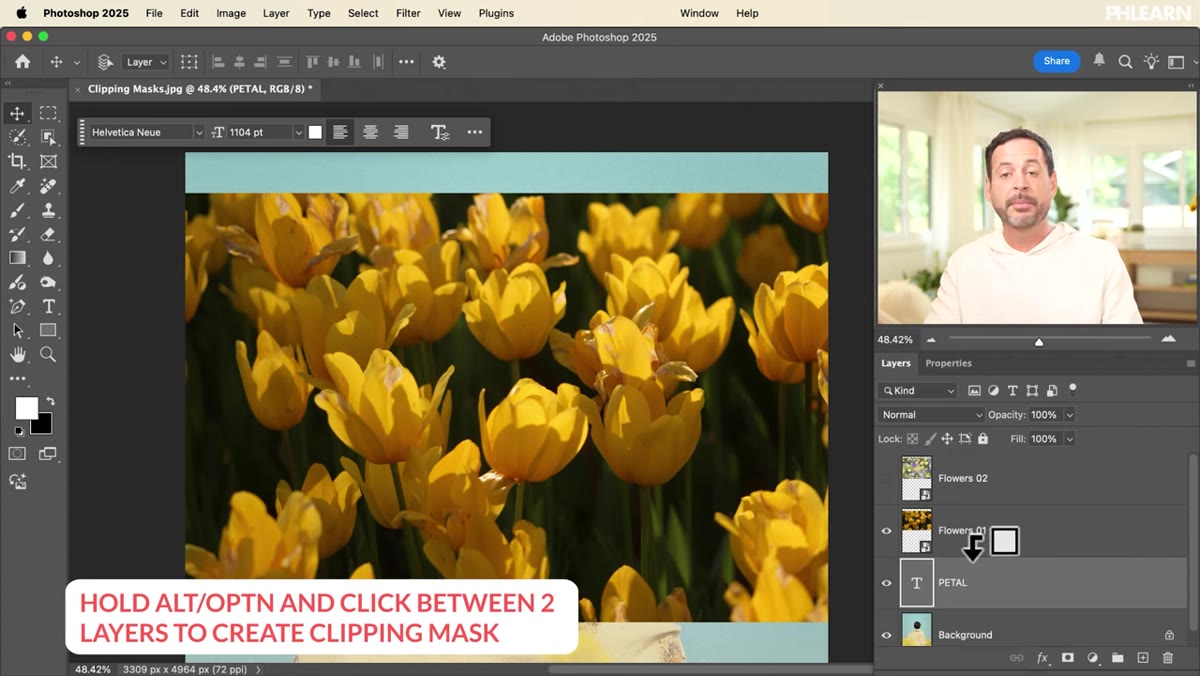 Alt/Option hover between layers showing down-arrow icon before clicking
Select the first fill image layer in the panel. Hold Alt (Windows) or Option (Mac) and hover your cursor over the line between that layer and the text layer directly below it. You will see the cursor change to a small icon showing a downward arrow with a box. Click once. The fill layer snaps to the right in the panel, showing a small arrow indicating it is now clipped to the layer beneath it.
Alt/Option hover between layers showing down-arrow icon before clicking
Select the first fill image layer in the panel. Hold Alt (Windows) or Option (Mac) and hover your cursor over the line between that layer and the text layer directly below it. You will see the cursor change to a small icon showing a downward arrow with a box. Click once. The fill layer snaps to the right in the panel, showing a small arrow indicating it is now clipped to the layer beneath it.
That fill image is now visible only where your text layer has visible pixels. The rest of the canvas masks it completely. If you want to do this through the menu instead, go to Layer, then choose Create Clipping Mask. To remove it, go back to Layer and choose Release Clipping Mask. The keyboard shortcut, Option+Cmd+G on Mac or Alt+Ctrl+G on Windows, is worth memorizing if you plan to use this technique regularly.
Step 5: Clip Additional Layers to the Same Base
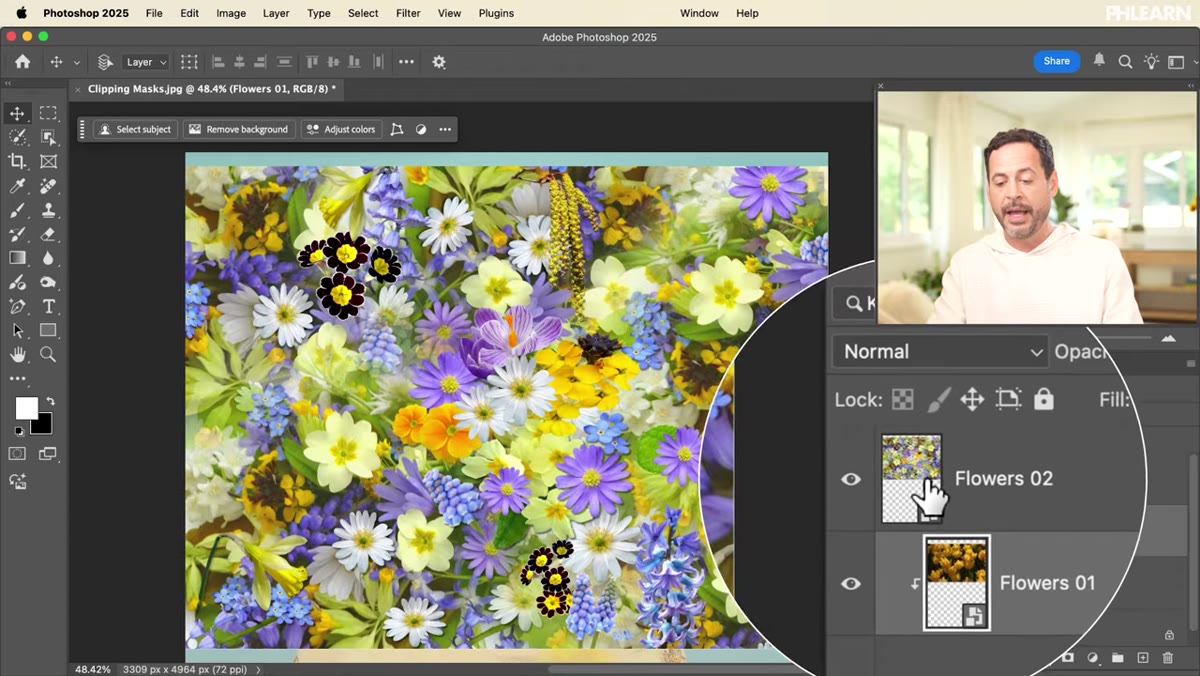 Second flower layer being alt-clicked to clip, both images now inside text
Repeat the same Alt/Option click process for your second fill image. You can stack as many clipped layers as you need, and all of them will share the same base boundary defined by the text layer. Each additional clipped layer simply piles on top of the previous one, all constrained by the same stencil.
Second flower layer being alt-clicked to clip, both images now inside text
Repeat the same Alt/Option click process for your second fill image. You can stack as many clipped layers as you need, and all of them will share the same base boundary defined by the text layer. Each additional clipped layer simply piles on top of the previous one, all constrained by the same stencil.
At this point, you can toggle your fill layers back to visible and start seeing the effect take shape. Each flower image appears only within the letterforms, and you have two layers to work with independently, which gives you blending and positioning flexibility.
Step 6: Move and Edit Non-Destructively
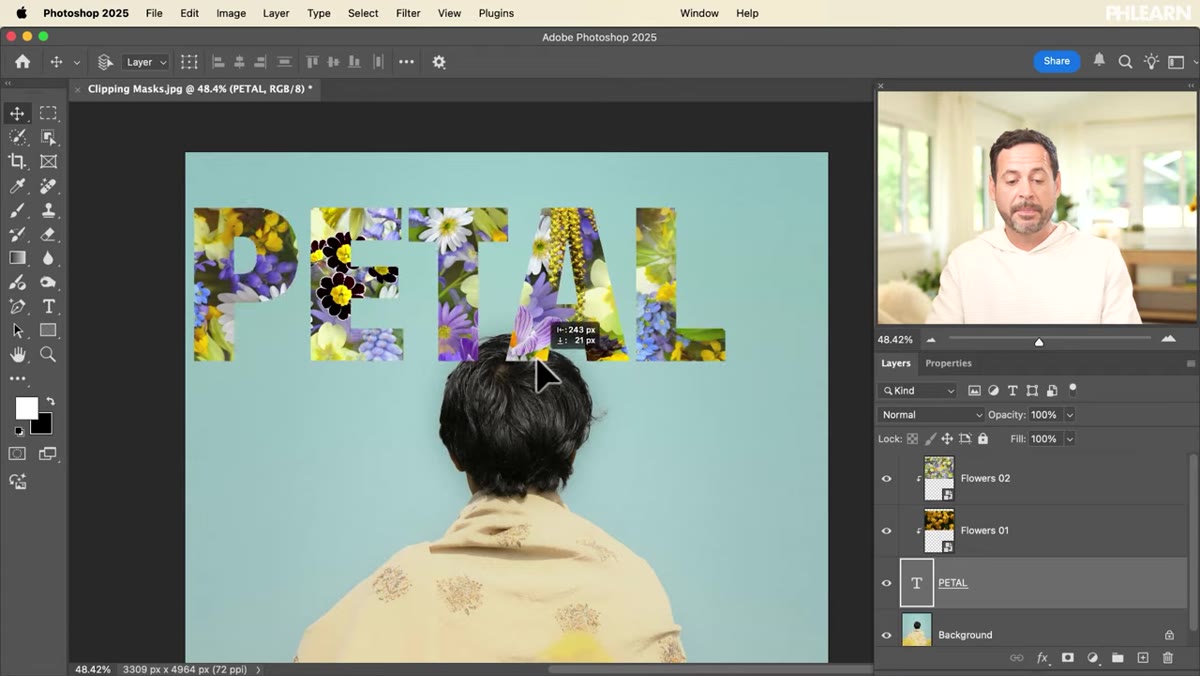 Text layer being moved while clipped image layers stay positioned correctly
Here is where the non-destructive value becomes obvious. Select the text layer and move it around the canvas. Every clipped layer above it travels with the visible boundary, revealing different portions of your fill images as the text shifts. Alternatively, select one of the fill image layers and move it independently. The text stays fixed while the imagery inside it slides around, letting you choose exactly which part of the photograph shows through each letterform.
Text layer being moved while clipped image layers stay positioned correctly
Here is where the non-destructive value becomes obvious. Select the text layer and move it around the canvas. Every clipped layer above it travels with the visible boundary, revealing different portions of your fill images as the text shifts. Alternatively, select one of the fill image layers and move it independently. The text stays fixed while the imagery inside it slides around, letting you choose exactly which part of the photograph shows through each letterform.
And if you double-click the text layer to edit the wording, the clipping masks remain fully intact. Change “petal” to “flower” or anything else, and your fill images are still clipped, still working, requiring no reconstruction.
A Note From Working With This on Real Projects
I want to add something Nace does not cover in this tutorial because it is specific to production work. When I use this technique on title treatments for covers or posters, I almost always add a curves or hue/saturation adjustment layer clipped to the same text base. This lets me shift the color or contrast of the imagery inside the text without touching anything else in the composition. Stack an adjustment layer above your fill images, clip it the same way, and it affects only what is inside the text boundary. It keeps the effect self-contained and makes client color revisions straightforward to execute without disrupting the rest of the composite.
One other practical note: if your text layer has any layer styles applied, like a stroke or a drop shadow, those styles render outside the text pixels but do not extend the clipping mask boundary. The clipping is based on the core character pixels only, so plan your design accordingly.
Clipping masks are one of those Photoshop features that seem minor until you start using them seriously, and then you realize they quietly appear in almost every non-destructive workflow you build. The ability to contain imagery within any shape, then freely edit both the container and the contents without rebuilding anything, is genuinely useful at a professional level, not just for decorative text effects.
Watch the full tutorial on YouTube and follow along with Aaron’s demonstration. Seeing the layer panel update in real time as the clips are applied makes the logic click faster than any written description can.
Comments (2)
This saved me so much time on my last edit. Wish I'd found this sooner.
This is fantastic. I've been recommending this approach to my readers too.
Leave a Comment