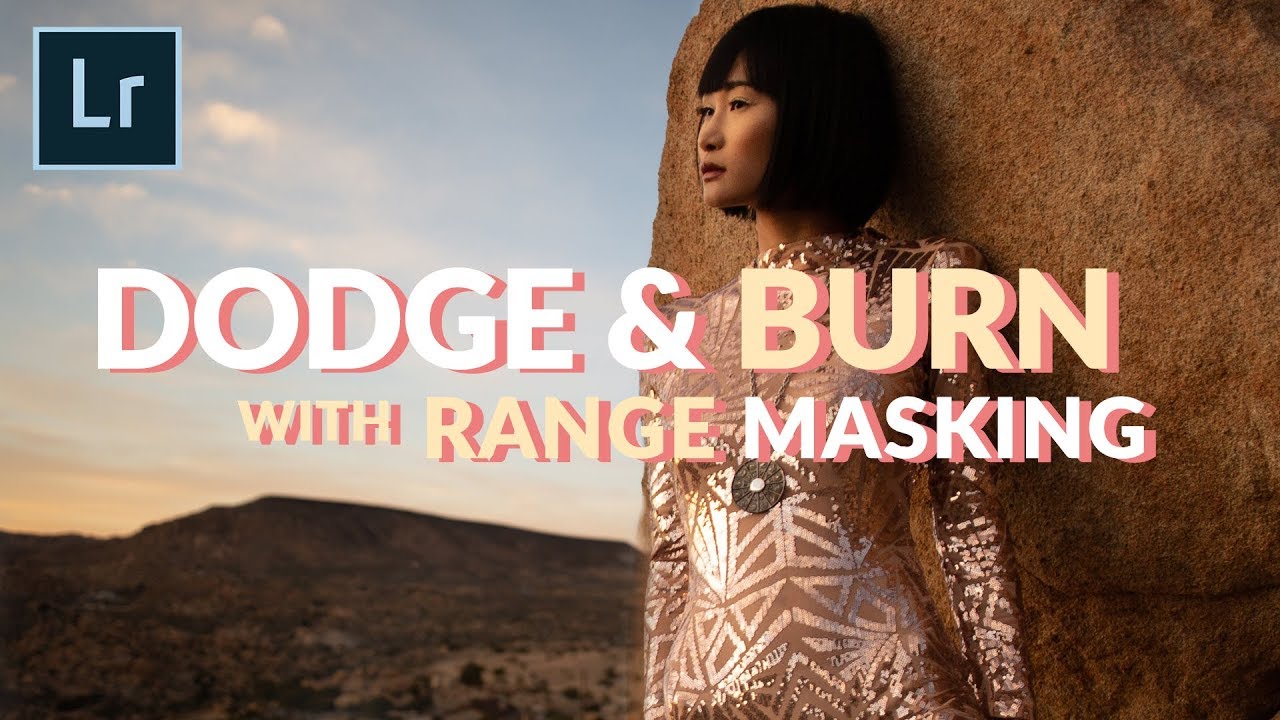
There’s a particular kind of frustration that comes from knowing exactly what you want a light source to do in an image and watching your tools fight you on it. I’ve spent years dodging and burning in Photoshop, layer by layer, mask by mask, and the control is real. But working on a RAW file? That’s a different conversation entirely. When I’m doing early-stage tonal work before a composite even begins, I want to stay as close to the original image data as possible. Pushing a RAW file through heavy localized edits without smart masking is how you end up with blown transitions and adjustments bleeding into tones they have no business touching.
In this Aaron Nace tutorial from PHLEARN (Watch the full tutorial on YouTube), he walks through a technique that I’ve since folded into my own pre-composite prep: using Lightroom’s Luminance Range Masking inside the Adjustment Brush to dodge and burn only the highlights or only the shadows, independently, with a smooth falloff you can dial in yourself. The RAW file stays intact. The edits stay targeted. It’s a cleaner starting point before anything goes into Photoshop.
What makes this worth your time even if you’re primarily a Photoshop person is the specificity. Range masking is not new, but seeing it applied deliberately to dodging and burning, with real attention to flow rates and smoothness values, turns a buried feature into a genuine workflow tool.
Step 1: Open Your Image in the Develop Module
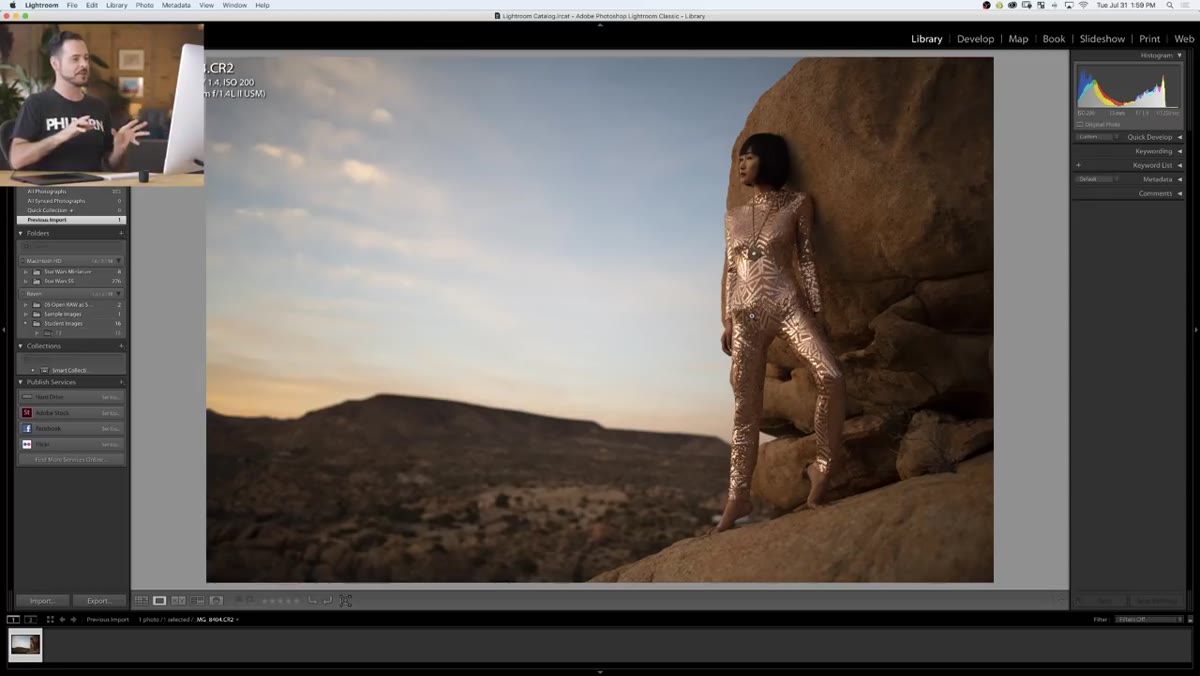 Lightroom Develop module open with a landscape portrait image
Start in Lightroom’s Develop module. Everything that follows happens here. Aaron is working with a RAW landscape portrait shot in California, and you can follow along with your own RAW file or download his from the PHLEARN site. The key thing to understand before you touch anything is why you’re here instead of Photoshop: RAW editing is non-destructive at the data level. You’re not painting on pixels yet. That matters when you’re doing preparatory tonal work for a composite.
Lightroom Develop module open with a landscape portrait image
Start in Lightroom’s Develop module. Everything that follows happens here. Aaron is working with a RAW landscape portrait shot in California, and you can follow along with your own RAW file or download his from the PHLEARN site. The key thing to understand before you touch anything is why you’re here instead of Photoshop: RAW editing is non-destructive at the data level. You’re not painting on pixels yet. That matters when you’re doing preparatory tonal work for a composite.
Step 2: Select the Adjustment Brush
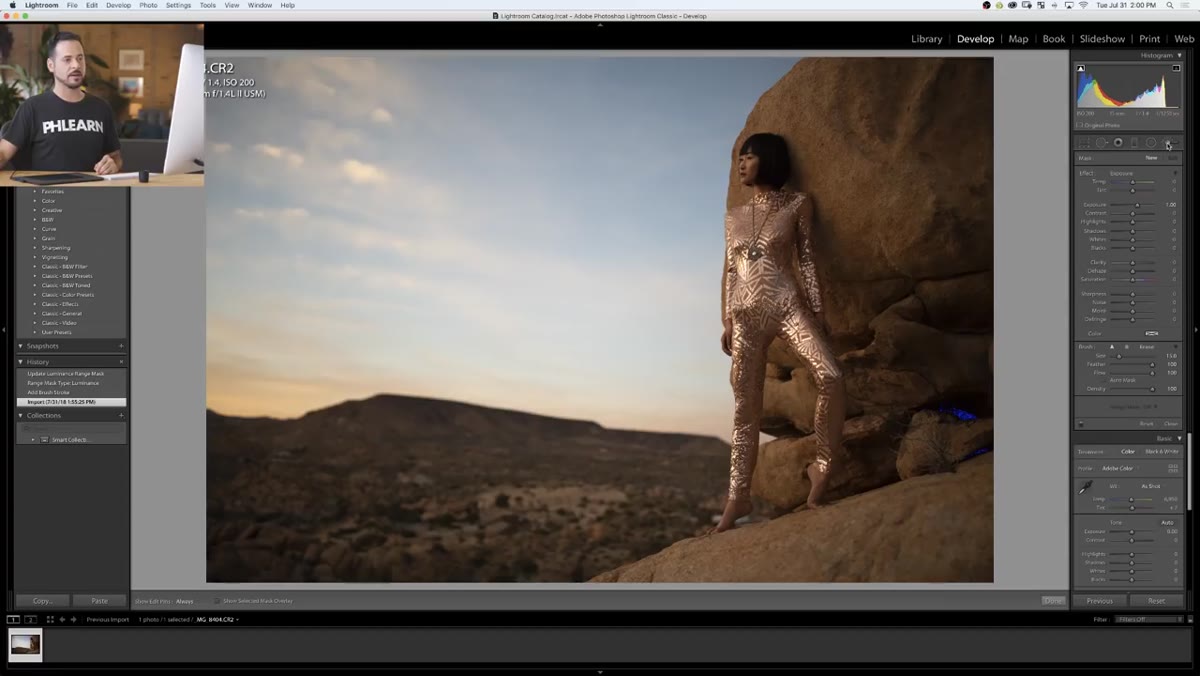 Adjustment Brush tool selected in the local adjustments panel
In the Develop module’s local adjustments panel, you’ll see three tools: the Graduated Filter, the Radial Filter, and the Adjustment Brush. Select the Adjustment Brush. This is the tool that allows you to hand-paint an affected region onto your image, which you’ll then combine with the luminance mask in a later step. You can think of the painted area as your “zone of influence” before the range mask narrows it down further.
Adjustment Brush tool selected in the local adjustments panel
In the Develop module’s local adjustments panel, you’ll see three tools: the Graduated Filter, the Radial Filter, and the Adjustment Brush. Select the Adjustment Brush. This is the tool that allows you to hand-paint an affected region onto your image, which you’ll then combine with the luminance mask in a later step. You can think of the painted area as your “zone of influence” before the range mask narrows it down further.
Step 3: Set Your Exposure and Paint Over the Target Area
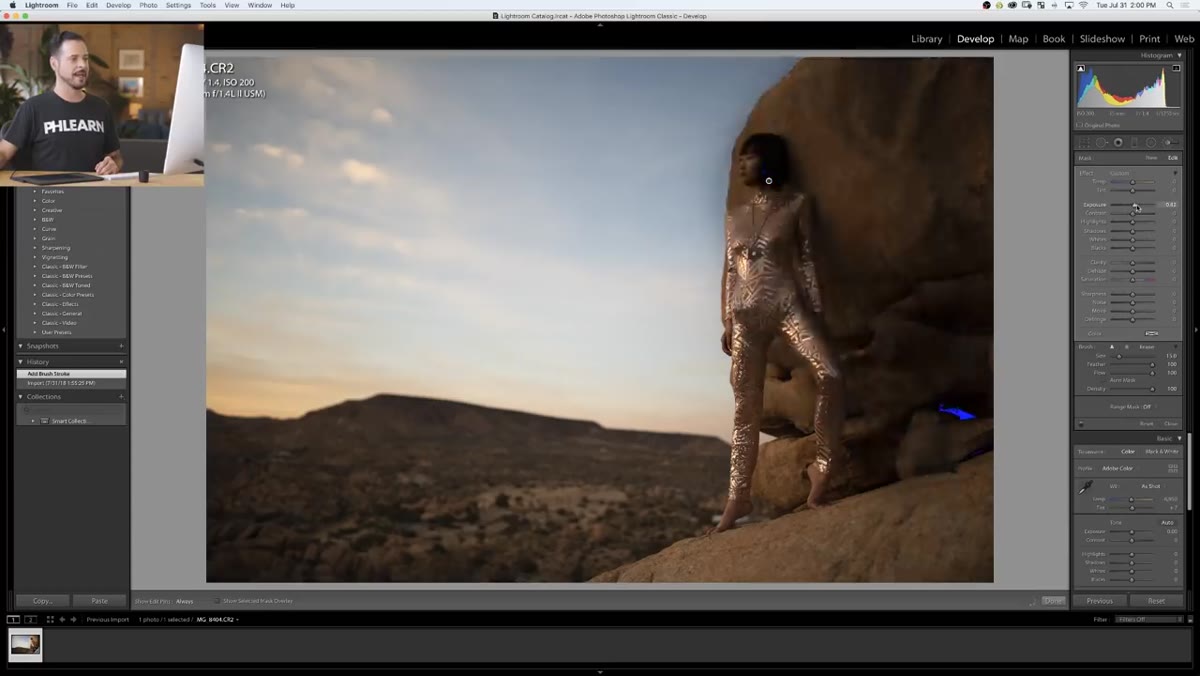 Adjustment Brush exposure slider raised, brush painting over subject
Before painting, nudge your Exposure slider up. You’re simulating a dodge, so you want to see the brightening effect as you work. Aaron keeps the adjustment visible while painting so he can judge coverage by eye. Here’s the part that separates a useful result from a blotchy one: lower your Flow rate. Aaron recommends somewhere between 20 and 40 percent. Painting at full flow is like pressing hard with a pencil on the first pass. A low flow lets you build the effect gradually, which gives you control over intensity without hard edges accumulating in one spot.
Adjustment Brush exposure slider raised, brush painting over subject
Before painting, nudge your Exposure slider up. You’re simulating a dodge, so you want to see the brightening effect as you work. Aaron keeps the adjustment visible while painting so he can judge coverage by eye. Here’s the part that separates a useful result from a blotchy one: lower your Flow rate. Aaron recommends somewhere between 20 and 40 percent. Painting at full flow is like pressing hard with a pencil on the first pass. A low flow lets you build the effect gradually, which gives you control over intensity without hard edges accumulating in one spot.
Paint loosely over the subject area you want to affect. Don’t stress about being precise at the borders yet. The luminance mask is about to do that work for you.
Step 4: Open the Range Mask Options
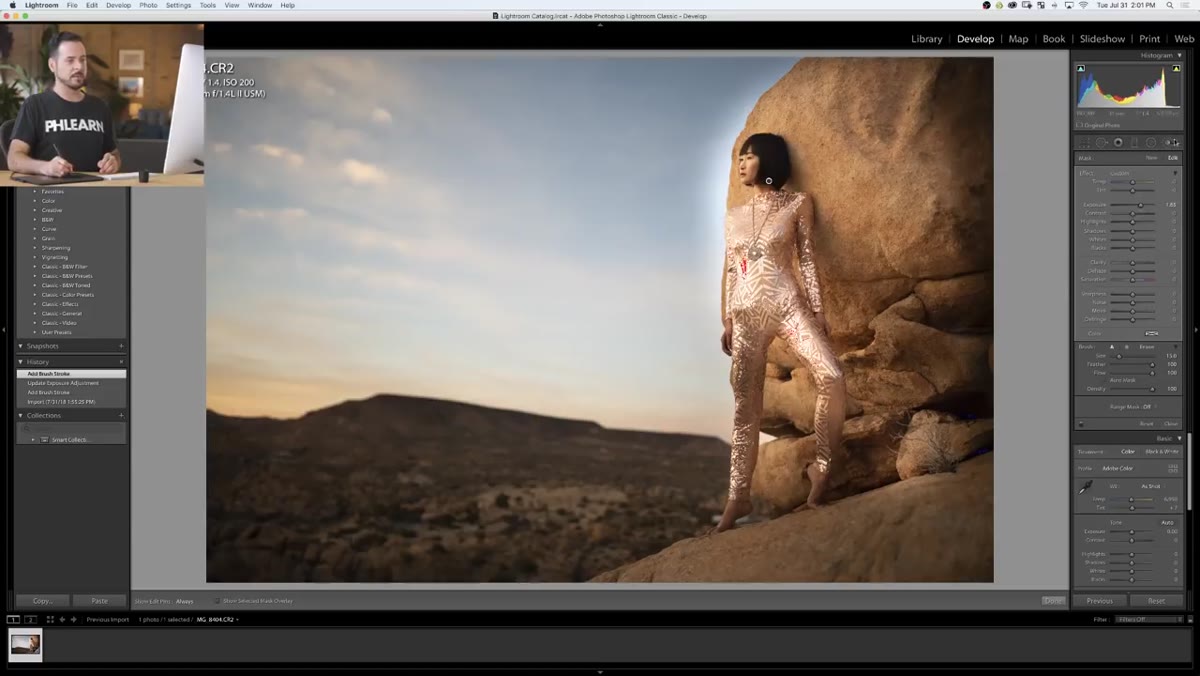 Range Mask dropdown revealed at the bottom of the adjustment panel
Scroll to the bottom of the Adjustment Brush panel and you’ll find the Range Mask dropdown, which defaults to “Off.” Click it. You’ll see two options: Color and Luminance. For dodging and burning, you want Luminance. Color masking is useful for other purposes, but dodging and burning is fundamentally about targeting tonal regions, so luminance is the right axis here. This is the moment the technique stops being a broad paint job and becomes something precise.
Range Mask dropdown revealed at the bottom of the adjustment panel
Scroll to the bottom of the Adjustment Brush panel and you’ll find the Range Mask dropdown, which defaults to “Off.” Click it. You’ll see two options: Color and Luminance. For dodging and burning, you want Luminance. Color masking is useful for other purposes, but dodging and burning is fundamentally about targeting tonal regions, so luminance is the right axis here. This is the moment the technique stops being a broad paint job and becomes something precise.
Step 5: Adjust the Luminance Range Slider
 Luminance Range slider being dragged to isolate highlight tones
Once Luminance is selected, a range slider appears. This slider defines which luminosity values your adjustment will actually be visible on. Drag the left handle inward from the left side and you’ll watch the adjustment fade off the shadow areas of your image, leaving it visible only on the highlights. Drag from the right side if you want the reverse, targeting the shadows instead.
Luminance Range slider being dragged to isolate highlight tones
Once Luminance is selected, a range slider appears. This slider defines which luminosity values your adjustment will actually be visible on. Drag the left handle inward from the left side and you’ll watch the adjustment fade off the shadow areas of your image, leaving it visible only on the highlights. Drag from the right side if you want the reverse, targeting the shadows instead.
Watch your image as you drag. The effect is live. You’re essentially telling Lightroom: “That exposure increase I painted? Only show it where the luminosity falls within this range.” For a dodge on highlights, pull the left handle in until the adjustment sits cleanly on the brighter tones of your subject and disappears from the darker areas underneath.
Step 6: Dial In the Smoothness
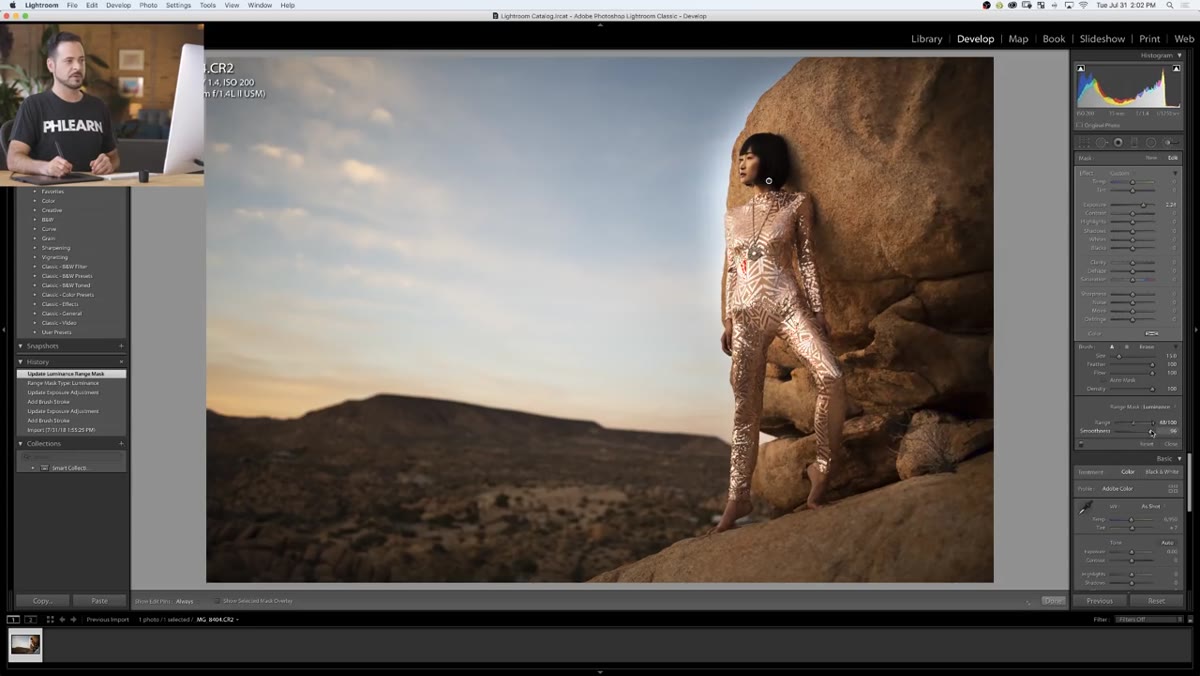 Smoothness slider adjusted below the Luminance Range control
Directly below the Range slider is a Smoothness control. This governs how abruptly the mask transitions at its edges. A low smoothness value creates a hard cutoff between masked and unmasked areas, which can produce visible banding if your tones are complex. Aaron pushes this toward the higher end, and I’d agree. For portrait or figure work especially, a smooth transition reads as natural light. It mimics the gradual way real light falls off across a surface, which is the whole point of dodging and burning in the first place.
Smoothness slider adjusted below the Luminance Range control
Directly below the Range slider is a Smoothness control. This governs how abruptly the mask transitions at its edges. A low smoothness value creates a hard cutoff between masked and unmasked areas, which can produce visible banding if your tones are complex. Aaron pushes this toward the higher end, and I’d agree. For portrait or figure work especially, a smooth transition reads as natural light. It mimics the gradual way real light falls off across a surface, which is the whole point of dodging and burning in the first place.
Set it somewhere between 60 and 80 and compare the before and after by toggling the adjustment off and back on with the switch at the top of the panel.
Step 7: Refine the Painted Area and Repeat as Needed
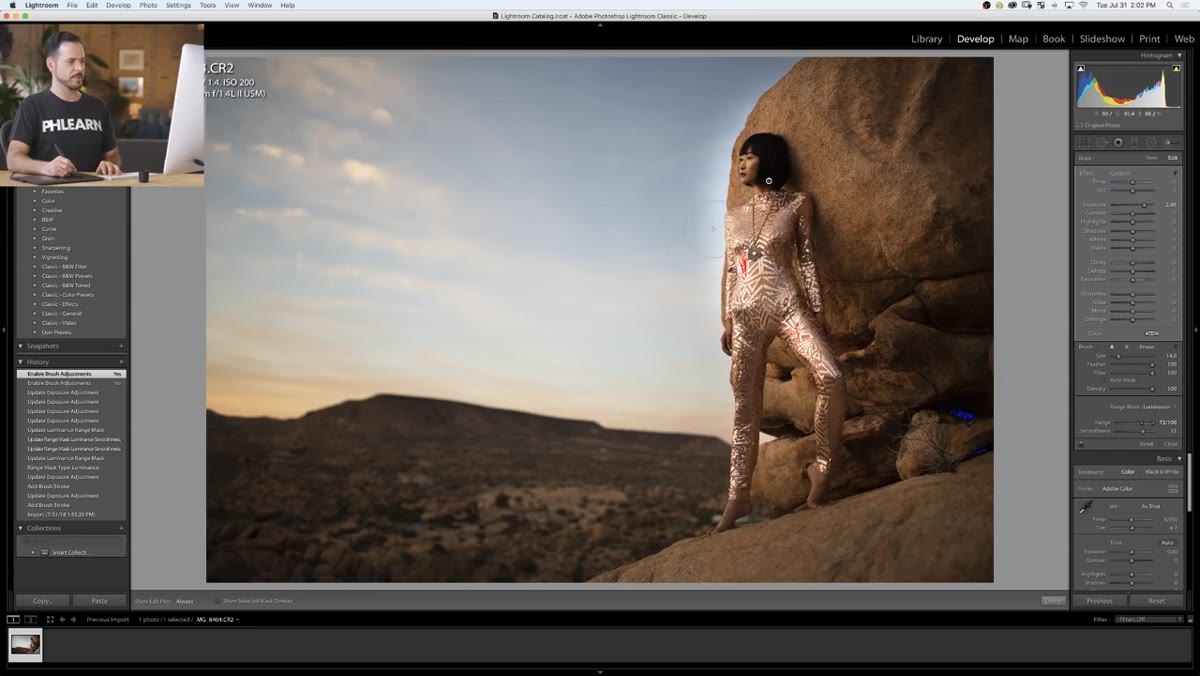 Alt/Option held to subtract from brush mask around background edges
Hold Alt (Windows) or Option (Mac) while painting to subtract from your masked area. Aaron uses this to clean up spots where the brush strayed onto the background or areas he didn’t intend to affect. This is standard Adjustment Brush behavior, but it’s worth flagging because range masking doesn’t forgive sloppy painting entirely. If you painted over a background region that happens to share the same luminosity as your subject’s highlights, the mask will affect both.
Alt/Option held to subtract from brush mask around background edges
Hold Alt (Windows) or Option (Mac) while painting to subtract from your masked area. Aaron uses this to clean up spots where the brush strayed onto the background or areas he didn’t intend to affect. This is standard Adjustment Brush behavior, but it’s worth flagging because range masking doesn’t forgive sloppy painting entirely. If you painted over a background region that happens to share the same luminosity as your subject’s highlights, the mask will affect both.
You can also create multiple Adjustment Brush pins, one for dodging highlights, another for burning shadows, each with its own range mask. That’s where this technique becomes a full tonal sculpting pass rather than a single tweak.
One Thing I’d Add From My Own Work
The flow rate point Aaron makes is something I don’t see emphasized enough in Lightroom tutorials. Most people painting in Lightroom are used to sliders, not brush pressure dynamics, and they paint at 100 percent flow out of habit. For composite prep specifically, I approach this the same way I approach painting light on a digital matte. I’ll make four or five passes at 25 percent flow rather than one pass at full strength. The result has a roundness to it that a single heavy stroke never does. The luminance mask handles the where. The low flow handles the how much. Together they give you something that reads as dimensional rather than corrected.
One practical note: this workflow shines on RAW files. If you’re working on a JPEG or a flattened export, the luminance range will still function, but you’re working with compressed tonal data and the transitions won’t be as clean. Shoot RAW if this kind of preparatory tonal work is part of your process.
The core idea here is simple and worth holding onto: paint broadly, then let the luminance range mask refine where the effect actually lands. It inverts the usual Lightroom logic of trying to paint precisely, and it’s faster and more accurate because of it.
Watch the full tutorial on YouTube and follow along with Aaron’s original RAW file to see every slider move in context.
Comments (2)
Love how you break down complex stuff into manageable steps.
This saved me so much time on my last edit. Wish I'd found this sooner.
Leave a Comment