
Every composite starts with the same anxiety. You have a great subject, a great background, and somewhere between the two sits a selection that refuses to behave. Hair goes wrong. Fingers disappear. The edge between your subject and the original background clings on like it has a personal agenda. I’ve rebuilt selections on professional jobs, movie poster work included, more times than I care to count. Not because the tools weren’t there, but because I hadn’t learned to use the right workspace for the job.
That changed when I went deep on the Select and Mask workspace in Photoshop. Watch the full tutorial on YouTube — Aaron Nace of PHLEARN walks through this workspace with the kind of clarity that only comes from someone who actually uses it. The tutorial is compact, practical, and worth your full attention. What follows is my working breakdown of the technique, expanded with the specifics you can apply immediately.
Before I sketch a composite on paper, I already know which elements are going to be the hardest to cut. Clothing with texture, hands, hair near a busy background. The Select and Mask workspace handles all of that in one place rather than bouncing between channels, layer masks, and the old Refine Edge dialog. Once you understand the logic of how each tool inside it thinks, the whole process becomes faster and more predictable.
Step 1: Open Select and Mask From Your Background Layer
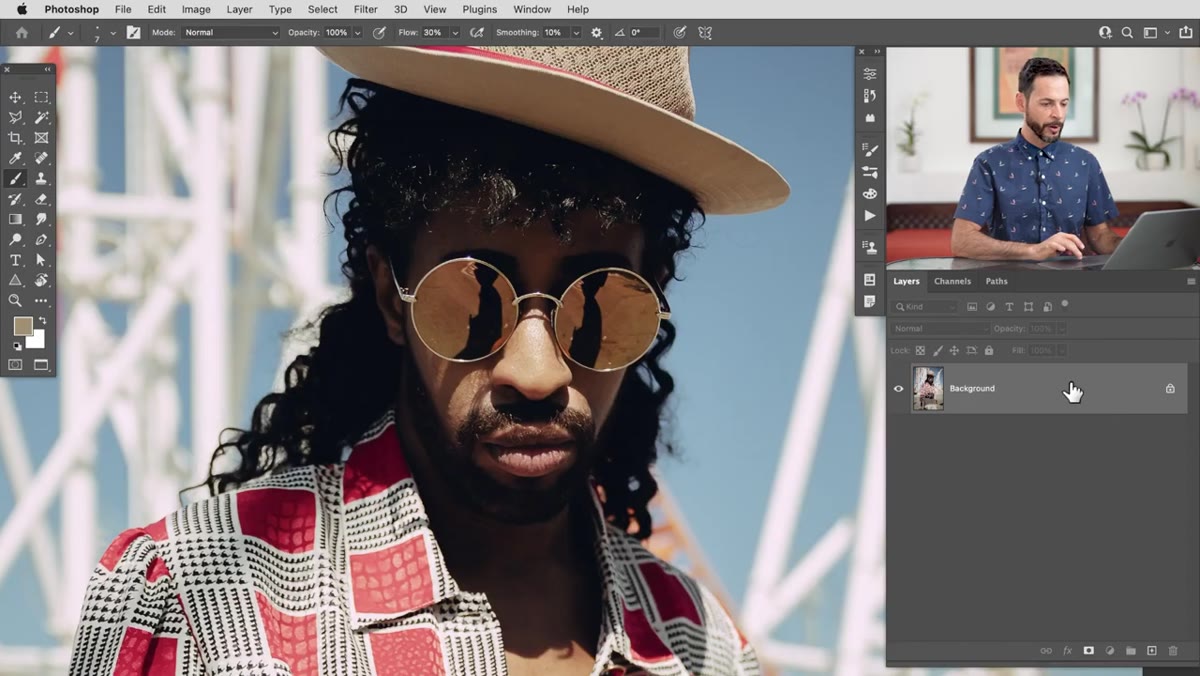 Navigating to Select and Mask from the Select menu
Start by clicking your background layer in the Layers panel. From the top menu, go to Select, then choose Select and Mask. The workspace will open and at first it may look like nothing has happened. That’s normal. You haven’t made a selection yet. What you’re looking at is just the interface waiting for you to begin.
Navigating to Select and Mask from the Select menu
Start by clicking your background layer in the Layers panel. From the top menu, go to Select, then choose Select and Mask. The workspace will open and at first it may look like nothing has happened. That’s normal. You haven’t made a selection yet. What you’re looking at is just the interface waiting for you to begin.
Step 2: Run Select Subject to Build Your Starting Point
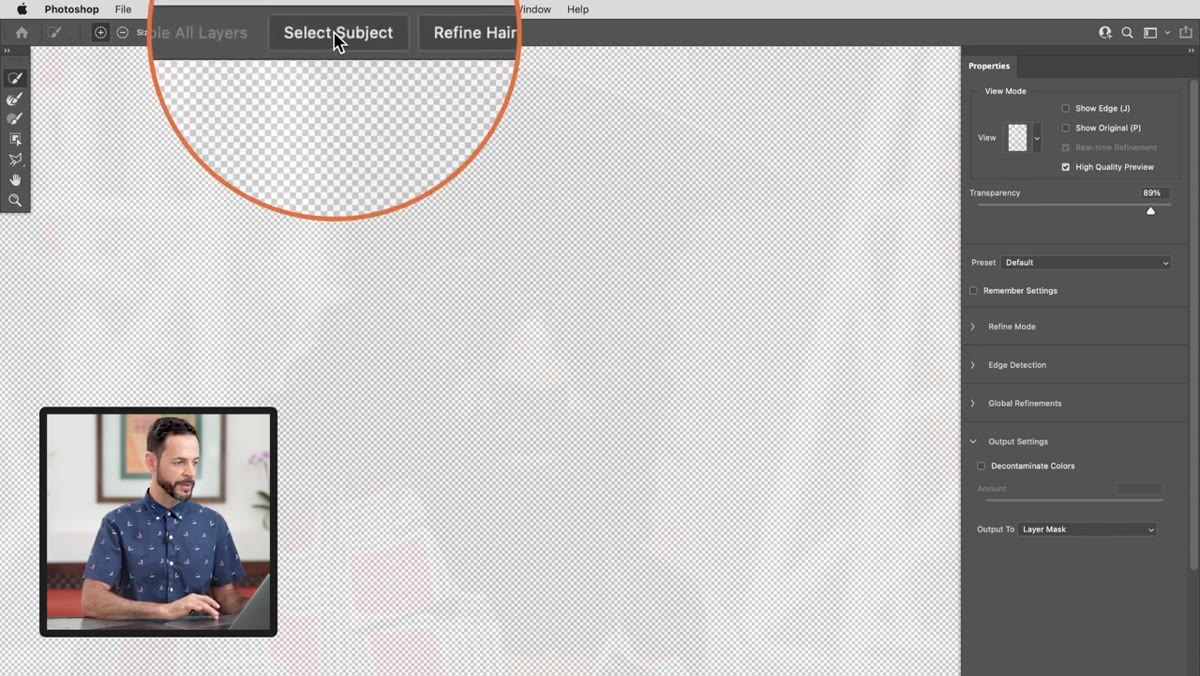 Select Subject button clicked, initial subject selection appears
At the top of the Select and Mask workspace, you’ll find the Select Subject button. Click it. Photoshop’s content-aware engine analyzes the image and makes its best attempt at isolating your subject from the background. On a reasonably clean photograph with a defined subject, the result will be surprisingly solid right away. It won’t be perfect. It doesn’t need to be. This is your rough draft, and the rest of the workflow is about refining it, not starting from scratch.
Select Subject button clicked, initial subject selection appears
At the top of the Select and Mask workspace, you’ll find the Select Subject button. Click it. Photoshop’s content-aware engine analyzes the image and makes its best attempt at isolating your subject from the background. On a reasonably clean photograph with a defined subject, the result will be surprisingly solid right away. It won’t be perfect. It doesn’t need to be. This is your rough draft, and the rest of the workflow is about refining it, not starting from scratch.
Step 3: Set Your View Mode to Understand What You’re Working With
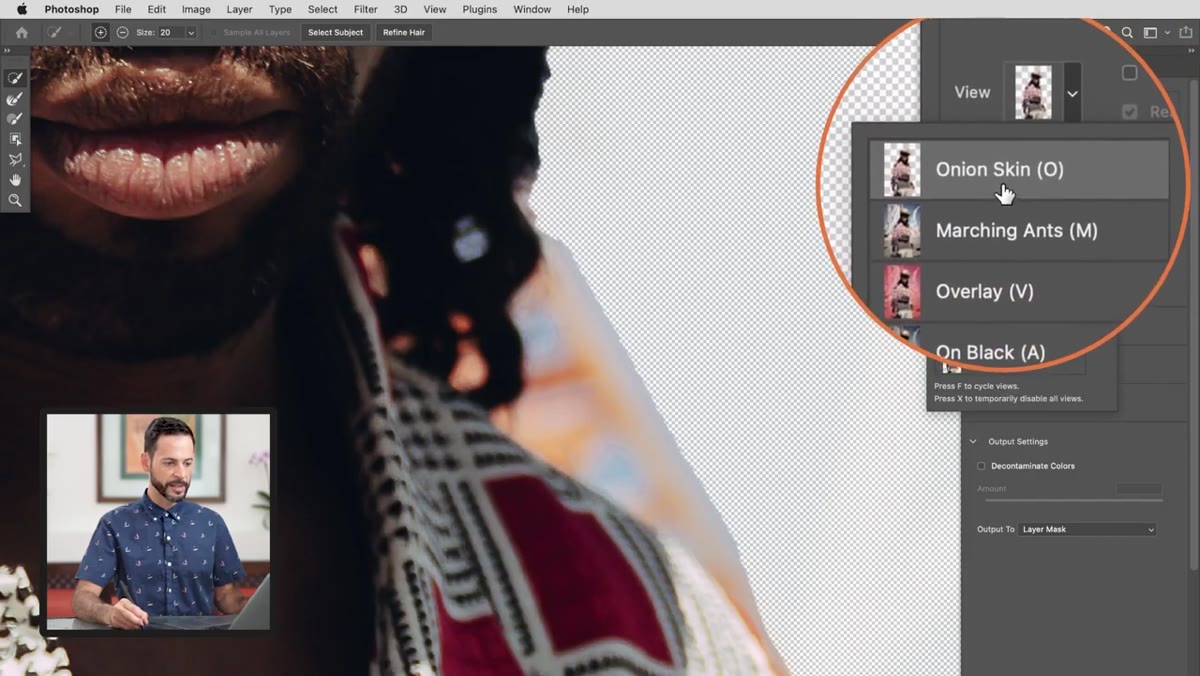 View mode dropdown open, Onion Skin selected in Properties panel
In the Properties panel on the right side of the workspace, you’ll see a View dropdown near the top. This controls how the selection is displayed on screen. Options include Marching Ants, Overlay, On Black, On White, and Onion Skin among others. None of these choices change the actual selection. They only change how you perceive it while you work. Aaron recommends starting with Onion Skin, and I agree. Once you’re in Onion Skin mode, drag the Transparency slider to blend between your subject and the background. Dial it to a point where you can clearly see what’s included in the selection and what isn’t. This preview is your primary feedback loop for everything that follows.
View mode dropdown open, Onion Skin selected in Properties panel
In the Properties panel on the right side of the workspace, you’ll see a View dropdown near the top. This controls how the selection is displayed on screen. Options include Marching Ants, Overlay, On Black, On White, and Onion Skin among others. None of these choices change the actual selection. They only change how you perceive it while you work. Aaron recommends starting with Onion Skin, and I agree. Once you’re in Onion Skin mode, drag the Transparency slider to blend between your subject and the background. Dial it to a point where you can clearly see what’s included in the selection and what isn’t. This preview is your primary feedback loop for everything that follows.
Step 4: Use the Quick Selection Tool to Add and Subtract Large Areas
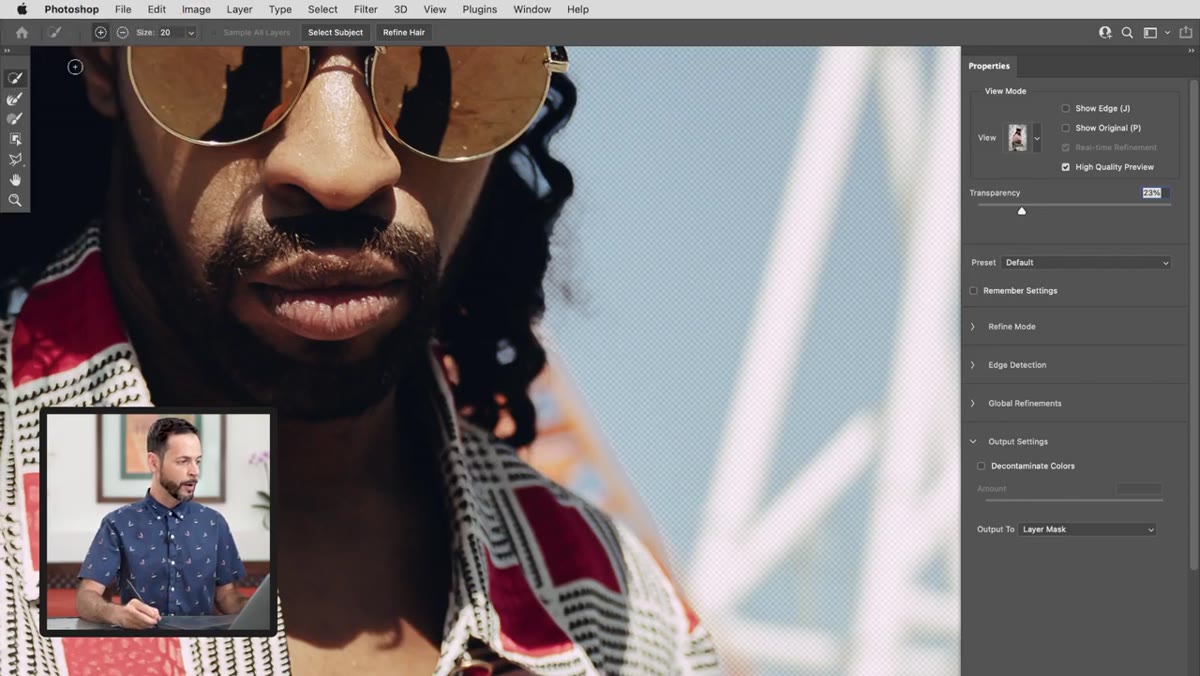 Painting over background with Subtract mode active, background area removed
The Quick Selection Tool in the left toolbar is your workhorse for the bulk of the cleanup. At the top of the workspace you’ll see plus and minus icons. These switch the tool between Add mode and Subtract mode. Start in Subtract mode and paint over any background areas that crept into your selection. The tool is context-aware, meaning it reads color and edge information from the surrounding pixels, not just what’s directly under your brush. A single click on a patch of background color can remove all similarly colored pixels in that region. When you accidentally lose part of your subject, switch to Add mode and paint it back in. Work at a medium brush size first, then tighten the brush for detail areas like fingers or the edge of clothing.
Painting over background with Subtract mode active, background area removed
The Quick Selection Tool in the left toolbar is your workhorse for the bulk of the cleanup. At the top of the workspace you’ll see plus and minus icons. These switch the tool between Add mode and Subtract mode. Start in Subtract mode and paint over any background areas that crept into your selection. The tool is context-aware, meaning it reads color and edge information from the surrounding pixels, not just what’s directly under your brush. A single click on a patch of background color can remove all similarly colored pixels in that region. When you accidentally lose part of your subject, switch to Add mode and paint it back in. Work at a medium brush size first, then tighten the brush for detail areas like fingers or the edge of clothing.
Step 5: Work Through Problem Areas Methodically
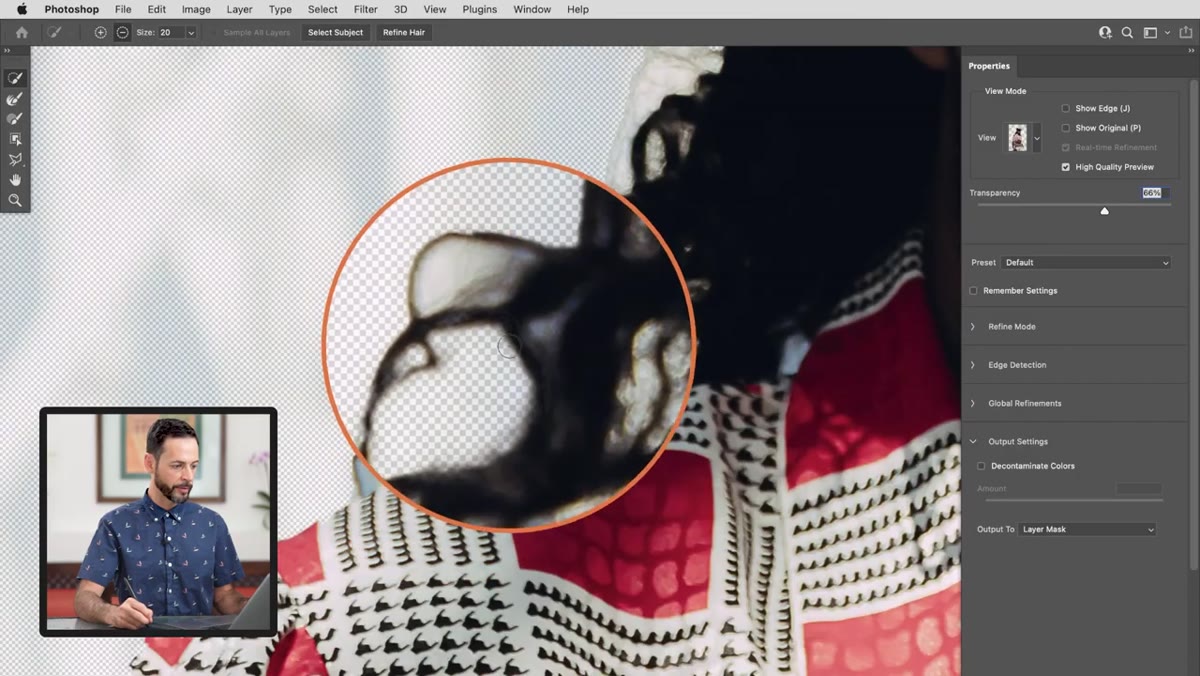 Painting between fingers with Subtract mode to remove background gaps
The spaces between fingers are a reliable trouble spot in any figure cutout. Zoom into these areas and use Subtract mode to remove the background peeking through the gaps. If the tool overcorrects and pulls out too much of the hand, switch to Add mode and paint the lost area back. The balance between add and subtract is iterative. Don’t expect one pass to finish it. Move around the full edge of the subject at this zoom level, checking the Onion Skin preview as you go. Pay particular attention to anywhere the background shares a similar tone with the subject. The tool can struggle there and may need more guidance from you.
Painting between fingers with Subtract mode to remove background gaps
The spaces between fingers are a reliable trouble spot in any figure cutout. Zoom into these areas and use Subtract mode to remove the background peeking through the gaps. If the tool overcorrects and pulls out too much of the hand, switch to Add mode and paint the lost area back. The balance between add and subtract is iterative. Don’t expect one pass to finish it. Move around the full edge of the subject at this zoom level, checking the Onion Skin preview as you go. Pay particular attention to anywhere the background shares a similar tone with the subject. The tool can struggle there and may need more guidance from you.
Step 6: Output Your Refined Selection as a Layer Mask
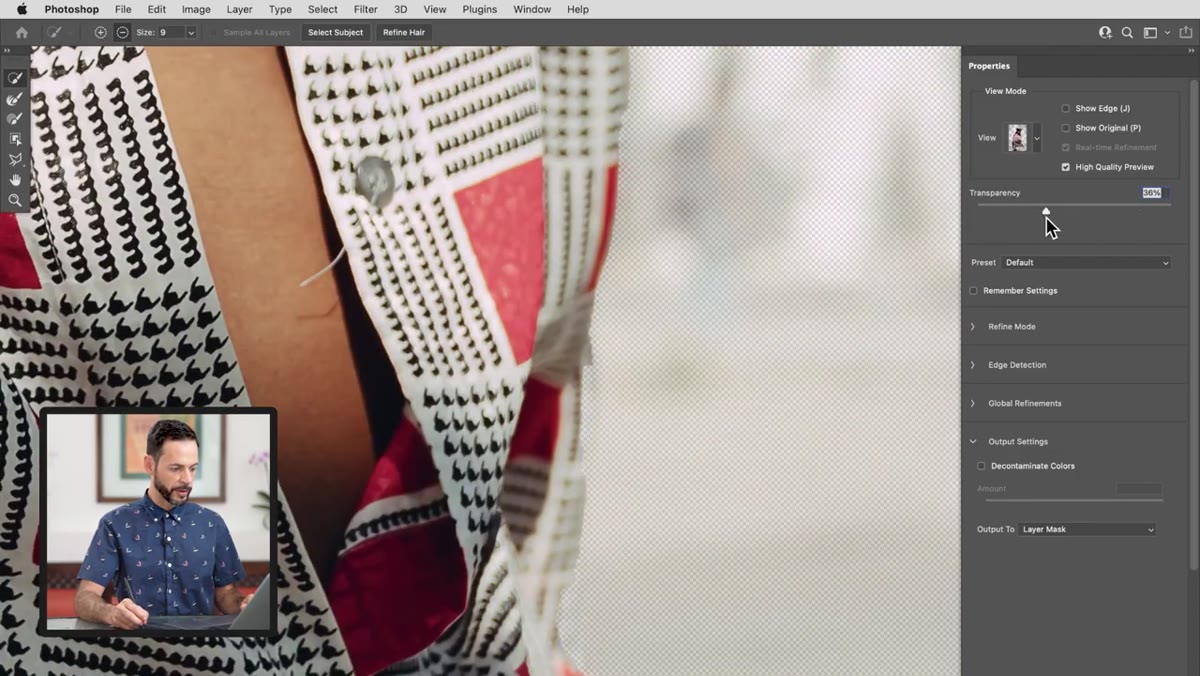 Output To dropdown in Properties panel, Layer Mask option visible
Once the selection looks clean in your preview, go to the bottom of the Properties panel and find the Output To dropdown. For most compositing workflows, Layer Mask is the correct choice. This converts your refined selection into a non-destructive mask attached to the layer, which means you can continue to adjust it after you leave the workspace. Click OK and Photoshop applies the mask. From here you can paint directly on the mask in black or white to clean up anything the workspace missed.
Output To dropdown in Properties panel, Layer Mask option visible
Once the selection looks clean in your preview, go to the bottom of the Properties panel and find the Output To dropdown. For most compositing workflows, Layer Mask is the correct choice. This converts your refined selection into a non-destructive mask attached to the layer, which means you can continue to adjust it after you leave the workspace. Click OK and Photoshop applies the mask. From here you can paint directly on the mask in black or white to clean up anything the workspace missed.
What I Add to This Workflow on Paid Projects
The Select and Mask workspace gets you 90 percent of the way there fast. The remaining 10 percent is where I spend most of my time on professional work. After I apply the layer mask, I zoom to 100 percent and go around the full edge of the subject looking for fringing. That’s the halo of color from the original background that clings to the edge pixels. I deal with it by painting on the mask with a hard, small brush, or by using the Minimum filter on the mask to contract the edge by a pixel or two. On composites where the lighting conditions change dramatically between the subject and the new background, I also use a Curves adjustment clipped to the subject layer to nudge the edge tones into alignment. The selection is only as useful as what you do with it after the workspace closes.
The single most important thing Aaron’s tutorial reinforced for me is this: Select Subject is a starting point, not a finish line. The workspace gives you a set of smart tools to correct and refine from that starting point quickly. Learning where each tool excels, and where you need to take manual control, is what separates a selection that holds up at full resolution from one that falls apart when a client zooms in.
Watch the full tutorial on YouTube and follow along with your own image. The workspace clicks into place faster when your hands are in it.
Comments
Leave a Comment